background preloader

Raspberry Pi at Southampton

Raspberry Pi at Southampton
The steps to make a Raspberry Pi supercomputer can be downloaded here [9th Jan 2013 update]: Raspberry Pi Supercomputer (PDF). You can also follow the steps yourself here [9th Jan 2013 update]: Raspberry Pi Supercomputer (html). The press release (11th Sept 2012) for our Raspberry Pi Supercomputer with Lego is here: Press Release University Page The press release is also here (PDF): Press Release (PDF). Pictures are here - including Raspberry Pi and Lego: Press Release (More Pictures). We wrote up our work as a scientific journal publication where you can find further technical details on the build, motivation for the project and benchmarking. The reference to the paper is: Simon J. Iridis-pi: a low-cost, compact demonstration cluster Cluster Computing June 2013 DOI: 10.1007/s10586-013-0282-7 These are some links you may find helpfulul

RPi Guides Back to the Hub. Community Pages: Tutorials - a list of tutorials. Learn by doing. Guides - a list of informative guides. Make something useful. Projects - a list of community projects. Tasks - for advanced users to collaborate on software tasks. Datasheets - a frambozenier.org documentation project. Education - a place to share your group's project and find useful learning sites. Community - links to the community elsewhere on the web. Games - all kinds of computer games. Introduction This page contains a set of guides to show readers how to do common or useful tasks on the system. The Raspberry Pi Forum has a list of Project Ideas & Links, to help people get started. Please add links to your guides (and ones you find interesting). Fill in each section: Guide Title (as a link to the project webpage or connected wiki page) Guide Description (including any additional links or information Tags (key words related to the item, i.e. System Tasks Easy Medium Advanced

Azeez märkmed: Ehitus Vaarika Pi Cluster - 2. osa The Grand Finale In a previous post on Building a Raspberry Pi Cluster, I wrote about how we built a cluster using several Raspberry Pis. This cluster was used for hosting the WSO2Con App. In this post we will take a look at the finishing touches & some interesting information from WSO2Con 2013. The project was unveiled at WSO2Con 2013, London & was an instant hit. Power Supply Like I mentioned in my previous post, we had to build a custom power supply that can cater to the voltage & current requirements of the Raspberry Pi cluster. USB Power Board Shown below is the USB power distribution board which could power up to 8 Raspberry Pis, or a single row in the rack. The +5V & GND lines in the board were connected to the power supply. Raspberry Pi Cluster Rack - the finished product The rack had to be very lightweight, and being able to easily disassemble it was a prerequisites since we had to carry the setup from Colombo, Sri Lanka to London, UK. Raspberry Pi Control Center switch.py code

Wednesday grab bag Another post in an occasional series on the cool stuff people have been doing with their Pis. Sorry for the lack of a post yesterday – total disorganisation on our part. The event we were at yesterday (at which we won a paperweight proclaiming that Eben is Cambridge’s most influential business person, a rather phallic award, and a box of chocolates – hurray chocolates) went on for longer than we’d expected, we didn’t get to do half the things we were meaning to before the end of the day, and we are reminded that it’s probably getting close to time to hire some admin staff, because this diary is becoming a MONSTER. First up, some competition news. In other competition news, if you submitted an entry to our own Summer Coding Contest (which we’re judging at the moment – we had a lot of really excellent and complicated entries, so it’ll take us another couple of weeks to get through them all), you should have received an acknowledgement email from us. Kindleberry Pi.

Sneak Peek: Adafruit Raspberry Pi WebIDE September 19, 2012 AT 2:14 pm We love the Raspberry Pi. This tiny computer has so much potential for makers, and it is offered at an extremely reasonable price. The one thing we didn’t like about the Pi is how inaccesible it is to those who are new to Linux. As the name suggests, the Raspberry Pi WebIDE is entirely web based. We have also included a built-in terminal so you can listen to, and talk directly with your Raspberry Pi. We have so many cool things planned for the WebIDE, and expect to have plenty of updates (especially at the beginning). Like I said, this is just a sneak peek, and covers only a few of it’s many features. Stay tuned to the Adafruit blog for more updates. Related Sorry, the comment form is closed at this time.

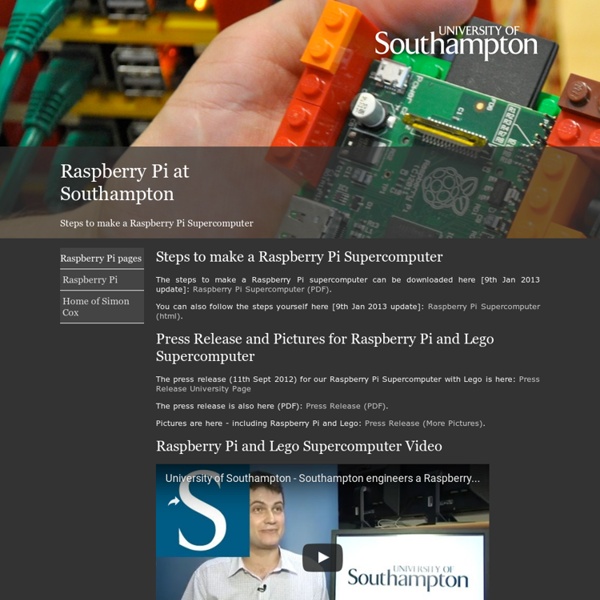
www.southampton.ac.uk/~sjc/raspberrypi/pi_supercomputer_southampton.htm Return to View video at: Prof Simon Cox Computational Engineering and Design Research Group Faculty of Engineering and the Environment University of Southampton, SO17 1BJ, UK. V0.2: 8th September 2012 V0.3: 30th November 2012 [Updated with less direct linking to MPICH2 downloads] V0.4: 9th January 2013 [Updated step 33] First steps to get machine up 1. I originally used: 2012-08-16-wheezy-raspbian.zip Updated 30/11/12: 2012-10-28-wheezy-raspbian.zip My advice is to to check the downloads page on raspberrypi.org and use the latest version. 2. You will use the “Write” option to put the image from the disk to your card 3. 4. $ sudo raspi-config 5. $ passwd 6. $ exit 7. 8. $ sudo apt-get update 9.

nRF51822 - Nordic Semiconductor The hardware tools in the nRF51 series tool chain consist of an evaluation kit and a nRFgo compatible development kit, in addition to application specific reference designs. The software support are split in two major parts: SoftDevices containing wireless protocol stacks; and the nRF51 Software Development Kit (SDK) forming a common code base for all nRF51 devices. 3rd Party Supporting Products nRF51822 Evaluation Kit (nRF51822-EK) The evaluation kits gives you the lowest cost entry point to development with the nRF51822. The kit operates stand alone, and is based around a small module with headers for all IO pins, 2 buttons, 2 LED's as well as a built in Segger on board programming and debugging over USB solution. Please note that progamming and debugging functionality on the evaluation kit is limited to the devices in the kit itself. For more details and product related downloads, go to the nRF51822 Evaluation Kit page. nRF51822 Development Kit (nRF51822-DK) nRFgo Software SoftDevices

R-Pi NAS Back to RPi Guides. Raspberry Pi Network Attached Storage This project configures your Raspberry Pi to share files with any other computer on your local network. You can add a large hard disk to the RPi and use this to store your important files/photos/videos in a central location. The files on your RPi can be easily accessed from any type of computer which is connected to your network, for example a Windows PC, a Linux PC, A Mac, a smartphone, etc. In a classroom, each student can have access to a private area, and also a public area for sharing files. Warning: Make sure that you store your important files in more than one location. Note: There are two major classes of Network Attached Storage Low-power NAS. This project does not require any coding or compilation. You need to... Edit configuration files on the RPiEnter basic Linux commands to configure users and passwordsUse standard software tools (Windows/Linux/Mac) to add a network drive to your PCConnect computers using ethernet cables

Opcion para crear un cluster economico Investigando un poco para poder desarrollar un cluster de bajo precio, encontre con un ordenador simple, portable de $35dls. el cual es el "Raspberry Pi", esta placa de bajo coste, cuenta con las especificaciones mas basicas. Las especificaciones son: Procesador ARM1176JZF-S 700Hz256 Mb. de Ram1 puerto USB1 salida de video HDMIRanura para memoria SD (Almacenamiento)Entrada de EthernetConsumo energetico de 3.5WSO Debia, Fedora o ArchLinux Lo importante a resaltar aquí es la entrada de ethernet y el sistema operativo que maneja, ya que este lo podemos emplear como servidor o hacer un mini cluster, ya que nos da la posibilidad de emplear Debian o Fedora, que son buenos para empezar con computo paralelo, la posibilidad de expandir la memoria de almacenamiento, su portabilidad, ya que si quermos trabajar en conjunto con otros, podemos llevarlo a todos lados, ya que es una simple placa.

NasBerryPi Wiring Pi Crust breakout board makes it easy to get peripherals on Raspberry Pi Joe Walnes, a Chicago-based hacker and maker, has just released a design for what he has dubbed the Pi Crust: a very cheap new hardware add-on for the Raspberry Pi. The breakout board, which debuted on Wednesday, is meant to make it easier to tack various hardware peripherals onto the cheap computer, and it does so in an compact design. The new board only adds 2mm of height to the existing Raspberry Pi. As Walnes lays out on his site, there are various well-labelled pins, including GPIO, I2C, SPI, UART, and power. "This makes it so you can connect things directly to a Raspberry Pi. Expanding access to the Raspberry Pi's General Purpose Input/Output (GPIO) pins is probably one of the most important aspects of this add-on—Arduinos, for example, use GPIOs to read from various environmental sensors. "However all the different signals are grouped together, which makes them hard to connect to. Walnes isn’t selling the Pi Crust; he's just making the design specification available.

PighiXXX Website Raspberry Pi Peripherals Adjustable Enclosure System The adjustable enclosure system is designed as a sandwich. The Raspberry Pi (Rev B boards with mounting holes) is held by the top cover. The RAS-DAS-1 and any other boards are held in place from the bottom cover. There are no mounting connections between the Raspberry Pi and the additional board. Not Just the Raspberry Pi Most enclosures are designed to house just the Raspberry Pi itself. The adjustable enclosure system was designed from the start to house multpile boards. Raspberry Pi itself one or more accessory cards which connect to the Raspberry Pi such as : RAS-DAS-1 Audio Explorer card Since the enclosure is expandable, even the small size, can hold up to two additional accessory cards. Ventilation, And Access To Ports, And LED's The adjustable enclosure is open on all sides. No Mechanical Strain The Raspberry Pi is held in the enclosure by the two mounting holes (currently only Rev B boards only are supported). Adjustable - Expandable

Related: