
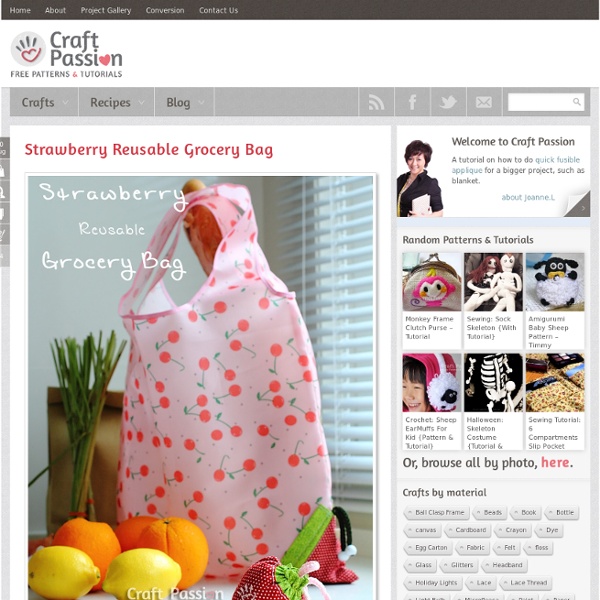
Zipper Pencil Case Summer is over, it is a whole new round of “back-to-school” and “back-to-work” again!!!! I hope you have enjoyed your sun shiny days through out the pass few months; have refreshed and recharged yourself mentally and physically for another round of loooong journey. I don’t have summer vacation since it is all year round of hot sunny days which I usually hide myself from it… Anyway, I just had a great weekend getaway with friends from far, we ate, we adventured, we explored, we chat, and we definitely enjoyed every moment together! Now, I am ready for more challenges…. renovate my new home and make whole lot of crafts to stuff it up.. woohooo!!! To welcome you back to the craft room of Craft Passion, here is the zipper pencil case pattern and tutorial which I did before my recent weekend getaway. As you can see from the photos, this zipper pencil case has a zipper that opens all the way down from top to the sides. {Get full details on next page.} Pages: 1 2 Get all updates via email:
Draping - A Tutorial of Sorts I adore draped clothing. I think it is figure flattering on pretty much anyone, and it just adds an element of elegance to even the most simple designs. In case you have no idea what I am talking about, here are a few examples of draping. See? I say "formula" because I see it as exactly that. The front, obviously, is the tricky part. Here is the trick, if you just widen the width of your shirt, you will get an unflattering floppy fold at the neck. Next, I measured down 3 1/2 inches and marked that. I wanted my arm hole to be 8 inches long so I measured down 8 inches and marked that. Now I cut out that just that piece. Next, I drew myself a line from the bottom of the arm hole to the bottom of the shirt, tapering down the size. The idea when you sew, is to turn the top of the shirt in so that the shoulder seam is now at the top where it should be. I found that it was easiest to hem the neck of the back shirt piece and all the arm holes first, before sewing the back and front together.
A Big List of Tips for Sewing Knits! Hey, everyone! Happy Monday! I’ve been asked for tips on sewing knit fabrics, to help with sewing up the Renfrew Top pattern. So I’ve compiled a whole bunch of links, tutorials and tips that might help you! Conquering Knits: A Self-Help Guide Lauren from Lladybird’s no-nonsense guide to sewing with knit fabrics, stabilizing shoulders, and why knits are so great to work with. How I hem knits. Dixie DIY has a whole series called Never Fear Knits – check out the whole list of posts here: Gertie’s New Blog for Better Sewing featured a guest post series on sewing with knits: and this post on sewing with double knits: Field Notes on Sewing with Double Knits A Primer on Sewing Knits from Threads Magazine, covering fabric, edge finishes, and choosing the right pattern. Sewing with knits from Figgy’s Patterns includes how to stabilize knit fabric, sewing seams and sewing neckbands in knit fabric. That should be a good start!
Tissu personnalisé Vous fournissez le fichier (150 DPI, JPEG, RVB, échelle 100%). Motif Personnel s'occupe de l'approvisionnement en coton brut, de l'impression, de la fixation des encres et du lavage du tissu. Ces étapes sont réalisées dans une usine textile traditionnelle, en France. Il faut compter environ 3 à 4 semaines entre l'envoi de votre fichier et la réception de votre tissu imprimé. Largeur imprimable : 140 cmPassez commande en ligne. Tarifs : à partir de 23 €TTC /mètre linéaire Pour optimiser le rendu des couleurs, Motif Personnel suggère d'utiliser un nuancier textile imprimé dans les mêmes conditions que votre futur tissu personnalisé. Vous pouvez passer commande de tissu personnalisé ou d'un nuancier directement depuis la boutique en ligne. Pour plus de renseignements sur le service Custom ou pour une demande de devis, contactez-nous.
Tuto !! Porte-Monnaie à l'ancienne. - Coté Passions Tuto !! Porte-Monnaie à l'ancienne. Comme promis, pour vous remercier de vos nombreuses visites, de tous vos gentils mots, un petit tuto pour réaliser un porte-monnaie à l'ancienne comme CELUI CI. Matériel : *Un fermoir avec des petits trous.Ceux sans trou permettent uniquement de coller l'ouvrage, nous, nous allons le coudre pour qu'il tienne bien !! Etape 1 : On dessine le contour de son fermoir sur la fiche bristol en suivant le bord et on invente la forme de son choix pour le bas du porte monnaie. Etape 2 : On marque de chaque côté, les ouvertures du porte monnaie. Etape 3 : On double son trait à 1 cm du 1er, pour avoir notre marge de couture. Etape 4 : On coupe son patron ainsi crée, sur la marge extérieure. Etape 5 : On coupe 2X le tissu extérieur et 2X la doublure. Etape 6 : Si vous comptez broder, c'est mainteanant qu'il faut le faire. je m'inspire des couleurs du tissu de doublure. Etape 7 : La broderie est finie, nous allons passer à l'étape couture. De l'autre côté : A bientôt.
Zipper Tutorial » twelve22 Once upon a time, somebody asked how I do my zippers. Because I like to share knowledge, I decided I’d write up a little tutorial for my method (and probably the method of others, too). Because I am lazy busy, it’s taken me a long time, but I finally got round to it. Some things: This is a tutorial for a zipped pouch, but you can use the same method on larger projects. If you put little ‘end caps’ on the ends of the zipper before sewing it into your project, you can have a zip that doesn’t go all the way across, as with this purse. Take one piece of your outer fabric and lay it down on top, right-side-down, creating a delicious zipper sandwich. With your sewn zipper sandwich, fold back the two pieces of fabric so the wrong sides are together, like so: Again, you can pin your pieces together or iron it flat, but I just can’t be bothered. Repeat for the other side of the zipper, and you’ll wind up with something like the photo below.
TUTORIAL - Alterations to the FREE Buttercup Bag Pattern A few of us Craftsters have made the free Buttercup Bag Pattern from here: I made a bag with quite a few alterations to it, including enlarging the pattern to 125% on the photocopier. Here's the link to the one I made: The alterations I made were: Firstly - enlarged to 125%Added a mobile phone pocket instead of a flat pocketAdded a zipperLengthened the strap to 24"Interfaced the outer topA couple of words of advice. OK. Then cut your pieces for the bag. Then you need to add the side bits to the zipper, like this: Then you need to cut the whole piece to 1 3/4" wide x length of outer upper piece, centering the zipper, like this: Now you need to sandwich the zipper between the lining bottom and top, like so: Repeat for the other side. Then sew the lining together. Make sure you leave an opening in the lining to turn right sides out: OK. Turn right sides out.
Sewing Tips: Attaching Buttons with a Sewing Machine Don’t you love realizing there’s a faster way to do something? [If only there was a faster way to potty train a snarky little 3 year old boy who tells me it's not time to poop (or pee for that matter) in the potty yet. While I was changing his messy diaper yesterday, I suggested he give his potty chair another try......and he quickly responded, so matter-of-factly, "Not today mommy, maybe when I'm 4!" Anyway, I digress. But today’s little trick will definitely save you some time. Now you can sew them on with your sewing machine in a few easy steps. I sure wish I would have realized this trick back when I made this pillow (found here). Sheesh, those buttons took me a long time to attach. So don’t let those little buttons intimidate you. After you get the hang of this technique (after practicing on one or two) you’ll never go back. (And a I have had several emails asking about making button holes. Would you like to learn how to sew on your buttons with your sewing machine? What are feed dogs?
Blog Le Nouveau Comptoir - Part 2 Le fil qui « choucroute »dessous. Lorsque le fil « choucroute » du coté de la canette,ce n’est, la plupart du temps ,pas à cause de la canette mais du fil supérieur (qui peut etre mal enfilé). Recommencer en priorité l’enfilage complet de la machine. Ensuite avant de penser que la machine à coudre est en panne,il faut vérifier la longueur de l’aiguille,(pour cela mettre une aiguille Schmetz dont la longueur est parfaite), Réenfiler la machine avec un bon fil synthétique(type Mettler,Gutermann en 2ou 3 brins maximum).Faire un essai sur un tissu de coton sans problème. Si cela ne s’améliore pas,il faut envisager une réparation…….. L’Impressionnisme et la Mode au Musee d’orsay l’exposition » L’Impressionnisme et la Mode »jusqu’au 20 janvier Une très belle exposition sur la Mode et les Impressionnistes au Musée D’Orsay permet d’imaginer la vie,les modes vestimentaires à la 2eme moitié du 19eme siècle à travers les robes exposées et les tableaux des Maîtres Impressionnistes. Fatigue et stérilité.
Brassiere Hanty Panty > Brassiere Soft and comfortable brassiere made of 2 way stretch cloth and stretch lace. Sponsored links Non-stretch cloth is unapt for cups. Making is rather easy because it's pullover. Materials Cloth. Pattern Print the pattern on A4 paper. Sewing Cut the cloth added the seam allowance. Sew the cup to the wide lace of half. Attach a ribbon. Set Bra and panty of the same cloth (Stretch cotton). Straps are made with the narrow lace of double. Hanty making / Camisole Recycled T-Shirt Baby Hat - The Handmade Adventures of Captain Crafty This sweet little baby hat makes a charming gift and can be stitched from simple stuff found around the house. All you need are a couple of old t-shirts, some dental floss, straight pins, a needle and an hour of time to spare. This Alabama Stitch Book inspired cap fits 4 to 18 months. Click pattern, save to file, print, and start stitching to make your own hand sewn baby cap. Tags: For Kids, sewing, tutorials