
Crystal Egg Geodes - Martha Stewart Easter Geodes can be grown without using egg dye. The resulting crystals are clear to milky white, like quartz. While large chicken eggshells are suggested in this process, larger eggshells can be used. This Easter craft from Jim "Figgy" Noonan doubles as a science project, offering an opportunity to show kids the crystallization process at work. Resources: If you don't want to blow your own egg or would like to try a larger eggshell, pre-blown shells are available from The Eggery Place.
Hey Look - Event styling, design inspiration, DIY ideas and more: PRETTY PACKAGING IDEAS I think my favorite part of gift-giving is wrapping the goods. I really don't mind if the wrapping paper is being ripped off afterwards, I simply enjoy spending a lot of time and thought on making a present look as pretty as possible. Here's some cute and creative gift wrapping inspiration I found around the web: Washi tape ideas: Sweet Paul (left) and Tea For Joy (right) Lace gift wrapping: Sweet Paul, Colorful fabric packaging: Handmade Weddings (via Haystack Needle) Simple glitter ribbon on craft paper (Besotted Brand) & Colorful woven paper (Craftzine) Pretty doily wrapping - left: Facil Y Sencillo, right: A Creative Mint Confetti on double-sided tape: 3@12, Confetti dipping fun: Tokketok Left: rainbow yarn on craft paper (via babble), right: bunting, pom garlands and yarn (two shades of pink) Left: great idea for wrapping a cookbook (Sweet Paul), right: signature gift packaging by Inhaus Press
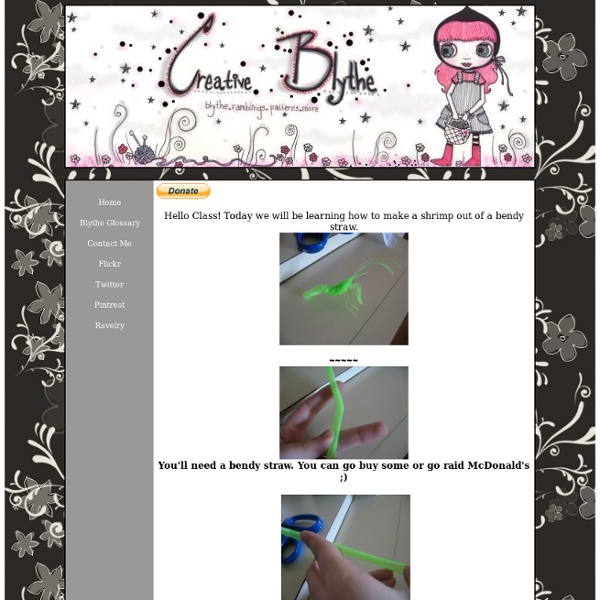
How to Make a Bird out of a Plastic Straw (with pictures) Edit Article Normal Straw MethodLong Straw Method Edited by TOHGIN minako, Wyvernbait, Meta Knight, Lois Wade and 17 others This project is a fun and easy example of plastic straw art. Plastic straw birds are a unique decoration to add to cocktails, cupcakes, or other little delicacies, and are sure to set a lively mood and garner many compliments from your recipients. Ad Steps Method 1 of 2: Normal Straw Method 1 Cut the straw. 19 Display the bird on a glass by putting the rim between the two legs. Method 2 of 2: Long Straw Method This method is the same basic steps as the one above, however the images show what the bird would look like with the use of a long straw. 1Cut the straw. 19Display the bird on a glass by putting the rim between the two legs. Tips Illustration. Try not to cut your fingers.Wash your hands before starting.
The Hipster Home » Blog Archive » How to Make a Tiny Terrarium in a Light Bulb Ahoy there Hipster Homers! I’m Julie and I’m the very first guest blogger on this fine site. Today’s project involves breaking stuff, plants, found objects, and miniatures. Fun, right? Let’s get started! We’re going to go through the steps to create your very own little terrarium. Dos and Don’ts: Do use sand or small pebbles; these are good because water drains through them easily. How To: You’ll need a few tools to make a tiny terrarium but nothing complicated to get started. Needle-nose pliersScissorsLong tweezers or chopsticksFlathead screwdriverGlasses or goggles Let’s start with the light bulb. We will be removing the inside parts of the lightbulb. First, remove the metal tip from the bottom of the bulb. Then, when enough of the sides are raised to get a good grip on them, hold one of the sides with your pliers and yank out the metal tip. Next remove the black glass. Now you will be able to see the interior parts of the light bulb. Pull out any remaining wires with the pliers.
Crafts: Bottle Fish. Can you believe this nice craft was made from trash? It was a simple plastic bottle. Now it is transformed to an awesome piece of art or decoration. Before I start the instructions how to make it, let me tell you a story. One morning, I was driving on Riverwatch Pkwy (Augusta, Georgia). Here are the list of material needed: A plastic soda bottle. This project uses a plastic soda bottle. First, we need to remove the wrap and wash the bottle. Cut the bottleneck and the bottom. Now, we can dry the inside of the bottle using a paper towel. Using scissors, cut each side first, as the photo shows. Proceed to make two cuts, 'V' shaped, on the bottleneck. it will be the fish mouth. Gently, Pull each gill and each fin (sides) of the fish. Using spray paint, with a clear color first, paint the entire bottle. Glue the eyes on each side of the fish (a.k.a. plastic bottle). Do you remember where is the base of the plastic bottle? ...Hold on, there is a crucigram. That's it.
A Lesson on Forgiveness The Buddha was sitting under a tree talking to his disciples when a man came and spit on his face. He wiped it off, and he asked the man, “What next? What do you want to say next?” The man was a little puzzled because he himself never expected that when you spit on somebody’s face, he will ask, “What next?” He had no such experience in his past. He had insulted people and they had become angry and they had reacted. Buddha’s disciples became angry, they reacted. Buddha said, “You keep silent. “If you think on it deeply,” Buddha said, “he has spit on his own mind. The man was even more puzzled! Puzzled, confused, the man returned home. The next morning he was back there. The man looked at Buddha and said, “Forgive me for what I did yesterday.” Buddha said, “Forgive? “And you also are new.
Make a scrap-yarn-wrapped branch decoration! While flipping through The Big Ass Book of Home Decor a couple weeks ago, I came across a project like this – yarn-wrapped twig arrangement. I felt like I’d seen similar projects online too, like it wasn’t the first time I’d seen a branch wrapped in yarn, but now I can’t find anything in blog-land (at the bottom, I linked to some other related projects that I did find!)… Anyway, mine is a bit different from the book project, so now I’ll share it with you! I wanted to use a glue gun, but some crafty items got temporarily lost in the move and my guns were nowhere to be found, so I came up with methods that use as little glue as possible. All you need for this project are some branches/twigs (the size and amount that you want for your vase or other arrangement plan), yarn leftover scraps, glue, and scissors. To make the scrappy version, you’ll need a bunch of yarn bits around 1-2 feet long. To wrap the offshoots, the number one rule is be careful – they can be easy to snap!
Tiny Polaroid Magnets | { Ambrosia Girl } Hi there! It’s felt like forever since I’ve last blogged, and has felt like an eternity since I’ve done anything crafty and nifty. Since my morning sickness has gone into full speed (yes, we’re expecting our third this fall!) I haven’t felt like myself. But nothing like inspiration to wake one out of a reverie — or nightmare, in my constantly sick state. I came across these DIY Pantone chip magnets on How About Orange and wanted to do something similar. You will need: Cardboard (mine was the backing of a sketchbook — much thicker than the back of a regular spiral bound notebook) or 2-3 sheets of white cardstock or poster board spray-mounted together to use as a sturdy backing to the magnetsOpaque white marker (necessary only if your cardboard is not white) Craft knife Metal straight edge/ruler Clear packing tape or frisk film. Step 1: Download a Photoshop file of the Polaroid frames below. Step 2: Print out photos onto photo paper. Step 4: Trim out photos with craft knife. 487 Comments