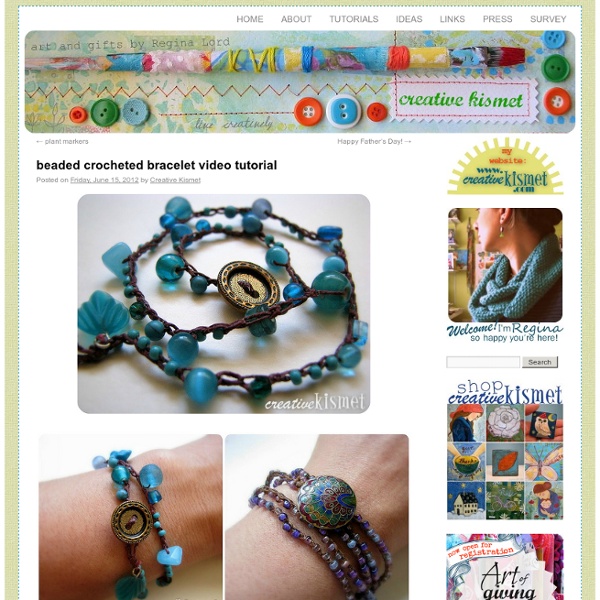
Beaded crocheted bracelet video tutorial
I love the look of these bracelets. The turquoise & brown is my favorite, of course. I really love the mixture of color and bead shapes and sizes. All of them feel like summer to me. Maybe because of the colors I chose or the crocheted “twine” look. This is a great road trip project too! Supplies: a really long length of 3-ply waxed linen thread (at least 3 yards) various beads (seed beads size 11/0) 1 button crochet hook, size 5 Things you might want to know: * T0 find out how long your bracelet needs to be, measure your wrist and add 1/2″-3/4″ for each time you want it wrapped around your wrist. * It is best to find a good fitting bracelet you already own and use that as a guide. * The purple bracelet is almost 34 inches long and wraps around my wrist 5 times. Please leave any questions in the comments. Be Sociable, Share!
Beachy Little Bracelet #2
This is the second installment of our Beachy Little Bracelet series. Last time we made Sea Glass (the middle bracelet in the photo below), a super easy chain stitched project. Now we're moving on to our second bracelet, a tiny bit more complicated, but very quick and easy. This bracelet is made with two strands of No. 10 crochet cotton (I used DMC Baroque), and a Size F hook. The only other materials are: 1 button and 15-25 beads. Make your bracelet just a bit snug. Let's crochet! String the beads on a double strand of cotton. Make a slip knot, leaving a 4-6" thread tail. Then make a 2-double crochet (2-dc) cluster in the first chain. To make a 2-dc cluster: yarn over, insert hook in chain 1, pull yarn through, yarn over, pull yarn through 2 loops. Repeat the above step. Yarn over, and pull yarn through all the loops on your hook. Slide a bead down close to the hook, then chain one (with the bead inside the chain): Chain 3: Make another 2-dc cluster in this space. And my bracelet was done.
DIY Mix and Match Wrap Bracelets (A Tutorial
Obviously I’m reinventing the “DIY bracelet” wheel, but I like the way these turned out using different kinds of ball chain (it’s also a much more simplified version of the leather and bead ones from last February). Anyways, I mixed and matched a bunch of different chains, rhinestone strands and chunky clasps to get a funky, layered bohemian look. Make sure to check out the long-short ball chain towards the bottom….it results in a “twist” effect. Here’s how I made them…… First, you’ll need leather and/or suede lacing, various rhinestone strands and ball chain, chunky lobster clasps and embroidery thread (which I forgot to include in the photo): Note: I picked up my lacing and chains at Target Trim in L.A.’s fabric district. Step 1: Cut a length of leather or suede lacing (for a double wrap I cut mine in 16″ lengths). Step 2: Lay your rhinestone strand or ball chain on top of the lacing and begin wrapping the thread around it to secure them together: A finished bracelet! Comments comments
West Pine Creations
One for Me I had only one blue cats-eye cabochon. After tatting the foundation, around the cab, I knew I couldn't release this one into the wild! I had to tame it and keep it for myself. This one was Tatsmithed with two strands of Sulky, gold metallic thread. 77 of 100 motif challenge. Of course, I needed changeable earrings to go with it!
Related:
Related: