
Kleas: Lantern Walk Despite the rain, our preschool celebrated Martinmas last night with a traditional lantern walk. We ended up making lanterns that look very much like last years. I experimented with something new and Peanut and I made these... ...a cross between paper lanterns and yarn bowls. Day 1: using a mix of glue and water we pasted white tissue paper over the bottom part of balloons. They dried over-night in the basement. Day 2: The kids added colorful tissue paper. Again, drying in the basement. Once dry, we cut the balloons out. Then we punched four holes along the edge, strung yarn through them and attached them to sticks, for carrying. Although the lanterns had trouble staying lit in the wind and rain, we had a lovely walk by the lake which ended in a spontaneous game of swinging from the willow tree.
Easy Soap, Scrubs and Lotion Recipes | Soap Recipes for Beginners Nothing’s more fun than sharing and swapping a good recipe. Here are a few of our favorites for making everything from skin nurturing soaps and scrubs, to solid perfume and more. Share your recipes by using the “comment box” at the bottom of this page. Gardener’s Soap Recipe 8 oz. Melt base and scent. Honey Bee CP Soap Olive Oil 32 oz. At trace, add fragrance and 1 Tablespoon of honey. Easy Shea Butter CP Soap Coconut Oil 16 oz. Easy Lip Balm Recipe – using Lanolin 1 oz. Skin Firming Gel – using CroThix CroThix has a secondary use as a skin firming agent. This makes (4) four ounce containers of gel-crème. Water 13 oz. Heat the water and Glycerin to 170 degrees and set aside. Lotion bars! Easy Lotion Bars 4 ounces Mango or Shea Butter 4 ounces Beeswax, Yellow or White 5 ounces Liquid Oil (Jojoba or Grapeseed are both excellent) 2 teaspoons of Essential Oil or Fragrance Oil Melt the beeswax in a separate container and the butter/oil in another container. Cookie Cutter Soaps by T.J. 1. 2 tsp.
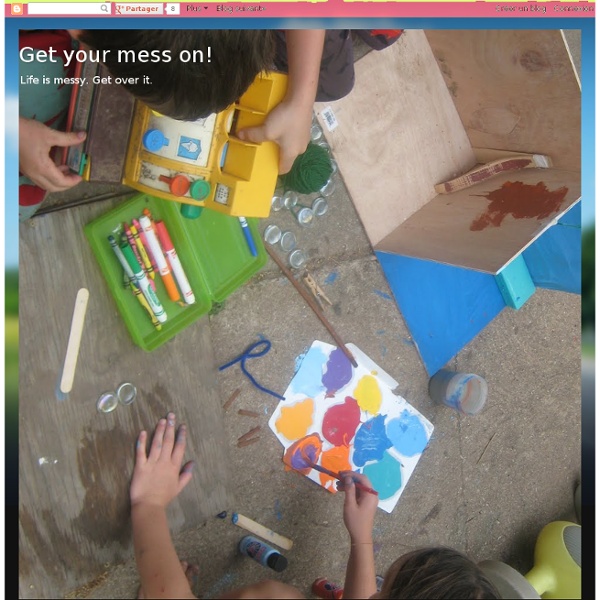
Homemade Microwave Puffy Paint DIY paint that puffs up in the microwave? Sounds like a surefire hit to me! I saw this idea on Mommy Labs awhile ago and filed away for a rainy day. We started with one cup of flour and mixed in 3 teaspoons of baking powder, 1 teaspoon of salt and enough water to make it the consistency of pancake batter. Rubber band the baggies like you would if you were icing a cake and snip off the teeniest little bit of the tip. Paint away! We made about ten paintings this morning, and we still have plenty of paint leftover so that Sawyer can have a chance to try it when he gets home from school too.
Chalkboard Wine Bottles Pages This Blog Wednesday, October 26, 2011 Chalkboard Wine Bottles Chalkboard paint in a can is great stuff! What you need: Chalkboard PaintEmpty Wine BottlesChalk How to make it: Fill in the sink halfway with hot tap water and place bottles in the sink, label down.Let it soak for about 30 minutes. Once dried, spray the wine bottles with chalkboard paint. Linking up to: Posted by Blythe at 9:00 AM Email ThisBlogThis! Labels: chalk, chalkboard, paint, tutorial, wine bottles 6 comments: MaryAnneOctober 27, 2011 at 7:13 AMI love that these are entirely covered with paint - it's a different look than I've seen before. Load more... Newer PostOlder PostHome
How to make Paper Clay I fell in love with sculpting with paper mache during my first project five years ago. However, I never really found a recipe that was worth the time and effort and mess that it took to get what I wanted. As a result, I used Celluclay for most projects. However, I recently stumbled upon an incredible blog called, Ultimate Paper Mache where Jonni (the artist and blogger) shares all sorts of tips, tutorials and recipes to help anyone on their way to successfully paper mache-ing. I am blown away by what Jonni can create, but I was especially grateful for the recipe she shared on how to make your own paper mache clay. Hot dog! For my purposes, I ended up altering the recipe just slightly so that I could get the thicker consistency that I like. Paper Clay: 2 Cups toilet paper 1 Cup regular joint compound (the premixed kind. 3/4 Cups flour Start off by soaking your toilet paper in water: When it is fully wet, remove cardboard center, squeeze out as much water as you can and break up into chunks.
Crafting ideas from Sizzix UK: The Vintage Cabinet box I will be perfectly honest. As much as I love this die and its possibilities, this idea was originated by Patricia Villa Boas, the Portugal distributor of Sizzix and the organizer of Chocolate Quente, the event where I taught this project. But with her permission granted, I can share it with all here. Beware it is a picture heavy post.All measurements are in inches as it is easier for this project. the funny thing was that I originally did it all in inches, then thinking that in Portugal all would be in centimetres I translated the measurement, leaving in the UK the inches. First class, they wanted all measurements in inches so a quick change was needed. Cut the 12 x 12" in to two 6 x 12". One of them trim 1 1/2" off the bottom -not including the white strip!) Then score it at 3 3/4" from the left edge. Score at 3" from the other score line - or at 6 3/4" from the left edge if it is any easier. Take the other 6 x 12" and trim it in half (so that you get two 6 x 6"). Like this.
12 Easy Image Transfer Methods for DIY Projects The Graphics Fairy is a resource for Home Decorators, Graphics Designers, Crafters, Collage Artists and Junk Journalers. Find over 7,000 FREE Vintage images, Illustrations, Vintage Pictures, Stock Images, Antique Graphics, Craft Clipart, Vintage Photos, and Printable Art, to MAKE craft projects, collage, Mixed Media, Junk Journals, DIY, scrapbooking, etc! DIY and Craft Tutorials, and Home Decorating Ideas are offered as well. Looking for our ad free PREMIUM MEMBERSHIP site? Sumo 25 Handmade Gifts Under $5 If your gift list is long and your budget is small here are some great Handmade Gifts that you can make. Keep in mind that handmade items are not just beautiful but special… I love to give them and I love to receive them. Jersey Knit Bracelet Lovely! This would make a perfect gift for any of your girlfriends. You can choose the colors and recycle t-shirts that you have around the house. Cheap and cute! tutorial Paper Clip Earrings Tutorial This is a brilliant idea… and the possibilities are endless. Love it! Printed Candles Who doesn’t love a candle? Think about how many different stamps you could use to customize this project. tutorial Hot Chocolate Art! What a great gift for neighbors and teachers… I am personally a hot chocolate lover so this would make a great gift for me tutorial Tile Coaster You can buy these plain tiles at Home Depot for under a dollar. I’ve seen them with family pictures also… Way cute! tutorial Bow Belt I was amazed how easy this tutorial was. So Pretty! tutorial Paper Plate Clock Cheap?
rolled paper flowers {tutorial Welcome to flower week – five days of simple and delightful flower projects. I could probably do three weeks of flowers because there are so many different ways to create them, but I’ve limited it to five of my current favorites. Before we get started, let me make a few disclaimers: 1. 2. 3. Okay, so let’s begin. Here’s what you’ll need: :: paper {either cover or text weight} :: florist wire :: scissors, pencil, glue gun STEP ONE: cut irregular circle This circle is approximately 8 inches, but you can do any size you wish. STEP TWO: cut spiral Start at the outside edge and cut in a spiral fashion to the center. I like a sort of bumpy shape so that the petals end up a bit irregular If you aren’t so sure about your cutting skills, feel free to draw your spiral before cutting. To add a little interest to my bouquet, I used a variety of yellow scrapbook papers {my favorite is that yellow dot} STEP THREE: roll your blossom start at the outside edge and coil tightly STEP FOUR: release coil
DIY in the Kitchen: Carve Your Own Wooden Spoons I have a beautiful wooden spoon, one of my favorite things in my kitchen. It was carved by hand and because of that, it was expensive. Totally worth it, in my view, but a once in a lifetime purchase for me. Arten has never purchased wood for his spoons. The article in Mother Earth News might be too sparse for some people. The bottom line is that making a wooden spoon for your kitchen or as a gift is a relatively simple project that requires very few tools and is rewarding way to spend an afternoon. By the way, the spoon pictured above is the one I mentioned in the first paragraph and it's a far cry from what a beginner might accomplish. Related: Homemade Wooden Spoon Butter: For Buffing, Not Eating! (Image: Dana Velden)