
The BEST Play-Dough Recipe Have you ever made play dough and it just fell apart?? Well… not this time. This recipe will make play dough that is seriously the closest thing to store-bought you’ll ever make. No falling apart or drying out (as long as stored in a sealed container). Ready to make it? Ingredients: 1 C Flour 1 C Water 1/4 C Salt 1 TBSP Vegetable Oil 2 tsp Cream of Tarter Food Coloring (actual coloring or a kool-aid packet will do) Sparkles (If you wanna be a fun mom!) Pour in all ingredients. Stir until everything is mixed well. Once the mixture is (mostly) clump free. Stir. Stir, Stir Stir.Just keep stirring until the Play Dough is formed. Remove from heat, and knead by hand. Once cooled it’s ready to go. Or grab your cookie cutters, plastic scissors, rolling pin, etc.. and let your toddler go to town. What a fun thing to do on a rainy day! # kristanlynn xoxo I’ve linked up here, here, here and here UPDATE- answering your questions: This recipe yields about a cup and half of dough.
Melted Crayon Art Perhaps I should begin this post by introducing you to my mom, also known as Her Ladyship Craftiness…er, Her Royal Craftiness? I’m still working on the title. Regardless, she’s the coolest, most creative and talented woman I know. She can make pretty much anything. At least once during high school, I borrowed a friend’s purse, brought it home to Mom, and she whipped one up just like it for me. Yes, I probably abused the power of being Her Ladyship’s daughter, and I no longer steal my friends’ purses, but the point is: my mom is awesome. If you follow Young House Love, Bower Power, Making a House a Home, or Style by Emily Henderson you know how timely her visit was, as today is the big reveal for the Pinterest Challenge. The supplies were pretty simple: canvas, crayons, and hot glue. The next step was to peel off the paper labels from all 60 crayons. It worked like a charm. What do you think of our masterpiece? Total money spent: $9.60 Total time spent: about 1½ hours Like this:
Lace lamp/Doiliy Lamp – DIY | Dos Familly We are at our little cottage in Dalarna and we are fixing it up. So we are able to use it even in the winter. (Dalarna is in th middle/north of Sweden. To me and Jenny it’s north but Sweden is a very tall country so I guess we are not even in the middle). First we used a huge baloon that I bought at a party store. Then you collect all the old Dollys (?) Paint them with lots of wallpaper glue so they are soaked. Hang the ballon on a string and put the soaked lace on the baloon. Then wait for a while. Pop the baloon when the glue is dry. Update 1:Some of you asked how to get the bulb into the shade. You mos def want to use a LED lamp or a energy saving bulb because it’s cold and it will not affect the glue either. I bought a nice looking iron wire in pink but when I opened the box it was red. Update 2: Problems making the lamp?! 1. 2. 3. 4. 5. 6. 7. 8.Good luck! xxx Isabelle If You want to link to this post please share with love.
fish scale pendant lamp This is the second project we’ve shared from designer Kara Paslay in recent weeks, and again she’s managed to reintroduce me to a cool technique I had long forgotten about. Inspired by the ocean, Kara decided to transform a simple paper globe into a beautiful sculptural pendant lamp. By dyeing and dipping cut paper rounds into wax, Kara has transformed the material into an almost unrecognizable state. The “scales” have a glowing, translucent finish and a gorgeous deep watery hue, giving the lamp a beautiful texture, whether it’s unlit or switched on and glowing from within. I can’t get over how far removed the end result is from a simple paper globe, and given that the whole project cost around $20 and can be done in an afternoon makes it even more appealing! Have a DIY project you’d like to share? Read the full how-to after the jump . . . Every year around this time, I start to daydream about the beach and the beautiful scenery that surrounds it. Materials Instructions 1. 2. 3. 4. 5. 6.
Design Crush & Popsicles! Not to sound full of myself, but I’m pretty sure this is the be all, end all of popsicle roundups. There’s a little something for everyone: the foodies, the purists, the ones who prefer frozen yogurt, the ones who prefer a little alcohol, everyone. Tweny-five options to be exact. The post I did last summer on the cold guys was one of DC’s most viewed ever, so I thought you’d all be up for another round – was I right? Click on the photo to be taken to the recipe. All photos and recipes copyright of their respective source unless otherwise noted. TIPPED OUT all photos: Kristin Ess + thebeautydepartment.com post designed by kristin ess Lots of emails this week asking for a tutorial on Lauren’s temporary bright colors. Here I’ve replicated the process for you in 7 steps on an extension. While I never recommend bleaching out the ends of your hair at home, if you want to do the fun colors yourself, maybe get the tips bleached out by a pro + then play with the temporary colors on your own. The best things about this color– you’re able to hide it in a bun for work if you need to, AND you’re only doing a couple of inches on the bottom so it won’t kill you to cut it off if you get over it quickly. TOOLS: highlighting comb, clips, foils, color brush, hair bleach with the appropriate volume (always seek a professional when using bleach), light pink color, dark pink color, light blue, dark blue, clear gloss. Step 1 Highlight the tips of the hair using hair bleach with the correct volume. Step 3 Shampoo and lightly condition bleach out of the hair.
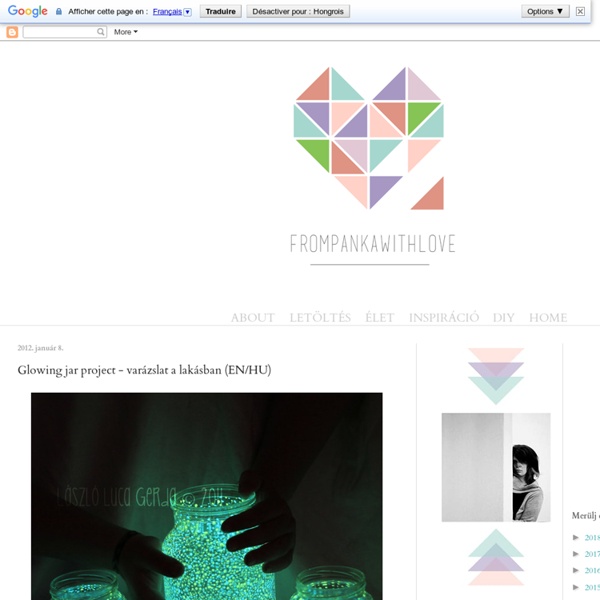
DIY Glow Jars Tutorial Posted on October 19, 2011 by Christina Aren’t these glow jars sublime? They take about two minutes to make and cost only 20 cents a piece. How’s that for an enticing DIY wedding project? These would look amazing at an evening outdoor wedding. Line walkways with them, or place them on tables. If you like this project, check out my DIY ‘glitterarium‘. DIY Glow Jars Tutorial For each glow jar you will need: a jartwo Glow Sticksscissorsrubber glovessafety glasses Disclaimer: This is a project meant to be done by an adult – not a child! Purchase Glow Sticks (I got a pack of 15 for $1.50) and dig a jar out of your cupboard. Grab two glow sticks and cut at one end.
Newspaper Nails A few weeks ago I shared in this post that I learned how to do this amazing thing called "newspaper nails." Since I love words, and reading, and books, it has inevitably become my favorite manicure. Want to learn the how-to? First, gather your supplies. Step one: Grab some newspaper and cut it into pieces big enough to cover your nails. Step two: Paint your nails white. Step three: Dip a piece of newspaper into the rubbing alcohol and saturate them well. Step four: Press the bit of newspaper on your fingernail hard for about three seconds and peel it off. Step five: Top coat time! Now admire your creation; and try not to chip your nails the first day like I all-too-often do.
Tutorial: How to turn Google map images into throw cushions - Spoonflower blog This week guest author Emma Jeffery from the blog Hello Beautiful shows us how she used satellite images of her neighborhood to make some very cool throw cushions. I must be getting sentimental in my (not so) old age as I’m increasingly drawn to surrounding myself with meaningful and thoughtful items. Sure, I’m inspired by designs and trends I see in stores online and locally, but I’m often searching for ways to translate these ideas into something more than a passing fad. I love it when items or objects in my home have a story to tell or a memory to share. They seem to give a depth and richness to my environment that store-bought items cannot. Ask my husband, and he’ll probably share with you his opinion that we have more than enough throw pillows in our house, but anyone who enjoys fashion, design and sewing as much as I do knows that cushions are a great and easy way to change the look and feel of a room. Next I zoomed in to get a view of our house and its surrounding area. Hi!
25 Beauty Tips Reusing Household Items - Homemade Beauty Tips on ELLE 1. Old Buttons Repurpose spare buttons by using them to keep pairs of earrings together: Most buttons have at least two holes in them, so simply place an earring in each opening to neatly store when not wearing. Photo: Jupiter Images 2. 3. 4. 5. 6. 7. 8. 9. 10. 11. 12. 13. 14. 15. 16. 17. 18. 19. 20. 21. 22. 23. 24. 25. Re-purposing: Tshirts into 5-strand-braided-headbands I was walking through Target a few weeks ago and noticed this little knit fabric headband that was not just braided together…….but woven. I decided they were charging way too much for something that could be made with t-shirt scraps. And that means free. So there you have it. (Or you may need one for working out. I kinda love it on my little girl . She always has little hair fly-aways that get into her face…….and this helps with that problem. It even works great with her hair down…..and keeps that hair tucked behind her ears. And yep, good for me too. Thanks little t-shirt scraps. Want to make your own? First, find some old t-shirts. Then, cut your fabric into long strips. Next, stack your 5 strips on top of each other and sew together at one end. Now, pull on each strip of fabric so that they kind of curl on the edges. Now, to create this 5 strand braid……..you’ll kind of be braiding on the left side and then braiding on the right. But let me explain a little better. And that’s it.
Constellation Jar I asked Amy of This Heart of Mine for a project that would be fun for kids or adults. I love that she thought of star-gazing! We’re so far into the countryside, that the stars here are outrageously bright. It’s awesome! — Gabrielle Star gazing is one of my favorite things. Because of my love of the stars, when my daughter was little, I purchased her a night light that shines stars all over her bedroom walls. What you’ll need: - a wide mouth jar – The jar needs to be wide enough to fit the small click light inside. -an awl - scissors Cut a strip of the cake pan long enough to fit around inside the jar and tall enough to reach to the very top of the jar. Use the awl to poke holes for the constellations. I connected the constellation dots with a silver Sharpie to make them easier to spot. Fill in the other space with more holes. Roll the aluminum sheet until it fits snug inside the jar. Put the encircled aluminum sheet inside the jar. Take into a dark room and enjoy.
DIY Roundup - Lace and Doilies Hi everyone! Today I'd like to share a round up of DIY projects that are all about lace and doilies. 1. DIY Lace Paper Enveloppe - Tutorial here 2. DIY Lace Hearts Garland - Tutorial here 3. 4. 1. 1. What do you think of this doily dress? Find more about Jillian & Dax's lovely wedding here