
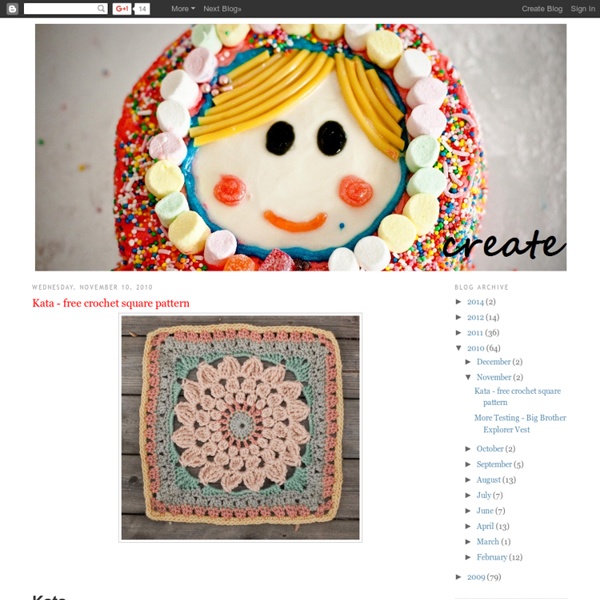
Polkadot Square Pattern ( at last) Hello! How are you going today? It's the last day of school holidays here and I am putting off ironing the school shirts that have sat in the ironing basket since before Christmas. I'll probably end up ironing them while the boys have their showers in the morning. Nothing like the last minute to get things done in my house! So I am writing this instead. You might remember these polkadot squares that I crocheted a while ago? Anyway, I have finally finished writing the pattern down and doing a little photo tutorial on how I made them. I will put the pattern at the bottom of this post if you just want to skip straight to the concise version. Ok here we go, happy hooking and good luck! This is for a circle in a square type granny, using single crochet sts to create a nice solid piece. I used a 3.5 mm hook and 8 ply Bendigo Knitting Mills Cotton in a variety of colours, but you could try this in any yarn I think. This pattern is in US. stitches, sorry UK ladies, for you, sc =dc, hdc =htr, dc =tr
Cushion with Sunburst-like Motif (Crochet * Stash-buster) I used the same colours as the blanket: grey, cream, fuscia, vintage pink, green, camel, beige; and for the background: brown. Utilicé los mismos colores de la frazada: gris, crema, fucsia, rosado antiguo, verde, camello, beige, y todo el fondo en café. Both sides of the cushion are made with the flower motifs. Ambos lados del cojín los hice con el motif de las flores. I was inspired by the famous “Sunburst motif”, but made a few variations to the original pattern: (a) For the center, instead of using trebles, I made a row of 8 sc, and then a row of 16 Dc. Me inspiré en el famoso motif “Sunburst”, pero le hice unas cuantas variaciones. [Note: Sandra @ Cherry Heart made a very similar motif, and has a wonderful photo-tutorial in her blog: Rosie Posie Grannie]. [Nota: Sandra @ Cherry Heart hizo un motif similar, y tiene un tutorial en su blog. WIP (work in progress): Currently I am making a blanket with this motif, but with a blue background…
:: Meet Me At Mikes : Good Stuff For Nice People: Granny Squares 101 aaa Tutorial Granny Square Lo prometido es deuda y hoy les traigo el tutorial, paso a paso del diseño que estoy usando para mi primer manta en el proyecto Crochet Mood Blanket 2014 (para las que no vieron la entrada anterior, este es el enlace) Primero los pasos de un pantallazo y luego la explicacion vuelta por vuelta.... Pues bien... aqui vamos con la explicacion.... Vamos a empezar con un anillo mágico o con 5 cadenitas unidas con un punto pasado para armar la base de nuestra primer vuelta. 1er vuelta: Tejemos 3 cadenitas para dar altura y luego 15 varetas. 2da vuelta: En esta vuelta vamos a tejer una vareta en cada uno de los espacios que hay entre las varetas de la vuelta anterior y vamos a tejer una cadenita de separación ente vareta y vareta para permitir que nuestro circulo comience a crecer. 3er vuelta: En esta vuelta vamos a aprovechar los espacios que nos dieron las cadenitas y vamos a tejer entonces grupos de 3 varetas. 4ta vuelta: En esta vuelta tenemos un doble desafio. Linda semana para todos!
How To Crochet A Larksfoot Blanket or An Arcade Blanket! (VERY Image Heavy!) You might remember this blanket that I made a little while ago? It's Kit's Arcade Blanket, and it's based on the Larksfoot stitch. About 400 people registered to get this emailed out to them, and then my email program would not let me bulk email. So I'm putting it here right now, with apologies to the early birds that the email system (or I) did not work out! Anyhoo, I'm going to show you how to Larksfoot... and how to turn your Larksfoot into an Arcade block or blanket! Let's go! I'm using Australian/UK terminology. Let's start with Larksfoot. I'm using cream as my base colour. Foundation Chain :: I used a 4.5mm hook and regular DK yarn. Foundation Row :: Note I'm using my base colour of cream here. Row One : (see images below) Still using your base colour, chain 'up' three stitches to begin the next row. So you'll have something like this when this row is done! Row Two : Chain up 3 (counts as the first treble, as it did in the previous row!) Change Colour : Okay. Excellent! Right!
Margarita 3D ganchillo para granny #2# Después de la última entrada, en la que aprendíamos a hacer la margarita en 3D con el ganchillo, vamos a crear nuestro granny o cuadrado. Lo he hecho en un color cada capa para entenderlo bien. Lo mismo he hecho con el esquema, siento si no es profesional, pero es el primero que hago. Tomamos la margarita y en un espacio entre pétalo y pétalo, enganchamos el ganchillo y hacemos tres cadenetas. Osea, en el primer espacio, tres cadenetas y dos puntos altos dobles. Hago el primero de tres, ahora toca esquina... esta es tres puntos altos dobles, dos cadenetas y de nuevo tres puntos altos dobles, todo en el mismo espacio. Una vez que tenemos uno de tres y esquina haremos dos de tres puntos altos dobles, es decir en los doce espacio que tenemos tenemos que crear un cuadrado y para ello entre esquina y esquina van dos de tres puntos altos dobles. Recordar, uno de tres, esquina, dos de tres, esquina, dos de tres, esquina, dos de tres, esquina y terminamos con uno de tres.
Undisthreadness: 16-Circles Square How long since the last post!!!! Four months!!!! What a shame. I’ll put here some granny squares I designed. Back then I joined the Friendship Granny Square Exchange — a swap of 6” worsted-weight yarn granny squares. The square I’m posting today wasn’t the first one I designed — this one is from 1997 — but it’s the one I’m most proud of. 1st. row (4 circles): With color 1, chain 22. In the 4th chain from hook, *3dc; skip 2 st, 1 ss (one quarter circle made), skip 2 st*; repeat from * to * twice more, 3dc in the next chain. Remove hook from loop, insert hook in the last stitch of the beginning chain (that is now the "head" of the first dc of the first dc group), 12 dc in the same st of the previous 3 dc. Now you work in the other side of the chain, inserting the hook in the same stitches of the first half-row. So, make #ss in the next ss, 11dc in the next 3dc-group#, repeat from # to # three times more, close with a ss, finish off. 2nd row (12 circles): With color 2, chain 70. Last row:
[Free Pattern] This Is One Stunning Afghan! - Knit And Crochet Daily The blanket is fabulous and the border finishes it off perfectly! It is based on the Flower Burst Square by Chris Simon, a simple design that is simply beautiful. This block is easy to make and pretty and looks a lot different with different color combinations, however I love the soft colors in the featured afghan, and they are so delicate and look so lovely together. the yarn was an 8 ply/double knit and i used a 4mm hook. the colours just came together – there was no plan or scheme but i did want a limited palette.jana – i sewed the squares together using the taupe coloured yarn and what i would call a lacing stitch. you are sewing the edges together so the afghan is flat on the back and front – no ridge. so you are effectively lacing the two edges together. i hope this helps and makes sense! (Source) Image source: Louise Thanks to Louise for this article inspiration and featured image.
Impossible Hexagon 12 inch Afghan Granny Square – As part of the Crochet Lovers Victoria, Square-a-month crochet-a-long, we were invited to design a square each. From star to hexagon to lacework to square, the differing colour choices give this square a unique look every time. Happy crocheting !! A big thank you to the wonderful ladies who allowed me to picture their squares: Top row (from L to R): my square, then Crystal’s square, and Crystal’s second square. Impossible Hexagon 12” Afghan/Granny Square By Stramenda, tested by LaughingPurple and HappyPeacock Hook size 5.5mm DK (8 ply) yarn – US terms Colours: Square can be made in two or more contrasting colours. Terms: DC – US Double Crochet SC – US Single Crochet TRC – US Treble Crochet Sl st – Slip Stitch Sk – Skip Ch – Chain Sp – space To start: Ch5, join with a sl st to form a ring. Round 1 Ch 3 to count as the first DC, work 11 more DC in the ring; join with a sl st to the top of the beginning Ch 3. (12 DC) Round 2 Ch 3, 2DC in same space, (sk1 stitch, ch3, 3DC in next DC) 5 times. Round 3
Crochet Dahlia Squares Pattern Thanks for all the great feedback on the name for these little granny squares! By popular vote I decided to call them “Dahlia Squares” but feel free to also think of them as Sunbursts, Pinwheels, Colorbursts, or Kaleidoscopes I was inspired to do this project after noticing how many little balls of yarn I had lying around. Materials: – Worsted Weight yarn in 3 colors + a color for your borders. – Size H Crochet Hook – Tapestry Needle Abbreviations:Magic Ring Tutorial HERE SC = Single Crochet HDC = Half Double Crochet DC = Double Crochet Cluster Stitch: (Yarn over, insert hook in indicated stitch, yarn over, draw yarn through the stitch, yarn over, draw through 2 loops on hook), repeat 4 times, yarn over and pull through all 5 remaining loops on hook. Note: you might want to weave in ends as you go. Finished Squares should be 4×4 inches Now here is a picture tutorial of the pattern for all of you visual learners When your square is done, you might want to wet block your squares.
Baby Bootie Crochet Pattern | patternsforcrochets.info Baby Bootie Crochet Pattern Baby Bootie Crochet Pattern What is more rewarding in the world than having your baby dressed in an outfit that has been specially crocheted by yourself like booties or cute sweaters. The Art of Crochet you will find is the easiest of all crafts to learn, even for total beginners of using yarn. It takes just an evening to crochet booties and a matching sweater for baby will take a weekend. Baby Booties To make the baby booties just require the basic stitches of : chain stitch (cs), dec (pull up the loop of the next 2 stitches, pull the yarn over then through both of the loops on the hook), and single crochet (SC). 1 Get some worsted weight yarn, equip yourself with a size H hook hook, and start by 5 CS (Chain Stitch). 2 Now 5 SC, two SC in the next stitch; repeat 2 SC in the next stitch, repeat again, 5 SC, 2 SC in the next stitch, SC, 2 SC in the next stitch, SC, and 2 SC in the next stitch. 4 and 5 Even crochet with no increases for these next 2 rounds. Sweater
something pretty – the pattern | mille makes... about this pattern: i found this pretty picture on pinterest and was totally smitten. after a lot of googling and searching i wasn’t able to find the pattern, so decided to figure the pattern out myself. dottie angel‘s pictures of her thrifty find was very helpful, and i was happy to find out that this is actually a pretty simple pattern, so novices – don’t be alarmed! just go ahead and try it out for more pictures, check out this, this or this post. about yarn/hook: any yarn with corresponding hook will do, i find that moving up a hook size from what the yarn says makes a softer material that would work better with a blanket. i’ve made pillows with these squares so that wouldn’t matter so much. i used sandnes duo (dk weight) and hook 4 mm and the square measures 8×8 cm, with garnstudio drops paris (aran) and hook 5 mm one square is a bit over 10×10. first a couple of basics: 2. the first dc on row is made by chain 3 begin with colour of flower. chain 4, make circle with one slip stitch