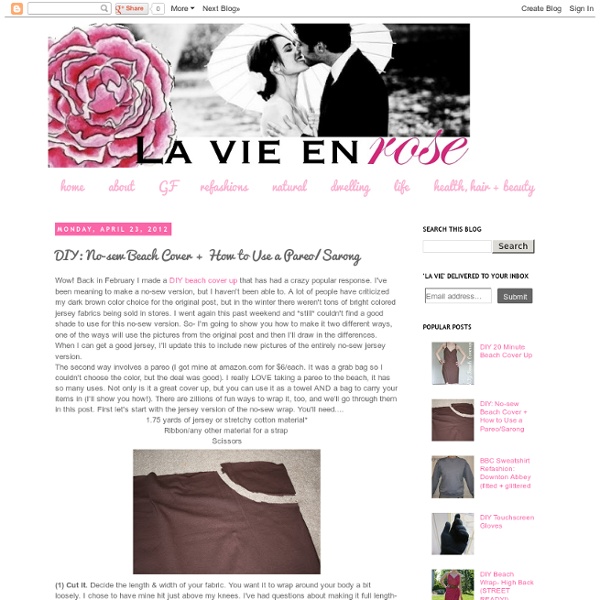
DIY 20 Minute Beach Cover Up
** NO SEW VERSION CLICK HERE!****HIGH-BACK VERSION/STREET WEAR- CLICK HERE****HALTER VERSION- CLICK HERE****MAXI WITH THICK STRAPS HERE** Need more help? Click HEREProbably my favorite 'la vie' project... ever. I was browsing through a swimwear catalog and saw an adorable beach cover up. I sooo wanted it, but obviously I wasn't spending $45 on it, plus, it was totally make-able. I made some revisions and here it is! Maybe it seems a little too early to be thinking about the beach... but seriously, I can't wait. So- without further ado- the 20 Minute Beach Cover Up! (1) Cut it. (2) Braid it. (3) Attach it. Another option: if it's bunching too much in back, you can add in a tapered curve. (5) Wear it. It was so simple!
The Forge: {she made it} jersey weave sweatshirt
did you all have a good weekend? we pretty much got snowed in so during nap time I thought i'd scratch this little diy off my to-do list... This was the inspiration for this diy. i've had it pinned on pinterest for an eternity. so when I came across $3 sweatshirts at wal-mart the other day i felt like it was just meant to be. i resisted grabbing more than two (i am so bad when it comes to good deals) brought them home and gave them both a good wash and dry. the other one is white and i already have something in mind for it... like it? For more fashion DIY posts simply click HERE.
Urban Renewal
Arrow Belt D.I.Y.
I love accessories, especially when it's a special piece that no one else has! Today I'm going to teach you to make a super unique belt! This adorable arrow belt is the perfect accent for a simple dress or top. Here's how I made my belt... 1.) Supplies Needed: Leather in a couple different shades, lace ribbon, yarn in tones you love, scissors and a Crop-A-Dile . 2.) Have fun creating!
DIY
Trash to Couture original DIY tutorials Click on the links below the pictures to see the page.
DIY kimono cape
Continuing with the oriental trend… I wanted to make the garment of the moment. It was “in” last summer but we see it coming back this spring. The kimono. I wanted to make a simple tutorial for all… It doesn’t matter if you don’t have a sewing machine, you can make yours just using scarves, a needle and thread. It’s a kimono-cape version and I’m sure you will not want to take it off this spring. Materials: 1 large square scarf or 2 small. Process: 1. 2. 3. * From here on follow the steps if you are just using one big scarf. 4. Here’s your kimono-cape!! For this tutorial I wanted to make a DIY total look. The peep toes are from the tutorial TIP: HOW TO DYE SHOES and the SIDE STRIPE PANTS. As you can see you can dress from head to toe in DIY creations and customizations. I hope you enjoyed this DIY tut, it’s suuuuper easy and looks great with shorts, dresses, jeans, tops, heels ….. Until the next post DIY’ers!
Little Red Infinity Dress Tutorial
February 14, 2011 I’m always searching for a beautiful, well-fitting, versatile dress, and I finally found it. In fact, I MADE it. The infinity dress has got it all! I made my infinity dress in about 3 hours and for under $20! I found these infinity dresses on Craftster years ago and have always loved them. First, you need to do some measuring. So, 30/6.28 = 4.7. Then I decided on length of skirt and came up with 18″. To make your straps, you need to decide how wide to make them. To determine strap length, you need to make them 1.5 times your height. So, got that? To make your pattern, get packing paper, freezer paper, or a bunch of pieces of computer paper taped together. Then I measured 18″ down from that and made another line for my skirt length. Cut out on your lines. Now, keeping your fabric folded in half with selvages matched, fold the fabric in from the end so it’s doubled on itself. Next, cut a waistband 10″ tall and the length of your waist you measured. Now for construction.
jacket- zipper blazer
Transform your classic blazer in to a versatile piece with a zipper to change the length depending on your look and add a touch of color. materials: BlazerZipper (contour length of your jacket)ScissorsMarking chalkPinsSewing Machine Process: 1. 2. 3. 4. 5. 7. You can wear this blazer with the zipper closed, half-open or remove the bottom. Do you like the idea of the zipper to update your blazer?
because im addicted DIY leopard print short shorts
What better way to enhance a Coachella staple than by adding a little leopard? RAAR! Everyone’s got a few spare pairs of shorts laying around, so we took a walk on the wild side and made over the classic cut offs. Try it yourself. How to: DIY Leopard Print Short Shorts You will need: Shorts (we used a pair of the BCBGENERATION Jackson shorts) X-Acto knife Leopard print stencil, you can print one here Fabric pen 1. 2. 3. More of our DIY’s right this way. Happy Coachelllllla! Photos: because im addicted in collaboration with Sophie Monet
Sewing on to Dance Tights (Thigh High Boot Covers) in Patterns & Tutorials Forum
#ThrowbackThursday for the week of 2/20/14 The long awaited tutorial! After asking around, and finding very little online in the way of an actual how-to (most of results were things like "Um, yeah, I think you can") I've put together a tutorial which I hope will help those people trying to figure out how to keep that seamless look along the legs, because I know I HATE hiking up my thigh-hi boots every 5 minutes. Please excuse the craptacular photography. It was hard to remember to take pics at all, but I wanted to try and get it down for people, since so many asked top keep them updated. I did this when putting together my Zatanna costume this year for HeroesCon. I created what essentially was a big tube sock, with the features that I wanted (color-blocked top, angle, etc). Now, pull on a pair of dance tights. Now take the hose/sock construction off CAREFULLY. (did I mention the craptacular pics yet?
hair bow PDF sewing pattern fashion 90s style by IMakeItYouMakeIt