
25 Handmade Gifts Under $5 If your gift list is long and your budget is small here are some great Handmade Gifts that you can make. Keep in mind that handmade items are not just beautiful but special… I love to give them and I love to receive them. Jersey Knit Bracelet Lovely! This would make a perfect gift for any of your girlfriends. You can choose the colors and recycle t-shirts that you have around the house. Cheap and cute! tutorial Paper Clip Earrings Tutorial This is a brilliant idea… and the possibilities are endless. Love it! Printed Candles Who doesn’t love a candle? Think about how many different stamps you could use to customize this project. tutorial Hot Chocolate Art! What a great gift for neighbors and teachers… I am personally a hot chocolate lover so this would make a great gift for me tutorial Tile Coaster You can buy these plain tiles at Home Depot for under a dollar. I’ve seen them with family pictures also… Way cute! tutorial Bow Belt I was amazed how easy this tutorial was. So Pretty! tutorial Paper Plate Clock Cheap?
SLIME Don't you LOVE it when your little one is over the moon about an activity you shared together?! I do!! This morning we made RAINBOW SLIME and Biscuit was beside herself with excitement. There are a few ways to make slime, however I found this recipe works best ~ 1 1/2 cups of CLEAR glue and 1 1/2 cups of liquid starch. You mix it all together, separate the slime into a few small bowls and add food coloring to each bowl. You only need a few drops of food coloring!!! Making her slime All ready to go! "Stretchy" "Eeeeeew." "I squish it!" Deep in thought.... By the end there was just one big ball of slime. She played with this stuff for thirty minutes ~ uninterrupted. *High-fiving myself* Happy Playing & Exploring!!
{DIY sugar cubes} Why not spruce up the way you serve coffee or (iced) tea? Last night I played around with sugar a little and made my own sugar cubes. It’s really easy to make and so cute to look at! You should give it a try! What you’ll need: granulated white and/or brown sugarwaterbowlteaspoonice cube tray or candy mold How to: Pour about 1/2 cup of sugar into a bowl.Use a teaspoon to pour small amounts of water on the sugar, little by little, and mix until it is a paste-like consistency. I decided on just using the sugar plain. I’m partying here! Art From Everyday Objects: Paperclips + String | So today I thought it would be a fun challenge to work with paperclips. You can’t get much more mundane than a paperclip! After much thought, I came up with paperclip earrings. If you have paperclips and some pretty cotton string, you can create these beauties. They’d probably look pretty cool as a necklace too. Here is a diagram to show you where to open the paperclip to create this triangular shape. You are basically unbending the clip at all three of the curves. Once you’ve got the triangular shape, you need to glue the ends together. Fig 1: Winding the string around // Fig 2: Starting to wrap the string around the earring, secured with Liquid Stitch Once you’ve wound all the way round and secured with glue, you can then take another length of string and wind around the width of the “earring” creating horizontal stripes or you can create a more messy look by creating a “net” design (see below). Then just clamp on a pair of earring hooks. Categories: Art, DIY, Fashion
bird nest necklace} I have been seeing a lot of bird nest jewelry around lately. They are beautiful and I love the trend so I thought I would try making my own. These turned out to be really easy to make and require just a few simple supplies. This necklace would make a lovely Mother's day gift, which just happens to be coming up this weekend! What you'll need: - Jewelry wire (I prefer using a 24 gage because it is easier to manipulate but the 20 gage can work well too with the help of some round nose pliers) - pearls or glass beads - necklace chain - jump ring and a clasp Select the beads you want, string them onto your wire and arrange them as you'd like. then simply wrap the wire around the beads wrap some wire in the space between each bead (I like the look of three loops but you could just do one or two if you prefer) this is what the back looked like. now attach a jump ring and a clasp to the end of a necklace chain and this is what you end up with :) I love how each one is so different
you so must do this guys!!! Cheap Craft Ideas - Inexpensive Crafts Adapted from Clare Youngs’s The Perfect Handmade Bag ($19.95; Cico), this cute carryall requires little more than a pair of small wooden spatulas and two tea towels ($15 each; motherlindas.com). Cut six strips of fabric from one towel. Two, measuring 33⁄4"W x 141⁄4"L each, will serve as the decorative horizontal bands at the top of the tote and should incorporate the towel’s graphics (as shown, left). The other four, measuring 31⁄2"W x 8"L, will form tabs for the bag’s handles. To make a tab, topstitch one of the long sides of a 31⁄2"W x 8"L strip near the edge. Lay the second towel on a flat surface, right side up. Flip the towel right side down. Fold the towel in half, wrong sides together.
Believe! I have the blessing to be part of a great organization inside of the church I belong to; called Young Women. The theme for the girls {age 12 to 17} this year is “believe”. I’ve been thinking a lot during the last six months about such a simple word and what it means to me… However it was during this weekend that I found myself thinking more deeply about it while working on these little necklaces that I was making for our girls… So please forgive me if you came visiting looking for a craft or just a cool tutorial because I am afraid that today what you are getting instead is a piece of my heart… These are the tools I used to make the necklaces: My sweet friend Bonnie’s Steel Stamping Set, Hammer {the poor thing has seen better days}, Sharpie and a cleaning rag. Materials Your choice size washers. 1/8″ Steel Stamps. Chain and Embellishments. The first thing I did was stamp the washers. For this I used the 1/8″ steel stamps and a hammer. After I had stamped the washers they looked like this… …love them!
{every}nothing wonderful: Tutorial: Pot O' Gold Presents: Money (or Message) Soap Gift Tutorial Super easy, super fast and a fun take on the boring ol', but very appreciated money gift, money soap is the way to go for a difficult gift. A smart friend will use the soap as intended, until their reward, but there are those who might carve away at the best laid plans - just be warned. Delayed gratification isn't everyone's bag, so be it. Every year we try to find a fun and creative way to give my nephews the same gift: money. Perhaps you don't have anyone to give a gift to for St. What you'll need: Glycerin Soap - clear or any color you like. If the soap is shrink wrapped, start by taking off any labels you can. Next roll up your money or note as tightly as possible. Position the rolled up money/note where you would like to go in the soap and make a small mark where it ends - this will serve as your guide when drilling and indicate where to stop drilling. Take your drill and drill directly into the soap (through the wrapping if it is still there).
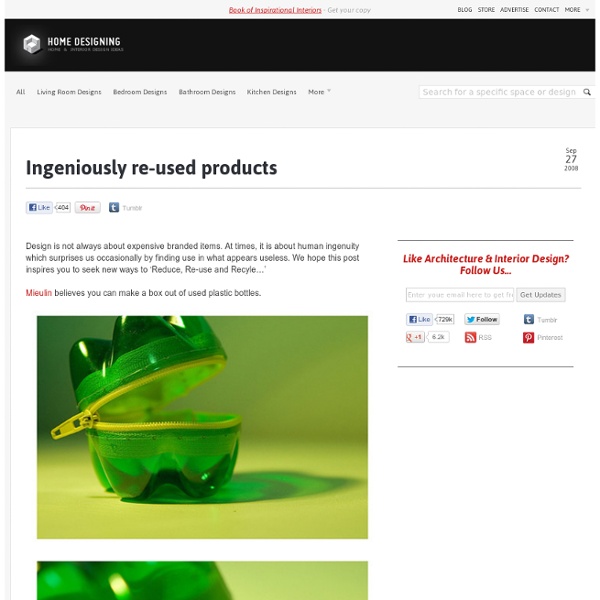
Recycle: Waxing colorful ... If you've got kids (or work with kids) you've got crayons. Lots of them. Melting down broken pieces to create colorful "new" crayons is an old idea ... but a good one, so I keep seeing creative versions for weddings, holidays and parties. If the silicone cookie /candy mould exists, you can make crayons in that shape (gingerbread crayons for the holidays?) I was inspired to finally feature crayons myself thanks to the amazing "crayon art" tutorial recently posted on 52 Kitchen Adventures. A sweet, colorful valentine that includes a little sparkle .... from Whipperberry. Sweet Tooth Pouch We don't normally have a lot of candy in the house. Well, the Halloween candy (at least nothing with chocolate - because that's all eaten within hours) is still in a jar in the kitchen cupboard. This little project was inspired by my son who asks for candy from the brightly colored packages at the checkout at Target. So, here's a little "sweet tooth" pouch. You'll need two candy pouches - I used skittles and M&Ms. You'll also need: iron-on vinyl a zipper (7 - 9" works well) two pieces of fabric for lining (each should be the size of your candy wrapper). thread, sewing machine, zipper foot, iron, X-acto knife UPDATE: Several of you have emailed me asking where to find iron-on vinyl. First, we'll put the vinyl onto our candy wrappers. Cut two pieces of vinyl slightly larger than the wrapper. Using a clean rag (or ironing cloth), iron the vinyl for 8-10 seconds on medium heat. Now that you have your wrappers covered in vinyl, we'll assemble the pouch. Now the top looks like this:
DIY Tangle-Free Headphones with Embroidery Floss In our post about The Science Behind Earbud Tangles, we showed you that making cords thicker is one of four ways to keep wires from knotting up in your pocket or purse. So we're not surprised to see that one Pinterest user figured out that a super-easy string-knotting technique keeps her 'buds from bunching up. Sick of seeing tangled earbuds? Us too. Thankfully wire-wrapped nirvana is only a few threads away. Pinterest user Ada(: took to the virtual pinboard site to show off her embroidery-floss wrapped Apple headphones. It's a technique from the grade-school days of knotting up friendship bracelets. These instructions from WikiHow will teach you how to make a Chinese Staircase bracelet. It's recommended that you have enough string to cover three times the length you want to wrap, so measure your headphones' cords (don't forget both earbuds!) Ada(: at Pinterest said it took her a day to finish the project. [via Pinterest.com]
Quick bread in a bottle Cool weather puts us in the mood to bake. So why not give a friend a head start? Layer the dry ingredients from step 1 (below) for this easy quick bread into a milk bottle or 1-quart mason jar. To fit, tamp each layer well (with chips and nuts on top). We used craft paper adhered with double-stick tape to cover the original milk bottle graphics and the lid. Add a label on the back of the bottle for the recipe instructions. Chocolate Chip Oatmeal Quick Bread 1. 2. 3. 4. Looking for milk bottles? We used bottles from milk we bought in an independent food market, which is a good source for milk from small, local dairies. Get local recipes that you won’t find online.
V and Co how to: jersey knit bracelet i don't know what it is about this time of year that makes me just want to have my bare feet in the sand, be watching the sun setting into the ocean, and breathing in the warm salty air of the beach...as i get older, more and more i find myself missing that place i used to go to almost every.single.day. as a teen. (my skin doesn't miss it. as a matter of fact, i now wish i listened more and DID put SPF on my face...hindsight is 20/20). my mom calls me from her walk on the beach almost every morning...*sigh*yeah, i get a little homesick around this time of the year. heck on my pinterest my "dreaming of summer" has the most pictures in it. ah yes. i miss my ocean. case in point. this bracelet, brought a flood of memories, not because i used to have one like it but because i can totally see me wearing it by the beach, not caring that it's gotten salty and wet, because i can totally make another one in like less than 5 minutes flat when i get home. *sigh* okay... *cut off excess tails!