
50 Free Apron Patterns You Can Make Home / Crafts / 50+ Free Apron Patterns You Can Make [Updated 2012] Here’s a treat for Tipnut readers, three free booklets packed full of apron patterns! I’ve scanned, re-typed and organized over 50 vintage goodies from my personal collection and organized them into separate eBooks for you to download (they are in pdf format). Please Note: The files are quite large so they may take a few seconds to load. Before getting started, if you’re looking for current designs that I’ve collected from around the web, you’ll find them moved to this page. Ready to download your booklets? The first is over 30 pages and consists of half-aprons. The second is 27 pages and features full-aprons, there are some pretty nifty ideas in this bunch too! The third is smaller at only 8 pages but it’s still a good one to scoop up! It was common in the 1940′s and 1950′s for companies to publish these in a grid pattern so that homemakers could make their own by looking at a diagram printed in a book or magazine.
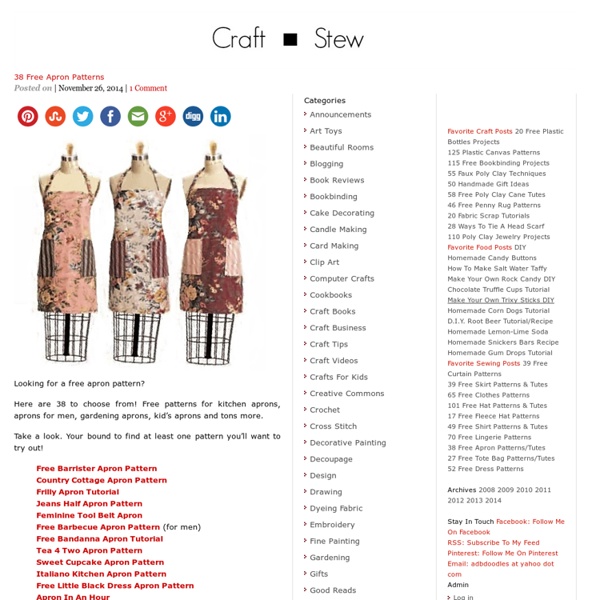
The Best Free Apron Patterns on the Net! I love aprons. Not only are they practical (I always end up with flour head to toe if I neglect to wear one), but they tend to keep me on task. And these days, there are so many fun aprons available, it's tempting to acquire a whole collection for every mood and whim. My favorite aprons have full coverage, long straps for tying, and never need ironing. There's quite a market for aprons these days, and many of the most attractive ones are costly. Simple hostess apronVintage tie half apronFrilly apron Scrappy apronSassy apron For KidsKids chef apronQuilt block girl's apronChild's bandana apronGirl's ruffle half apronMother-Daughter apronsGirl's Edwardian apron For MenMan's grilling apronMartha Stewart's chef apron
Ruler Growth Chart I have been seeing these wonderful ruler growth charts on blogs and Pinterest. The first one I saw was here: Love it! Easy to follow instructions and great pictures! Of course I had to make my own and make it a little bit different. Here is what you need: A 6 foot 10"x1" or 8"x1" board (I used a 10"x1") Printed off large numbers in different fonts. Start with sanding down the board and the sides: Wipe all the dust off and print off your numbers: Here is a picture of my numbers 1-6, plus the smaller numbers. Notice the tape measure laying on the floor next to the board? After I laid out my design and taped down the pattern, I used a pen to trace the design onto the wood: You need to press really hard, because you want to make an indention of the outline onto the wood. Here you can see the number two that was traced onto the wood. One it gets close to the edge of the design the wood will absorb the stain up the indention.
Canvas Silhouette Updates Remember those canvas silhouettes of my kids I made last year? The plan was to update them once a year to keep track of how the kids are changing. I love how Charlotte went from a little no-neck baldy to a wild-haired darlin' in just one year's time. Here's a list of supplies you'll need: Here's the step-by-step: 1. 2. 3. 4. 5. 6. Then I used the templates I made from the photos to trace onto the back of a vinyl sheet (see above & below). The extra step of tracing onto vinyl really saved me a lot of stress when it came to painting the profiles onto the canvas. Next, simply stick the vinyl cut-out to the center of the canvas. Pardon all the smudges on my kids silhouettes. P.S.
Let's Make Something Together - Lined Canvas Bins (from Diaper Boxes!) There are times when I finish a project and I am absolutely giddy to share it with you here. This was one of those! The idea for these bins came about as I was brainstorming projects for the Upcycling challenge at So You Think You’re Crafty a couple of weeks ago. I have been in dire need of some new containers for the built-in shelves in our living room to hold things like DVD’s and remotes, but I wasn’t wanting to spend a fortune on them. It occurred to me that a diaper box had precisely the dimensions I was looking for, so I determined myself to figure out a way to gussy them up to suit my needs! In case you missed it, here is the blurb from SYTYC… Over the years, my household has acquired an abundance of two things in particular: 1) little items that need to be stored away in some semblance of order; and 2) diaper boxes. What began as three diaper boxes became in just a couple of hours a chic collection of lined, numbered canvas bins. Ready to make a set of your own? Measuring tape
How To: Print On Fabric Printing on fabric is so much easier than I thought it would be! You start with some spray adhesive: Spray it onto a piece of cardstock and place your fabric on top, being sure to get out as many bubbles as possible. Then cut down the fabric so that it is the exact same size as your cardstock. Place it in your printer with the fabric facing whichever side gets the ink. You now have printed fabric! Just peel it off of the cardstock. And you are ready to use your new printed fabric!
Utah County Mom: Board Books Lily's favorite thing to do is to look at pictures of family. Since not all of our family lives close, I decided to make board books with pictures of everyone and names for her to look at. This is one of the only things that keeps her consistently quiet during church and entertained in the car. First, I found board books to use. We have a huge family, so it took 6 books in all. I designed the pages, cover, and spine in Microsoft Publisher. Since making this project, I have figured out a much easier way to design an adorable template for these books. Lily's middle and last name were blurred out in the picture above for privacy reasons. Then I printed the pages out using the highest quality my printer allowed. I glued each page on with glue stick, using an old insurance card to smooth each page to the book. After the glue was dry, I tested the corners to make sure they were secure and added more glue if necessary. Here are 4 of the 6 books I did for my little girl.
DIY - Single Use Antibiotic Packs | Brian's Backpacking Blog The ongoing trend in the consumer market of providing small, ready-to-go, individual size packages of consumables has been a win-win for the lightweight and ultralight backpacking communities. Always looking to shave a few extra ounces or grams off of our overall pack weight, these individual servings are the perfect fit for trail snacks, drinks, condiments - you name it. However, these nicely packaged individual servings can come at a premium. They can often be pricy or difficult to find without going online and ordering in bulk +shipping. That's when the creative types among us come up with ingenious solutions that lets us make our own alternatives using things we usually have lying around. Which brings me to today's topic - individual size packages of antibiotic cream. We're going to make very small, single use packets of antibiotic ointment using a generic alternative to Neosporin and a clean (unused) drinking straw. I've yet to have one of these burst or fail on me.
Making Gel Air Freshener | Bloom, Bake & Create I’ve never been one to like to use air fresheners. I have always been concerned about what they put in them to make that smell. Anyway, I came across this recipe on Little House on the Prairie Living that I just had to try. Years ago, I purchased a gel air freshener kit. I don’t have any idea where I got it from – must have been on sale – but I never made them. When I moved here I threw out the ingredients, but kept the little jars. Gel air freshener jars I took Merissa’s recipe and cut it in half. Gel Air Freshener Print This Post 1 cup of water 2 packets of unflavored gelatin 15 or so drops of essential or fragrance oil 1 teaspoon of salt Bring a half cup of water to a boil. I used one of my favorite fragrance oil which smells like coffee and chocolate. Mokalata Fragrance Oil It gelled up pretty quickly and it’s now sitting here in my woman cave. Mokalata Gel Freshener I’ll definitely make more. Thanks to Merissa for her recipe.
Marriage Survival Tool Kit I had a lot of fun putting this Marriage Survival Tool Kit together. This was for a wedding gift but the idea could be used for an anniversary, or Valentines gift. I would modify some of the sayings if it was to that special someone rather than to that special couple. Tape Measure - Love beyond Measure Tape - Stick Together Nails - Build your relationship every day ( I was going to put a hammer with this but the tool box I bought didn't let it fit) Assorted Household Hardware Accessories (little things like picture hangers and tacks)- Remember the big things are the little things Mini Screwdrivers - If a screw is loose, tighten it Level - Find balance in your marriage. Glue - Establish a divine bond And of course a tool kit.... I found some marriage advice to go with all the sayings as well. (find a copy below) and cut out a tag with the marital advice the same size of the other tags and placed them on the opposite side. Here is the marriage advice that went with the tape measure: Stephen R.