
Réussir à tricoter le pull parfait #1 Il y a peu j’ai fini “Mistigri” mon premier pull. Oui, je sais, j’ai déjà tricoté des tonnes de gilets, et des pulls pour Michel. Mais celui là, c’était le premier pull pour moi. Et assez étonnamment je pense que de tous les tricots que j’ai réalisé jusqu’à présent c’est celui que je vais le plus porter. Je crois que c’est mon premier “pull parfait” Patron: Marilyn Temps de réalisation: 29 h 55 min Laine: Cascade 128 Superwash chunly achetée chez Lil Weasel D’autres photos sur la page du projet: Mistigri Chaque fois que je me lance pour tricoter un vêtement, je me pose une tonne de questions: Quel modèle? Ces questions, des tricoteuses souvent débutantes (mais pas que) me les posent souvent (via le blog, twitter, sur ravelry ou quand je les rencontre) et c’est un sujet dont j’aime bien parler. Les difficultés sont à mon avis les suivantes : J’ai rédigé un article pour détailler chacun de ces points. J’en publierai un chaque jour. A demain! Tags: laine, raverly, tricot, tutoriel
How to make 3D paper ball ornaments I love 3D paper things. Love. And when I saw a little picture of what appeared to be paper balls in a CB2 catalog, I thought, "I am going to make those." So the other day while Alex was writing a paper about mysterious things like polymers and flexible films and tactoids, I made a paper ball. These are made from 12 slotted flower shapes that fit together to form a sphere. Download the PDF templates here:Large ball (10")– print/cut 12 sheetsMedium ball (5")– print/cut 2 sheetsSmall ball (3")– print/cut 1 sheet Download a Silhouette .studio file here:Small ball (3")– unzip the file; cut 1 sheet. If you want to hang your ornament, you might like to add the string before assembling the ball. Use the slits to join petals together. It might be helpful to think of the first piece as the "north pole," and then add a row of five flowers encircling it. Here's what it looks like upside-down: Attach the next row of five flower shapes, and finally, add the "south pole" piece to finish the globe.
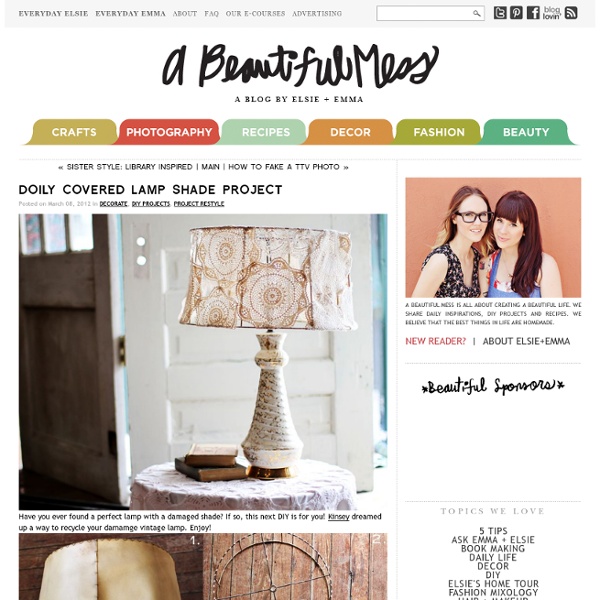
Song Lyric Wall Art / D.I.Y. Project A couple weeks ago, I found a paint-by-number at an unbeatable price. I can't pass these things up even though I already owned this particular design. I thought that I could maybe use it to make a fun D.I.Y., but my new rule is that all thrifts that I purchase with the intent of restyling need to get done right away. Here's how I did it... I displayed our piece in our bedroom, on Jeremy's side of the bed. A couple weeks ago, I found a paint-by-number at an unbeatable price. Paper snowflake decorations Somehow my gift wrapping session turned into a snowflake cutting session. I wanted to try making some snowflakes that look a little more 3D than the usual version. These are made with computer paper, a stapler, double-sided tape, and a scissors. If you've got standard staples that are 1/2" wide, accordian-fold a sheet of computer paper so that the pleats are 8 1/2" wide by about 3/4". If you get to the end of the sheet and have a little extra paper left over, trim it off. Staple the folded paper as close to the center of the stack as your stapler will reach. Unless you're using extra thin paper or you have super-human strength, you won't be able to cut through all the layers of paper when the stack is folded in half. Pull open the accordian folds and join two adjacent ends with double-sided tape, forming a semicircle. Repeat the process to make the other half of the snowflake decoration, cutting the same design from a second piece of folded paper.
tuto trousse à angle droit... carré ou rectangulaire tuto trousse à angle droit... carré ou rectangulaire Je vous l'avais promis... le voilà: tuto de la trousse à angle droit Cette trousse est doublée, mais vous pouvez tout aussi bien ne pas la doublée si vous la faites dans une matiere plus rigide que du tissu, telle que de la toile cirée etc.... Fournitures: * exterieur: 1 carré de tissu de 25 X 25 cm *doublure: 1 carré de tissu de 25 X 25 cm * viseline thermocollante pour rigidifier le tissu: idem...25x25cm * 1 fermeture à glissière de 25cm * 2 tirettes (pour ma part, j'ai choisi de les faire avec du biais plier en 2 et surpiqués) Vous avez tout???? 1/ thermocollez au fer chaud l'envers de votre tissu exterieur de la trousse 2/ Positionnez votre zip, endroit contre endroit sur votre tissu exterieur 3/ coudre votre zip en équipant votre machine du pied spécial fermeture éclairs 4/ faites de même de l'autre côté Vous obtenez ceci: (Si vous ne souhaitez pas doubler votre trousse... rdv à l'étape 7) La doublure: 5/ Ne retournez pas votre tissu exterieur.
A Beautiful Mess: OUR WEDDING Hi there! Today I want to share our instant photo guestbook that holds our guests photos from our wedding day! It was easy to make and, best of all, I didn't have to prepare anything before the wedding except to order the film! On our wedding day we used a Fuji Instax Mini camera and film to capture photos of our guests. They signed their names with a permenant acid free pen. While we were honeymooning I picked up this Kolo Album (can't resist a paper store, even on our honeymoon!). I adhered six photos per page (front side only) and added bits of lace and fabric to embellish! Boules de Noël Ready for a little DIY this morning? Well here we go! I was wanting to make something festive to start decorating our apartment for Christmas, but I really wanted to keep it cheap.. cause I’m like that, cheapy cheap cheap-o. So here’s a super easy DIY that’s guaranteed to bring a bit of bling to your Christmas decorating for next to nothing :) For the yellow string bauble: 1. 2. 3. 4. Note: Please be careful with the superglue! For the all-tack bauble: 1. 2. 3. Thank you, your sign-up request was successful! Given email address is already subscribed, thank you! Please provide a valid email address. Oops. Other posts you may like:
Fully lined zippered box pouch - pattern and tutorial - it's a Pretty Modern life I love the look of a zippered box pouch...so incredibly cute. I found many tutorials on the internet, but was disappointed after making pouches following these tutorials to find that they were not fully lined; looks so much nicer when you open your pouch and there are no seams. It took me a long time to figure it out and I thought and thought and thought...then I got it♥ I don't want to keep this knowledge to myself, so here it is. ♥♥♥Thanks so much! The finished pouch is 3 high x 4 wide x 7 long (inches) Here's what you need: 1 twelve inch zipper 2 10x7 inch panels for the lining (my lining fabric is the green one) 2 10x7 inch panels for the exterior (my exterior fabric is the brown floral one) 4 10x7 inch panels of fusible interfacing to give the lining and exterior fabric some structure (I have already ironed the interfacing onto the fabric in the photo above) 2 4x3 inch pieces of complementary fabric for the pulls at the end of the zipper STEP 1. STEP 2. STEP 3. STEP 4. STEP 5. STEP 6.
How I made my Instagram Wall After our living room tour many of you asked for tips on making your very own Instagram wall! This method is perfect for instagram (or any square) photos and polaroids. Mine is not permanent because we are planning to put our home on the market in the near future. The method I used is perfect for renters or anyone uncomfortable with making lots of holes in the wall. First, use a piece of painters tape to mark a level base for your collage on your wall. I used painters tape as the adhesive to make hang all my photos. I hope this has been helpful! Credits: Top two photos by Janae Hardy, I print my 4 inch photos using the PostalPix app.
Comment fabriquer soi-même des meubles malins et récup (2) Je vous l'avais promis,et vous verrez qu'il y a gros dossier...alors que peut-on faire avec de simples palettes de bois? On commence par une utilisation simple mais efficace en tant que rangement pour chaussures (personnellement je le repeindrais) : En table basse, rien d'autre à faire que de la customiser en la repeignant: En mode table rustique avec roue de brouette: Pour la terrasse: Façon rangement et déco: Meuble bas pour la télé, incluant des rangements: Pour des bureaux qui ont du caractère et une âme: La bonne idée? Une jolie table de travail en cuisine avec des palettes, j'aime bien cette couleur grisée: Employées de façon très maligne sur une terrasse ou dans un jardin: Ça fait rêver: une belle balançoire lit pour buller dans le jardin en été: Bien pensé aussi, le meuble rangement pour cuisine de jardin: Dans une cuisine: Pour les plus fortiches en menuiserie: Table basse et coffre: Des banquettes pour se créer un coin canapé avec un budget mini: Pour accueillir votre vaisselle: