
Kids Bedroom Interior Design For Small Rooms Small rooms need not look boring congested rooms – especially for your kids’ rooms. Whatever the limitations there may be about space availability, you can still create a bedroom for kids to help in fostering your kids’ creativity and thirst for knowledge. Kids’ room is not just a place for them to sleep and dump their things. Providing extra seating and guest beds for kids’ room will be most important as they grow up. Designs are various, but the challenge to save space without having to compromise with beauty and aesthetics while furnishing and decorating a room has been more than met here through corner long sleek shelves, low cots, pull-out table options, and built in floating shelves over the bunk beds etc. Space Saving Kids Bedroom Interior With Bed And Study Table Space Saving Kids Bedroom Interior Blue And White Color Space Saving Kids Bedroom Interior With Wardrobes And Furniture Space Saving Kids Bedroom Interior Colorful Decor Kids Bedroom Interior With Colorful Furniture
A Day's Worth of DIY Inspiration - Repurposed So much inspiration, so little time! It's DIY, it's repurposed and recycled, it's brilliant! milk crates in an antique buffet sculptures made from dice milk jug igloo wooden curtain rings bowl sewing bobbins necklace wall art made from bedsprings toy firetruck lamp And finally, I am seriously blusting (blog lusting) over this piece...made from lids! wall art made from lids Until next time... Mike Stumble this post
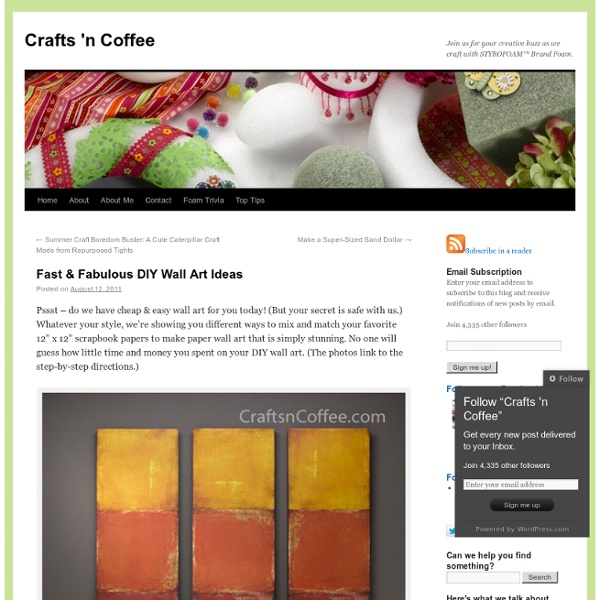
"Stained Glass" Votive Holders By Jenny Ryan Many times when I’m at the grocery or drug store, I can’t resist throwing a few scented votive candles in my cart. When I’m ready to burn them, it’s easy enough to sit one on a cute little vintage china saucer, but I recently decided to try and find a fancier display solution for them. I also wanted the project to be inexpensive, and the materials used to be things I already had on hand. Materials Tissue paper in your desired colors Mod Podge (matte finish), in a pinch you can also use school gluePaintbrush Scissors Glass containers to fit your candle(s), I used thrifted vases and wine tumblers Paper punches in various shapes Q-tips, optional Directions Step 1: Figure out what colors of tissue paper you’d like to use and what paper punch shapes you want to try out. Step 3: Start affixing the punched-out paper shapes to the glass using your paintbrush. Step 5: Once everything is dry, plunk in a votive candle, light the wick and enjoy! More: Related
tutorials When it comes to making art, I'm all about the process. While I love working on a project from start to finish, I've found that it's in the "journey" and the time spent experimenting that I grow the most. There are days when I will spend hours playing with a technique, supply or process simply to learn! Lately I've been having lots of fun painting on photo paper. All you really need for this process is photo paper and color. PHOTO PAPER: Just about any photo paper will work and by photo paper I mean the paper that you use for printing photos. COLOR: You can use pretty much any type of ink or paint for this process but I found the more fluid the paint (or ink) the better results. RUBBING ALCOHOL: Isopropyl Alcohol is my favorite supply to use with this process because when you drop it onto your surface, it will react with the color and repel that color leaving an area of the surface exposed. There are so many different ways to work with these materials! Drop color on the surface.
High Functioning Coat Hooks Back in Los Angeles, any old coat rack or a few hooks by the door would do. Most of us would just toss a jacket in the back of the car in the winter months. But here in Vermont we need a little more. Many of the vernacular farm houses I visit have at least a half dozen hooks per person lined up in their mud rooms. Materials, for each hanger you'll need: One cleaned or refinished paint can. 2 screws long enough to reach into wall studs. Tools: Long handled screwdriver or screw gun with sufficient extensions to reach bottom of can. Step one: With the handle in a horizontal position, layout and make 2 small mounting holes at the top and bottom of the can within an inch or less of the edge. Step two: locate and mark stud position on wall for upper screw position. Step three: Screw through the upper hole of the can into the wall stud but not quite snug to the wall. Step four: Straighten the can and screw through the lower hole of the can into the wall stud snug to the wall.
Weekend Project: A Candelabra Made From Old Bottles One of the many things I loved about working with art director Susan Wasinger at Natural Home was her knack for finding craft projects that had long ago lost their luster—and giving them a contemporary spin. Remember bottle-cutting? Back in the ‘70s everyone was using those as-seen-on-TV kits to make drinking glasses and vases. Susan took a look at all the beautiful shapes, sizes and colors that bottled mineral water comes in these days and found a way to revive that dying art. Here, she uses capped mineral water bottles to make a lovely candelabra. And if this iteration seems a little too complicated for a July weekend, consider making her bottled-light centerpiece. Blue mineral water bottles—too pretty to recycle—make a lovely candelabra. 1. 2. 3. 4. 5. 6. 7. 8. Bottled Spirits: A Variation Drill a large hole in a 6-inch square plywood scrap.
3 Four and Under: Silhouette Tutorial Nope, it's not what you're thinking. I'm not talking about the machine, I'm talking about making silhouettes of my beautiful children I've been wanting to make them for months, and I have been looking for inexpensive oval picture frames for months. I wasn't able to find any in my price range. This is how I made mine Step One: I took a picture of each of my children Step Two: I uploaded the pictures onto my computer and opened them in Adobe Photoshop And then I carefully deleted the background of the picture Step Three: I used the Paint Bucket Tool and colored in my daughter's silhouette in black Step Four: Then printed the pictures out and cut out each silhouette Step Five: I took the silver Dollar Tree trays and spray painted them white Step Six: After they dried I took my trusty Ralph Lauren glaze (that I got for a $1 a gallon) and painted it onto the edge of the trays and wiped it off with a paper towel Step Seven: Then using Mod Podge I decoupaged the silhouettes onto each tray
Paper Flower Key Holder / Mark Montano Difficulty Rating: Beginner Tags If you need a quick 'just because' gift for someone, this is it! It’s simple to make, couldn’t be less expensive and we can all use one. I for one am always losing my keys and this, by far, is the easiest way for me to keep track of them. Here’s how: 1. 2. 3. 4. 5. 6. 7. 8. 9. 10. Supply List Wire hanger Needle nose pliers with built in wire cutter (most are made like this) Hot glue gun and glue sticks Stapler Book pages Fiskars Scissors and Pinking Shears Krylon Clear CoatSmall piece of cardboard
Felting Project: A Rug! This is the most beautiful felt project we’ve seen. Strips of felt are wrapped around each other with hot glue to create this amazing swirled effect. What a great project for a snowed-in weekend and a movie marathon with the family. The kids could even help cut strips and decide on color combination while you operate the hot glue gun. Would you attempt something like this? Keep reading to see more pictures and find out where to find more details about this beautiful felt project! You can see all the instructions and details here on The Crafts Dept blog A few other fun pictures of the process: Images: Martha’s Crafts Department Blog Other post of mine you might like: The Best Thing to Happen to Your Baby’s Feet This Winter! Zara Kids Winter Collection Snow Bricks!
Summertime DIY! Make a Film Candle Holder in 3 Steps Poor, neglected photo negatives. Ever since digital photography has come into play, these photographic beings have lost their heyday and are quite the endangered species in the photography world. Well, neglect them no further—time to use those negatives for something positively enlightening! Brighten up their lives—and yours—by using them to make a lightbox-esque candle holders! It’s a super simple and fun way to dress up your candle lights for these lovely summer nights! How to Make a Film Negative Candle Holder! p.s. Why So Negative? Since they’re transparent, photo negatives are best viewed with some sort of light behind ‘em, and candlelight works perfectly to illuminate the different photos found on a negative roll. So why leave your photo negatives to the dust bunnies when they could be showcased using just a few additional materials? It’s a quick and easy way to personalize the rather plain glass candle holders—and makes a neat conversation piece, too! And hey—no negatives?
Altered thrift store art: Some personal faves Unknown, via Reddit. Banksy, via Flickr user goldenticket. It’s a simple idea: Find some bad art, whether original or a print, for a song at a thrift store, then modify it to make, if not “better art,” then at least something that’s more entertaining to look at. (Is it the same thing? Yeah, that sounds like a productive argument.) Anyway. Etsy seller loudxmouse. Banksy, via Flickr user Darrell Godliman. Reportedly Banksy, via Reddit. Banksy, via Flickr user poly_mnia. Banksy, via Flickr user SteeveeGee. Woodgill at Monocol’s Etsy shop. Did I miss a good one? Related
Paper Fortune Cookie Favors by La La Laurie Super Simple Homemade Air Freshener Baking soda naturally absorbs odours, so why not take advantage of that to create simple, inexpensive air fresheners? Here's how: Use a hammer and and a nail to poke holes in the lid of a small canning jar. Fill the jar about 1/4 full with baking soda Add 6-8 drops of lavender essential oil Put lid on and place in any spot that could use some freshening. I've made several, and I use them in my linen closet, under my kitchen sink (which is where the stinky garbage can is) and in the bathroom. This powder is also useful for removing odours from carpets and upholstery. You could, of course, substitute your favorite essential oil for the lavender. NOTE: As with any cleaning product (even the reasonably safe and friendly ones), keep out of reach of children and pets.
DIY Gear: Create Your Own Awesome Believe it or not, Do-It-Yourself isn’t just the realm of Bob Vila and that dude Ty on all those Discovery shows. You can, in fact, do it yourself. With a helpful bit of inspiration and an almost complete lack of instruction (exactly how we like it), you can combine found items and a bit of know-how into some seriously awesome stuff for your home – without the obscene price tag that high designers and big box stores would charge you for similar items. Like any good vacation, the planning of any project starts with the destination. So here you go, here are your destinations. Just add testosterone and power tools wherever possible. Disclaimer: Real life DIY doesn’t have a standby emergency team. This Hyundai sponsored post is about snapping out of the norm and creating your own awesome. Wall Lamp Pipe Shelf Calculate your desired shelf size. Beer Bottle Chandeliers BoomCase On the surface, it’s just a cool vintage suitcase with speakers inside. Metal Barrel Cupboard Pipe Works Coat Rack Mr.