
{Joli détail déco} Les yarn chandeliers | PrettySouthWeds Chères Pretty South Brides, aujourd’hui c’est DIY (ou loisirs créatifs pour les francophones invétérées) ! Vous l’avez peut-être remarqué, c’est la folie des pompoms en soie et des lanternes japonaises en ce moment sur les wed’blogs. Crédits: Style Me Pretty Mais j’ai décidé de vous parler d’un autre détail déco que personnellement j’aime beaucoup plus que les pompoms : les yarn chandeliers (bon, pour le « yarn » (ficelle) je vois bien, mais pour le chandelier, va falloir m’expliquer les ricaines !). . Pour cela, il vous faut : - de la ficelle - de la colle - de la maïzena (et si !) Première étape : on gonfle les ballons. Deuxième étape, on fixe un peu de ficelle au bout de chaque ballon et on suspend les ballons par ce morceau de ficelle à un support horizontal. Troisième étape : on enduit les ballons de vaseline (c’est pour que la ficelle ne reste pas collée au ballon au moment du séchage. Sixième étape : on attend ! Crédits: Ruffled
rolled paper flowers Welcome to flower week – five days of simple and delightful flower projects. I could probably do three weeks of flowers because there are so many different ways to create them, but I’ve limited it to five of my current favorites. Before we get started, let me make a few disclaimers: 1. 2. 3. Okay, so let’s begin. Here’s what you’ll need: :: paper {either cover or text weight} :: florist wire :: scissors, pencil, glue gun STEP ONE: cut irregular circle This circle is approximately 8 inches, but you can do any size you wish. STEP TWO: cut spiral Start at the outside edge and cut in a spiral fashion to the center. I like a sort of bumpy shape so that the petals end up a bit irregular If you aren’t so sure about your cutting skills, feel free to draw your spiral before cutting. To add a little interest to my bouquet, I used a variety of yellow scrapbook papers {my favorite is that yellow dot} STEP THREE: roll your blossom start at the outside edge and coil tightly STEP FOUR: release coil
Make Your Own Floral Suitcase! Plain vintage suitcases are pretty great but cover them in your favorite coordinating fabrics and your house just got cuter! Not only do they look cute in your home, they're great photo props. Decorate a nursery, stack them high in your living room, stand them up behind other items on a shelf, etc. It's an easy way to add color to your space without investing a lot of money. Keep an eye out for hard cases with stitched seams (for tucking fabric in) and think about using a variety of sizes for great impact. First, gather your supplies. , a paint brush, a pen, scissors, a rotary cutter (or a butter knife). Carefully spread a thin layer of Mod-Podge over one third of your case starting at one side. Your fabric should hang over your edge about 1/4" or more. When you're dealing with corners, apply a little extra Mod-Podge to your fabric and create two little pleats before you tuck the fabric in. This project turned out to be much easier than I thought with fewer complications than expected.
Perpetually Engaged: paper flower shower Whenever I see photos of other bloggers homes they always have fresh flowers in a pretty vintage vase on their dining room table. I'm sure a majority buy themselves a bouquet just for the shot, but I always find myself saying "I wish I did that more often". The other day I was thinking of buying myself a weekly bouquet of fresh flowers and then I remembered how cheap I am. After the group effort of baby shower onesies, I was thinking about projects for bridal showers. Thank you for all your kind words on my Sister's baby shower. I can't wait to meet my new niece!
{DIY} Des lampions en dentelle homemade | PrettySouthWeds Un peu dans la lignée des yarn chandeliers dont je vous avais parlé ici, voici une jolie idée déco pas trop compliquée à réaliser soi-même et pour un effet whouah! Si vous voulez mon avis, le rendu est superbe quand ces lanternes sont accrochées en extérieur. Et le rendu côté lumière est pas mal non plus Voici donc en images le tuto (qui nous vient d’ici) pour réaliser vous-mêmes vos lampions en dentelle. Matériel: Des ballonsDe la dentelle (des napperons chinés dans une brocante feront l’affaire). 1) Gonflez (ou faites gonfler! 2) Prenez vos napperons en dentelle et badigeonnez-les de colle pour papier peint. 3) Suspendez vos ballons à un fil et placez les napperons badigeonnés de colle tout autour. 4) Laissez sécher au moins toute une nuit (et à l’extérieur si possible) et éclatez le ballon une fois que la colle est bien sèche. 5) Faites un trou au sommet du lampion et faites-y passer le fil et l’ampoule. Quelques exemples de ce que cela peut donner:
::Crepe Paper Roses:: | February 13, 2009 at 2:42 am And now for something completely different… I’m drawn to almost any craft that involves a somewhat realistic looking flower as a final product. Hence my foray into French Beaded Flowers (fun…but takes FOREVER and expensive). Making crepe flowers is a classic craft that was popular in the 1950′s. There are two primary methods for making CPF: single petal and continuous petal. We’ll talk about the continuous petal method another day because with Valentine’s Day looming, it’s all about ROSES! Tutorial below. Crepe Paper Roses :: A down and dirty tutorial Materials Florist’s tape 18 gauge cloth-wrapped florist’s wire (check out your craft store’s silk flower department.) 2-ply or Double Sided Crepe paper* in petal and leaf colorsTEMPLATES Scissors Chopstick, pencil or some thin dowel (Optional for shaping) *2-ply crepe is really tough to find. Create Stamen and Stem Create Petals Pleat base of each petal. Create Leaves Note: The template has a smooth outline.
Rubber Stamps - Letter Background Rubber Stamp Item 497041 Price $14.95 Qty Details This beautiful rubber stamp features the charm of a handwritten letter. Related Items Shipping InformationYour order will take 1-2 business days to be filled, unless otherwise noted. Shipping Rates Shipping rates are based on your order subtotal. Shipping rates apply to orders within the continental United States. Shipping rates do not apply to bookboard or other heavy items. Ground Shipping Ground shipping delivers Monday through Friday, and can take up to 10 business days, depending on delivery location. Expedited Shipping 2 Day and Standard Overnight orders must be received by 2pm EST Monday through Friday to ship out the same day (assuming all items are in stock). 2 Day and Standard Overnight deliveries are made Monday through Friday only. Next Day and 2 Day shipments to remote areas may also take additional shipping time. Saturday delivery is available for an extra $12 in addition to the Standard Overnight or 2 Day charges. Questions?
33 Shades of Green: Tissue Paper Flower Tutorial A while back I posted a similar tutorial, but it's such an easy way to wrap a present, I thought it was worth posting another one. Not to mention, it's wedding shower season. Have you noticed? Top your present with a flower like this - the bride will love it! Tissue Paper Flower Supplies: - (5) sheets tissue paper, cut to 7" x 12" - 1 piece floral wire, 12" long 1. 2. 3. 4. 5. 6. 7. 8. Make a few flowers at once to keep on hand and the next time you need to wrap a present, you will be ready!
DIY : pompons en napperons de papier Certains d’entre vous l’auront peut être remarqué, j’ai une légère obsession pour les napperons depuis quelques temps. Il faut dire que j’ai un stock de 500 à écouler et que je trouve ça tellement joli et pas cher, ce qu’on peut faire avec, que je suis ravie chaque fois que je trouve une nouvelle utilisation. Donc aujourd’hui, voyons comment fabriquer des pompons en napperon. Pour cela il vous faut : - 9 napperons en papier de la taille du pompon que vous souhaitez - de la colle - un ruban Pliez un napperon en deux sans marquer le pli… …et encore en deux… …toujours sans marquer le pli, ce qui doit donner ceci. Collez-le sur un napperon (ici j’ai mis du scotch double face car je n’avais pas de colle) Répétez l’opération une deuxième fois… …puis une troisième puis une quatrième. Recommencez depuis le début pour obtenir un deuxième ensemble. Collez vos deux ensembles dos à dos en prenant entre les deux un ruban plié en deux qui vous servira à accrocher votre pompon. Joli, non ? Related posts:
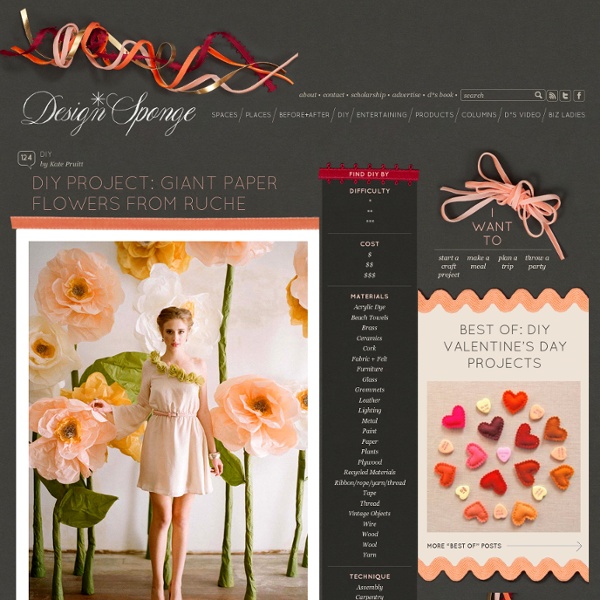
Giant Paper Rose Flower If you loved the beautiful DIY wedding this morning and Nata’s gorgeous paper flower bouquets, you are in luck as Nata is sharing how she crafted them with us! She was inspired by a template created by Morgan Levine on Martha Stewart (as was I in the flowers I created for this styled shoot). I just love that this basic idea has inspired different brides to create their own version of giant paper flowers – you might remember these equally awesome giant paper flowers from this wedding I shared last year. :) Thanks so much Nata for sharing how you created your giant pink paper rose + special thanks to Studio Castillero for the photos of the DIY + her wedding! Materials (to make one giant rose) Step 1: Cut the petals Cut 5-6 teardrop petals and 15-6 heart-shaped petals from the petal colored crepe paper. IMPORTANT: Crepe paper is directional so it matters which way you’re cutting the paper. Repeat until all of your petals are cut Step 2: Cut the leaves + calyx Step 3: Make the rose stem
How to Make Hanging Baskets at WomansDay.com - Hanging Basket Craft Project In small bedrooms, bathrooms and kitchens, sometimes, there's just not enough space for another piece of furniture. That's where this handy craft project comes in. You can create pockets of storage by hanging a series of wicker baskets from the ceiling by following the directions below. Skill Level: Beginner Materials Spool of heavy cord or twine; tape measure; scissors; set of three nesting wicker baskets; slim screwdriver (optional); heavy-duty screw-in cup hook. Directions 1.
How To Make Wedding Flowers With Paper Home › Make Your Own › Wedding Flowers Find the cheap wedding ideas you are looking for: How to make wedding flowers without flowers sounds a bit mad and although flowers are beautiful they can be expensive and if you or your partner are one of the many people who have allergies then this has to be the way to go. Plus it has not always been the case that brides carry flowers, traditionally it would have been herbs and garlic to ward off bad spirits. The most obvious alternative is silk flowers. These look just like the real thing if you buy a good quality and although this can be expensive you can always look to resell them after your wedding, or use them to decorate your home, or have them as gifts at your wedding. How To Make Wedding Flowers From Paper Photo by Andrew Malone Rather than buy the artificial flowers look at how to make wedding flowers yourself, you can buy craft kits to make flowers from tissue paper and paper – even Martha Stewart Weddings are doing it! top of page
Cupcake Wrappers Made from Doilies: Free Cupcake Wrapper Template Posted on May 24, 2010 by Christina I wish I could say that these cupcake wrappers made from paper doilies were my very own idea. I wish I could say that I was the genius behind this DIY brilliance. I discovered these cupcake wrappers over here. I was skeptical at first, thinking that it looked too easy. I asked Brittany over at Pink Peacock Paperie to whip me up a template for the cupcake wrappers. I was amazed at how easy they were to make and how pretty they looked. Here is the free cupcake wrapper template download. Tutorial for Cupcake Wrappers Made from Doilies You will need: paper doilies (Mine were just over 11 inches.) pencil scissors glue stick cupcake wrapper template Place doilie on a flat surface. Cut out cupcake wrappers from the template. Trace along the inside curve and at the ends. Cut out the cupcake wrapper. Using a glue stick, add glue to one of the edges of the wrapper.
Katty's Cosy Cove: Making a Giant Clam Sea Shell I was inspired to create this giant clam sea shell for my living room. These amazing Tridacna Gigas Giant Clam Shells can reach up to 4 feet across. The clam shell that I made measures about 28"X 15 1/2"; I was trying to make it the same size as a real, average sized clam shell. First I drew and cut this shape like you see in the photo out of cardboard for the sections of the clam shell. Then I cut small sections along the edge, and bent the cardboard to give it a curved shape. I glued together the cuts along the edges with hot glue. Then I glued them together. Then I covered all the sections with paper and white glue diluted with water. To give it a more ruffled edge to the shell I cut this shape from cardboard, and glued it on the joint sections of the shell. Here you can see the shell all covered. After the clam shell was completely dry, I covered it with All-Purpose Joint Compound using a sponge, and I let it dry. Then I applied joint compound to the interior of the shell as well.