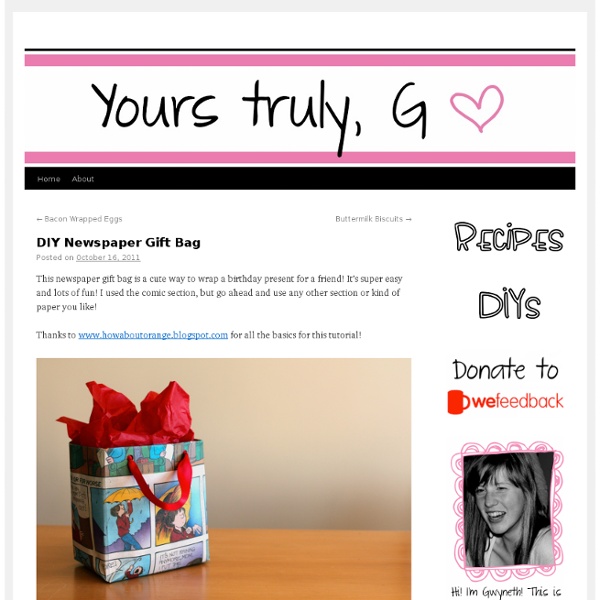
DIY Newspaper Gift Bag
Love Letters Box
[ Close Privacy Policy ] Privacy Policy / Your California Privacy Rights Revised and posted as of March 4, 2013 Prime Publishing, LLC ("Company," "we" or "us") reserves the right to revise this Privacy Policy at any time simply by posting such revision, so we encourage you to review it periodically. This Privacy Policy will tell you, among other things: Your California privacy rights. ACKNOWLEDGEMENT/YOUR AGREEMENT Company websites are not intended for use by individuals under the age of 18 or those who are not legal residents of the United States. HOW DO WE COLLECT INFORMATION AND WHAT INFORMATION DO WE COLLECT? Distribution Partners Website operators that license our ad serving technology pass information to us so that we may serve advertisements to you. Offer Forms We also collect information about you when you complete a survey or offer form on one of our websites or web pages. Website Registration Forms We collect information about you when you register on one of our websites.
{birthday week} a gift for YOU
it's our birthday week. and boy do we have some fun in store for you. so.. we're starting this party off with what most parties end with... a thanks-for-coming-gift. for all of our special guests. we have two fun party subway art prints to share. both are 16x20, but print perfectly as 8x10's too. But, that's not all. By shrinking the subway art, we can make some quick little birthday cards for our friends... trim them down and attach to a folded sheet of cardstock. thanks for coming.hope you'll party with us all week!
How to make 3D paper ball ornaments
I love 3D paper things. Love. And when I saw a little picture of what appeared to be paper balls in a CB2 catalog, I thought, "I am going to make those." So the other day while Alex was writing a paper about mysterious things like polymers and flexible films and tactoids, I made a paper ball. These are made from 12 slotted flower shapes that fit together to form a sphere. Download the PDF templates here:Large ball (10")– print/cut 12 sheetsMedium ball (5")– print/cut 2 sheetsSmall ball (3")– print/cut 1 sheet Download a Silhouette .studio file here:Small ball (3")– unzip the file; cut 1 sheet. If you want to hang your ornament, you might like to add the string before assembling the ball. Use the slits to join petals together. It might be helpful to think of the first piece as the "north pole," and then add a row of five flowers encircling it. Here's what it looks like upside-down: Attach the next row of five flower shapes, and finally, add the "south pole" piece to finish the globe.
Related:
Related:
