
DIY Sharpie Tie Die I love this Sharpie tie die DIY from The Art Girl Jackie blog! She did it with her adorable daughter and I think it’s a fun inspiration for this Spring and upcoming music festival season. Use this technique to spruce up your ratty t-shirts or maybe a pair of of cut off shorts. For another idea, check out how to spruce up your clothes with DIY leopard print here! What You Need: Pre-washed white or light colored t-shirtRubbing AlcoholLiquid dropper or medicine dropperSmall plastic cup(s)Rubber bandsVariety of colored Sharpies Do It! Choose a spot to start and put your cup in right side up and secure a rubber band around the cup rim holding the shirt tightly in place.Pick your colors and create a small design in the center of the stretched circle. Photos and DIY via The Art Girl Jackie
Callaloo Soup: Vintage Gift Wrapping Ideas Every year I try to come up with unique ways to wrap the Christmas gifts. Last year I went with monograms on kraft. This year I am sticking with kraft paper (is anyone surpised?) I really should call it more shabby chic than vintage since I am using modern items too. I so love the look of the white doilies against the kraft. And an actual doily adds a special touch. I think this one might be my favourite. I used a punch for the scalloped circles and stitched them together. One of the nice things is that the gift recipient can keep and reuse some of the packaging if she is at all crafty. I have quite the stash of these items so I will be adding some gift wrapping kits to my Etsy shop in the next update. 2012 UPDATE: I no longer have gift wrap kits available, but you can see a wide selection of vintage trims doilies and book pages here Don't you agree that a big part of gift giving is how the gift is presented?
{Valentines day} pixel-y popup card I‘ve been scratching my head trying to come up with a card for my hubby {AKA the non-romantic type}. I finally decided to make this pixely popup heart card! They are really minimal (which I love) and take about 20 minutes to make (that includes the card, insert and envelope). You can even make some pixely confetti to put inside the card (if you are a big kid like me!). Full instructions and printable templates below! (BTW I remember seeing something similar in a popup book years ago. How to 1. (If you have a cutting machine then see note at end of post!) Cut along the black lines and score the grey lines. 3. 5. 7. Edited to add: The lovely Kayla from saynotsweetanne has send me a .dfx file of the card which you can use if you have a cutting machine.
Dollar Store Crafts & Blog Archive & Reconstruct a T-shirt with a 99-cent Doily Home » $5 and Under , Headline , Wearable Crafts 9 July 2010 26,048 views One Comment by heather Another great project from Amy at Craft Chi shows us how to reconstruct a t-shirt into a racerback tank top using 99-cent doilies. Use a t-shirt that doesn't quite work for you and therefore sits in your drawer unworn, but that initially had high hopes for when you got it. Project estimate: Doilies ($1 each) = $3 or so Old t-shirt = free
Urban Comfort: Handmade I was out of town last week, one of my husband's birthday gifts to me being a ticket to New York. I had a great week, on lots of different levels, which I'll share as the week progresses. But for now, I'll get back to the blog post I had planned to publish last week. I like to celebrate the seasons as much as possible, turning the natural materials just outside my door into art supplies. Spring and summer are all about botanicals for me. Here's how I made it: Materials: Collected plant specimensFlower press or heavy booksNatural fiber fabric (I prefer cotton or linen)ScissorsRotary cutter and cutting matRulerInkodye (I mixed red and blue for this project)Foam paintbrushSmall dish for InkodyePaper towelsSturdy surface (I like to use a piece of scrap plywood)Laundry soap or InkowashIron and ironing boardFusible hemming tape Step 1: Collect and press botanicals For the most part, I find that it's easier to handle plants on a dry day, when the leaf edges are crisper. Done! Color Mixing:
Paint Chip Gift Tags I'm always looking for clever crafts, that can be done easily and inexpensively. These paint chip gift tags fit the bill perfectly. So many companies are making bigger paint chips now that you can use them for quite a bit without people even realizing it is a paint chip sample! The best part: the cost! I happened to have a bunch of paint chips laying around from several painting projects, but if you don't just go to a local hardware or paint supply store and select the colors you wish to use, they are free* (I recommend asking if you may take some if you do not plan on buying any paint). If you fall in love with a color, there are often small sample size paints you can buy for a larger project as well (I recently found a recipe online to mix your own chalkboard paint-- once I finish my project I'll be sharing that with you as well!). So, back to the gift tags. Another great thing about this project, is that there is little to no waste.
Rookie & RIT Dye Tutorial It happens to me every year. The second spring hits, I’m standing in front of my closet going, I am so sick of all my clothes, if I see that shirt again I’ll throw up, but I don’t have any money for new stuff, I’M SO TIRED OF EVERYTHING I OWN. You know that feeling? Let’s kill it with instant-wardrobe-transformer (aka RIT dye). to these! And it’s not even hard. Now, there are other kinds of clothing dye out there, but I chose RIT because it’s got simple instructions on the back of the package, it costs about $3 per box, and you can find it almost everywhere in the U.S. I’m gonna show you how to do a basic stovetop dye job. But! OK! You will need: Something to dye: choose a white, off-white, or beige item of clothing made of natural fiber (cotton, wool, silk, linen), a blend of natural fibers (like a cotton/linen blend), nylon, or rayon. So now that we have our materials, let’s dye this elegant-yet-boring purse I found at a garage sale for a dollar! Step One: Fill your pot ¾ full with water.
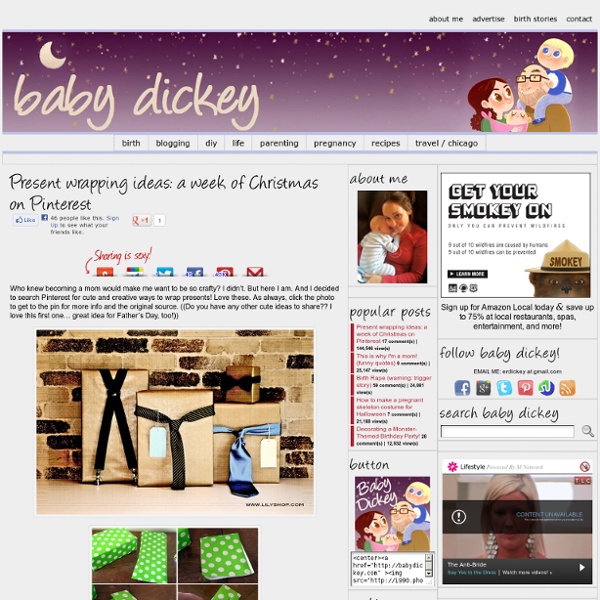
Make Typographic Gift Wrap This year, I vowed to only make or buy handmade holiday gifts for my friends and family, and I've kept to it so far. But wrapping these gifts in commercial paper didn't seem to make much sense, so I wanted to create some handmade gift wrap to match. I happen to think a gift wrapped in newsprint is actually quite attractive, and love the look of text on a package, but wanted to put in a little more effort. So I came up with a cool option that's clean, masculine, and maintains the typographic look of the newsprint. Plus, it eliminates the need for any "to:/from" tags, as the recipient's name is right there in tasteful type. Once I figured it out, it was actually quite easy and quick - less than ten minutes per gift. Here's how to do it: Materials and Tools 1. 2. 3. 4a. 4b. 5. 6. Happy Holidays!
How to make a Tulle Pom Pom Ball - Influential Mom Blogger, Parenting, Community - StumbleUpon 148.2K Amazing Shares Facebook 62 Pin It Share 1.2K 1K+ Twitter 9 Google+ 7 StumbleUpon 146.9K Email -- Email to a friend 148.2K Amazing Shares × How to make a tulle pom pom ball for wands…otherwise known as, “how to make a cat toy” in my house. I made a tulle wand the other day and I was going to give it to my friend Kims daughter, but she is pretty young and if she were to pull the pins out, it could mean a dangerous situation. Except instead of a tulle wand, I’m going to turn my example into a cat toy for Gwen. It could also be used for hair puff pony-o’s, cheer-leading pom poms, decorative shirt..um…decorations. Here is your How To Make a Tulle Ball {So you can still give it to the baby girl/kitten in your life} tutorial: 1) First you have to decide the size of your tulle ball. 2) After tracing, I used a straight razor and cut the circles, including a smaller circle in the middle so it has an appearance of a doughnut. Ribbon cream. (this is a real professional tut isn’t it) Happy Kitten:
Gift Wrapping Ideas Last night I was wrapping up my gift for the Cold Hands, Warm Hearts gift swap by Much Love, Illy and SandyALaMode, and I realized something. I may be "crafty" but I am sort of awful at wrapping presents. I rip the paper when I'm cutting it. I end up with way too much paper, which results in messy folds. Ok, Martha Stewart is getting a little too advanced for me here. :] This is something I would do. Just GORGEOUS! Don't you want to go wrap up some packages all pretty now? Whatimade.com part 4 Mummy: “Hey! Watch where you put those!” Frankenstein: “Hey, that’s my best jacket!” Here’s two seasonally spooky Halloween cutouts to end my short break from blogging. Oh, and while you are in the kitchen, how about decorating the fruit bowl with some yucky bugs made from recycled materials? How to make your own spooky Halloween cutouts for your kitchen knife block These spooky Halloween cutouts are very easy to make, but if you’d like to use my artwork you can download it below. Download printables and instructions› Includes: 1) Colour versions of the Mummy and Frankenstein artwork488 downloads so far, thanks everyone! [display_adsense ad_type="300x250"] The ‘craft’ blogging community is a very generous one. So, with that in mind I’d like to give Mini-eco a big shout out.
Photo With Me - Photos with celebrities - make photos with celebrities 2010 Planner Kit: Instructions - Red Velvet Art Blog Hi Everyone! These are the instructions for the 2010 Planner Kit. I am going to share with your the specific steps I took to assemble my planner. Please remember, though, that these planners are meant to be customized! Feel free to take out things your wouldn't use and add ideas to make your daily life more organized! step one: unpack your kit and line the back of the page dividers with a contact paper or scrapbooking paper (it's much easier if you do this before you cut them out!). note: i picked up this wood grain laminate from a local hardware store. Next, choose which font (typed or handwritten) you want to use for your monthly tabs, shuffle your cards however you want and add the tabs. Next up: adhere your monthly calendars to something sturdy (I recycled boxes from my house for this step!). Then, just cut them out. :) The Next step was the most fun for me. Make extra pages to fit your fancies. the felt on this page is about 4x4 inches. SO adorable!! next, you need to punch holes. yay!