
WordPress Themes - Best Themes 2014 Guy Kawasaki Explains How Entrepreneurs Are Getting Social Media All Wrong How to Create a Colorful Business Layout - Tutorial - Ultimate Designer Toolkit How to Create a Colorful Business Layout – Tutorial Already a member? This step by step tutorial will teach you how to create a colorful business layout. If you’re a member, you can download the PSD Layout for this tutorial at the bottom of the page. Before I begin this tutorial, I want to tell you about our 60,000+ premium design items package, which you will be able to download instantly and use in your own or client designs. Now to begin this tutorial, we will need to create a new document. I will select Rectangle Tool, and i will make a big gray shape. Then for this shape i will add the following layer styles. In the middle of the previous shape i will add another one but this time i will use Rounded Rectangle Tool. Also for this image i will add some layer styles. Under the big image with this nice colorful layout i will create 4 different shapes. Then for this layer i will change the blending mode to overlay, and in the same time i will change the opacity to 50% Download the PSD below.
La estantería mágica Hace dos días estaba intentando estudiar y cuan sería mi aburrimiento que fui a terminar de arreglar la estantería de mi cuarto, donde estaba toda mi infancia. Mi madre harta de que pasara año tras año sin arreglar aquella estantería y el armario, nos obligó a Diego y a mí a que lo hiciésemos estas Navidades, intimidándonos con que los reyes no nos traerían nada si no lo hacíamos. Había encontrado en aquella estantería de todo (yo me dediqué más a ella y mi hermano al armario), cartas, fotos, mis dos últimos dientes de leche en un bote con alcohol, pins, muñecos, carpetas, libros, cosas que por mi problemilla de Diógenes no deberían de estar allí, y cajas llenas de más cosas. ¡Muchos de estas movidas había olvidado que las tenía! Echándole de nuevo un vistazo a una de las cajas apunto de explotar, para ver si podía “vaciar” algo más, vi en el fondo de esta, entre un pequeño esqueleto de plástico y una bici-mechero, algo que brillaba, era una llave.
Photoshop Quick-Tipp: Metalloberfläche - Designtrax Dieses Photoshop-Tutorial zeigt Ihnen in wenigen Schritten, wie Sie mit dem Einsatz von Photoshop-Filtern eine gebürstete Metalloberfläche simulieren. 1. Ebenen anlegen Legen Sie zwei neue Ebenen an und füllen Sie diese über Bearbeiten > Fläche füllen mit 50% Grau. 2. Der oberen Ebene fügen Sie über Filter > Rauschfilter > Rauschen hinzufügen ein Rauschmuster zu. 3. Als nächstes wird das Rauschmuster über Filter > Weichzeichnungsfilter > Bewegungsunschärfe mit 75px Abstand weichgezeichnet. 4. An den Seiten kommt es zu unerwünschten Abstufungen (siehe Schritt 3). 5. Zum Abschluss erstellen Sie eine Einstellungsebene des Typs Verlauf mit einer Deckkraft von 75%. 6.
la guía mochilín Photoshop-Tutorial: Bokeh-Effekt - Designtrax In diesem Photoshop-Tutorial erfahren Sie wie Sie ein Hintergrundbild mit Bokeh-Effekt erstellen. 1. Kreis anlegen Erstellen Sie mit dem Auswahl-Werkzeug auf einer neuen Ebene einen Kreis mit ca. 400px Durchmesser und füllen Sie diesen mit Schwarz (SHIFT (Umschalt) + F5). 2. Weisen Sie dem Kreis über die Ebeneneffekte (oranger Kreis) eine schwarze 5-8px Kontur zu und stellen Sie die Flächendeckkraft auf 50%. 3. Blenden Sie die Hintergrundebene aus und wählen Sie den Kreis aus. 4. Erstellen Sie nun eine Einstellungsebene (oranger Kreis) des Typs Volltonfarbe mit einem sehr dunklen Grau (#2a2a2a). 5. In diesem Beispiel habe ich einen linearen Verlauf von Blau nach Grün bei 45° angelegt (siehe Screenshots). 6. Rufen Sie nun das Pinselfenster auf (F5), wählen dann den zuvor gespeicherten Pinsel und geben die Werte aus den Screenshots ein. 7. Um dem Bild Tiefe zu verleihen spielen wir mit Größe und Unschärfe der einzelnen Kreise. 8. 9. 10.
7 Proven Tactics for Effective Blog Titles Question: What is the most important element of a blog post? Here are your multiple choice answers. Choose wisely. a) Clear, easy to follow writing. b) An interesting topic. c) The absence of spelling and grammatical errors. d) An effective title. e) All of the above. Ok, 'all of the above' is obviously a no-brainer. Before readers even get to your website blog, the title needs to get attention through search engines, social media sharing websites like twitter, and email newsletters. When readers arrive at your website they'll usually see a list of blog titles and it's at that point they will scan-read and make a snap decision as to whether clicking and reading further is worth their time. So to help you grow your blog readership we present 7 proven tactics for effective blog titles. 1. People have limited time. Our 15 Favorite Blogging Tips 5 Business Logo Mistakes to Avoid 14 SEO boosting tips from our SEO checklist 2. We all love to be told how to do something. 3. 4. 5. 6. 7.
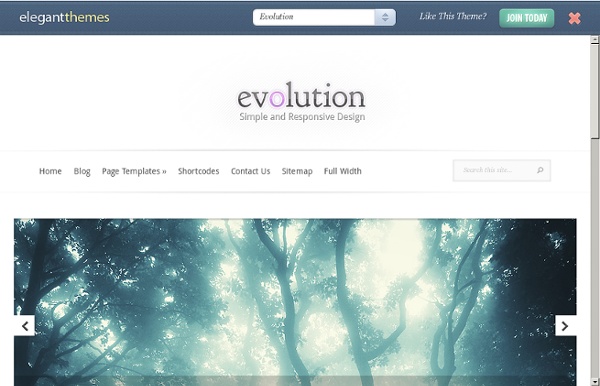
20 Best Photoshop Web Layouts Tutorials Photoshop Web Design Tutorials are one of the greatest resources to find out web designing in fast and easy way. As a good start-up, it is always good to learn from others having understanding in the web designing field. For this principle, you can refer the following tutorials to learn new techniques and tactics of using Photoshop. Here are some classic interior photos for your elegant photography web layout. How to Create an Effective Coming Soon Page This tutorial shows you how to stay away from making a tedious, boring design while still keep the concept of your coming soon page simple, and it shares some of the theories to bear in mind. How to Create an Effective Coming Soon Page How To Create A Colorful Business Web Layout Advertisement This Photoshop tutorial will demonstrate how to incorporate icons in your web designs. How To Create A Colorful Business Web Layout Photo Gallery Website Layout In Photoshop Learn to make a dark-themed photo gallery via this excellent Photoshop tutorial.
WordPress Video-Tutorial Teil1: WordPress lokal installieren Da man meiner Ansicht nach mit am besten lernt, wenn man jemandem über die Schulter schauen kann, möchte ich mit diesem WordPress-Screencast eine kleine Serie starten, in der ich Schritt für Schritt die Erstellung eines eigenen, individuellen WordPress-Themes erkläre. Im heutigen, ersten Teil zeige ich, wie du dir WordPress auf einen lokalen Server (ich nutze XAMPP) installierst und was dabei zu beachten ist. Viel Spaß beim Tutorial :-) Du kannst dir das Video-Tutorial übrigens auch direkt auf der Vimeo-Webseite anschauen. Hier findest du auch noch weitere Videos von uns. Link-Tipps aus dem Video: Ich hoffe mein kleines Video-Tutorial kann dir bei der Arbeit mit WordPress und der Erstellung eigener Themes weiterhelfen. Weitere Teile des WordPress Video-Tutorials
HTML lernen und die eigene Website erstellen - HTML Kurs / Seminar HTML- und CSS-Tutorials - Erstellen Sie Ihre eigene Webseite - HTML.net