The Anthro bookcase
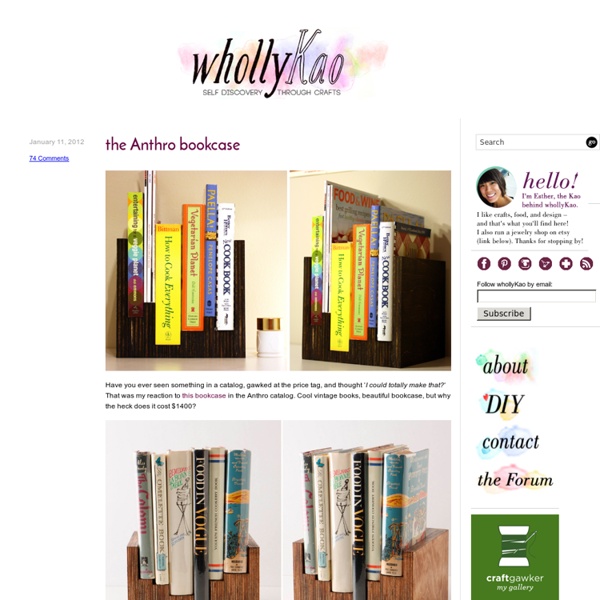
Decorative Pillow Pattern DANIELLA DAHLIA Felt par SewYouCanToo
Honestly WTF
The Technique Zone
you will need some beeswax and a means of heating it - if you don't have a melt pot an oil burner with a nightlight will work perfectly ok. I keep a pan for my melt pot especially for beeswax. I also use a brush kept again just for beeswax A photo and some cardstock Paint the beeswax on - gradually bulding up the layers until you can hardly see the photo I scraped the wax away from the faces then soften the wax with my heat gun and stamped all around with swirl image. Gorgeous smell in my craft room - I'll probably use this piece on the front of one of my books
I feel melty. | Light&Spoon
EDIT 11/5/2012: We are no longer selling custom crayon pieces in our Etsy shop. We are now focusing on a new jewelry project, so please check that out and we hope you enjoy the tutorial below! Edit: We are now selling custom crayon pieces in our Etsy shop! If you have questions about commissioning your own artwork, please see the shop or email us at lightandspoon@gmail.com. Here’s our contribution to the melted crayon craze on Pinterest. Anyway! He filled in in with marker, and then we taped some saran wrap around a piece of cardstock to make a run-off barrier for the top of the umbrella. We pulled out all the blues and greys from three boxes we got on sale for $2.50 each at A.C. Then it was just a matter of putting the crayons through the gun–the pretty-but-stupid impulse-buy glue gun that barely works, so I didn’t ruin my good one. The hardest part was removing the guard and fixing the wax around it. Yay! Like this: Like Loading...
How to Make Leaf Skeletons
I wanted to share with you a project from one of my readers who shares with us how to make leaf skeletons. I LOVE this! I have several leafs in various forms displayed in my home and knew I needed to make some of her leaf skeletons to add to my decor. I love how a pattern of leaves can enhance the beauty in your home. So I asked Heather if she would mind sharing her project with you. You can find more great projects from Heather at her blog The Other White House. I have spent hours and tried various ways of making these. You need washing soda, not baking soda! Gather your leaves. Washing soda is a strong base so you may want to wear gloves when handling the leaves. You will add 3/4 cup of washing soda and 4 cups of water to your pot of leaves. Keep going, you will need to add more water so your pan doesn’t dry out. When 1.75 hours are up fill a glass baking dish with cool water. I carefully removed them and rinsed with water and added clean water to the pan. 37.1Kstumbleupon
How To Make A Stylish Photo Frame For Several Photos
Here is a simple yet stylish photo frame that can accomodate quite many photos at once. The idea is very simple. Fasten twines on the empty frame and hang photos using clothes pins on them. You can use a frame you bought or a frame you made by yourself.
Related:
Related:
