
Rosette Bracelet Tutorial! (for personal use only – all patterns/tutorials are copyright protected) Wow! Can you believe that I finally posted it? As I said before, May really kicked my tushie! Happy to report that I am officially back into the crafting-swing-of-things! Tutorial That’s all folks… now go rock that bracelet! Multi-Chain & Ribbon Necklace Due to the resounding success of her last She’s Crafty, my friend Pandora from Accessory Source is back with another lovely necklace DIY tutorial that would make a fantastic christmas present for a friend or relative! She says: When it comes to jewelry, I favor big and bold pieces. And while I tend to wear mostly gold, lately I’ve become obsessed with mixing metals like silver and gunmetal (and throwing in some bling for good measure!). You will need the following tools: ScissorsRulerPliers (optional)Ribbon-1 yardTwo jump rings (the size of a nickel). Supplies I chose a mix of metals in various colors and sizes and a few strands with rhinestones. All of my materials were purchased at Toho Shoji. Cut your first strand of chain to 12 inches Step 1: Cut your first strand 12 inches long. Cut your remaining strands each a half inch shorter than the next Step 2: Cut the remaining strands 1/2 inch shorter than the strand before. Pry open your jump ring and attach your longest strand Similar Posts:
Weird, Wonderful and Wacky How-To: Rag Bags - POP Fizz Academy Difficulty: Moderately Challenging Instructions Things You'll Need: Two yards or more of non-stretch fabric (e.g. cotton from old t-shirts) Needle Strong thread Scissors Safety pin Step 1 Cut or rip the fabric into strips measuring 1 to 2 inches wide. P.S.- I made this... DIY Gallery Video Behind the scenes Book About Press Apr 01 Accessories Fashion Jewelry Lifestyle about 5 hours ago "I've always wanted to read a magazine with my fingers"- my Mom as she looks at @ NETAPORTER on my iPad about 5 hours ago Ohhhh @ AJSlavin is queen of leotards RT @ OscarPRGirl : i need more leotards about 6 hours ago Cats & Dogs cc: @ jfisherjewelry
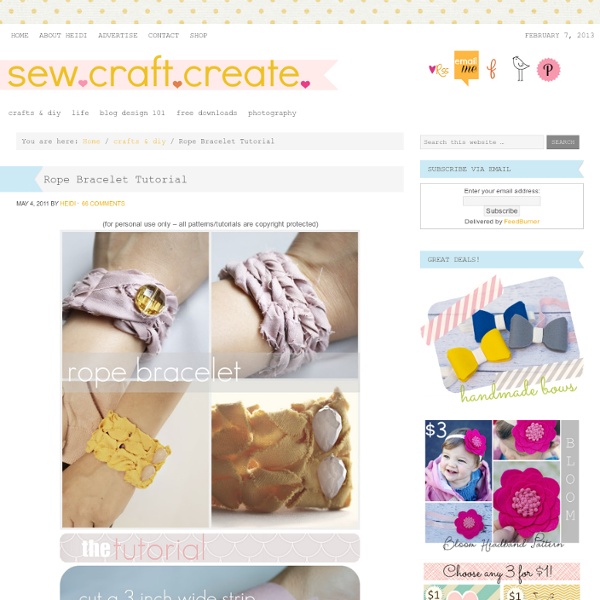
Zipper Rosette Bracelet Hi! I'm Heidi from Sew Craft Create. I have two sweet, little girlies and a serious addiction to all things crafty! I am so excited to be here today and today I am teaching you how to make zipper rosettes! What you need: Zippers {any color, any size} needle & thread *hard interfacing *hot glue gun Step One: Cut entire length of zipper, leaving just over a 1/4 inch on either side. Cut ends off zipper. Separate zipper. Fold 1/4 inch of the zipper onto itself. Wrap & stitch (same way) until you have 3 rows. Step Six: Insert needle through two rows (the new row and the row directly beneath it). Insert it from back of the rosette. Then insert needle from front to back. Keep wrapping and repeat step six every 1/8 inch until done. Step Seven: Once zipper is desired size, cut off remainder. Attaching to hard surface: Cut extra-heavyweight interfacing to fit rosettes. Attaching to soft surface (i.e., fabric): Skip step eight and sew directly onto fabric. All done! Attach to anything!
t-shirt latch hook rug tutorial I really love flokati rugs. I have two that are safely tucked away in my parents basement awaiting our reunion. When I learned that I would be having a child and building a nursery for him, I wanted a flokati. A gray one. Being a flokati snob though, I knew that I couldn’t afford the price tag ( ), and I knew that I would be too precious about the rug ( ). I’m going to show you how it’s done, but let me warn you- while this rug was super inexpensive to make with the resource of money- it was very costly in the resource of time. And now, this is how to make your very own latch hook rug. Supplies: Latch hook canvas latch hook tool old t-shirts scissors or rotary cutting tool/mat seam binding masking tape dye (optional) All of these things should be available at your local craft store, with the exception of the old t-shirts. On to the making! Once you have all of the strips cut, it’s time to dye them if you’d like. Now you’re ready to hook! good luck and happy hooking! xo elle
DIY Braided Bead Bracelet It’s been awhile since our last bracelet DIY. I don’t know about you, but our wrists have been begging for another colorful addition for months now. So after playing with some materials that were already on hand, we’ve created a tutorial for a braided bead bracelet, which is a not so distant cousin of the hex nut and wrap bracelet. Because honestly, you can never have too many . . . You’ll need: Cut the waxed linen cord into a 26″ and 19″ piece. Tie a knot about half an inch down from the loops. Start braiding the strands. Push the bead against the base of the braid, and cross the left strand over the middle. Keep a finger at the base of the braid, holding the beads in their place and keeping the braid tight. Finish the bracelet with another inch of braided cord, measuring it against the wrist. Thread on a two hole button – two strands through one hole and one strand through another. Trim the end. Your bracelet is finished! (all images by HonestlyWTF)
Chain and String Bracelet Já faz um tempinho que detectamos uma onda de pulseiras de corrente decoradas com trabalhos em crochê e linhas nas lojas mais bacanas de acessórios. O trabalho é supervalorizado porque muitas vezes o material da pulseira é de ouro, e o trabalho artesanal também tem o seu valor. Quem virou febre da modinha lá fora e vende suas peças no Net-a-Porter é o designer Aurélie Bidermann. As joias são feitas com materiais nobres, e as correntes são todas de ouro 18k. Vale a pena o investimento, mas se você não pode arcar com o precinho, encontramos um site que ensina a fazer o passo a passo da pulseira sensação. Pulseirinha da amizade fina! Fotos: Reprodução.
Sweetheart Bow T-shirt Tutorial I’ve been slightly obsessed with bows recently in case you haven’t noticed. I’m really digging them. I’m seeing bows pop up in the most fashionable of places like Anthropologie, J.Crew, Ann Taylor Loft and Urban Outfitters. As soon as I saw this bow pillow tutorial, I knew I needed to have a shirt with a giant bow on it. I bought two DownEast Basics v-neck shirts and transformed them into what you see above. The project cost a total of $5 and 45 minutes. To make this t-shirt, you’ll need two shirts; one of which needs to be v-neck. Grab the extra tee and set the good tee aside for later. Fold the extra tee in half lengthwise and cut just below the armpit and about 3 inches above the hem. Grab the middle section and align side seams together. Unfold the extra two inches and cut a 4×6 inch rectangle. Fold both bow pieces in half lenghtwise with right sides in. Turn fabric right side out and center the seams along the middle of the back side so they won’t show when you assemble your bow.