background preloader

Beginner jewelry

Beginner jewelry
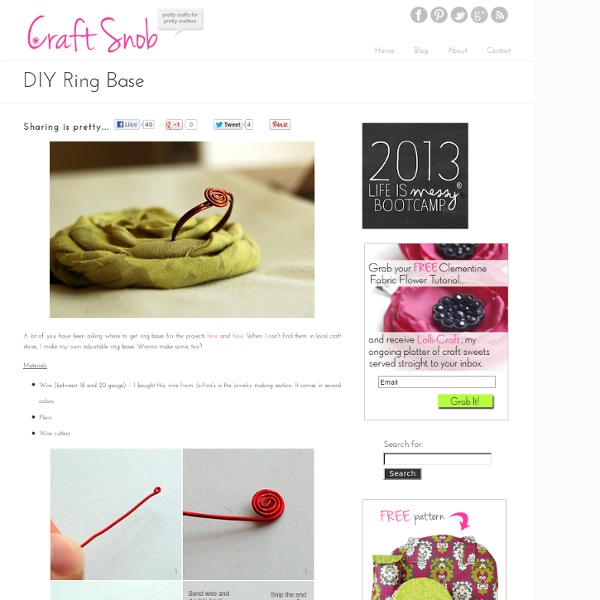
A lot of you have been asking where to get ring bases for the projects here and here. When I can't find them in local craft stores, I make my own adjustable ring bases. Wanna make some, too? Materials: Wire (between 18 and 20 gauge) – I bought this wire from JoAnn's in the jewelry making section. Cut a piece of wire 6 inches long. Once the base is made, use E3000 glue or a brad to attach a fabric flower, button, or other fanciful item to the top of the spiral. The Real Deal: It costs less than $0.25 to make one ring base.

Project: Gory Brain Cap By Jeromina Juan If you’ve been brainstorming Halloween DIY costume ideas, no need to bang your head on a brick wall. It’s time to put on your thinking cap. Literally! Materials Fitted cap, without adjusterCraft knife or seam ripper Newspaper Acrylic paint, red and blackPaintbrush Bowl, approximately same size as capTall jar Plastic bag 2 tubes of latex or acrylic caulking (not silicone)*, ivory or bone colorCaulking gun Water Gloves *NOTE: Silicone caulking is not paintable. Directions Step 1: Remove the cap’s brim by carefully ripping the seams with a craft knife or seam ripper. Step 2: Place the cap on newspaper. Step 3: On newspaper, create a work stand for your cap by placing a bowl upside down over a tall jar. Step 4: With a craft knife, cut the tip of the caulking tube to have an opening approximately 1/2″ in diameter. Step 5: Caulk convolutions on one half of the cap to create one hemisphere of the brain. Step 7: Let the caulking cure for 24 hours. Related

Colored Pencil Jewelry Note from Design Mom: I asked Kate of Mini Eco to create a Back to School themed project for us to try. I think making beads out of colored pencils is brilliant! Wouldn’t these beads be fun for your elementary school-ers to string for a class project? It would also be a fun activity at an art-themed birthday party. Lately I have become a little addicted to making (and wearing) colored pencil jewelry. I think the results look great and you, or your child, will definitely stand out from the crowd wearing them! You will need Colored PencilsJunior hacksawFine sandpaperDrill and small drill bitThread (for the necklace)Superglue (for the brooch and earrings)Brooch back (for the brooch) How to: Basic Bead Necklace 1. 2 & 3. 4. Once you have cut a number of beads simply string them onto a length of thread…job done! Tip: These little beads are also make lovely bracelets. How to: Pointy Necklace 1. 2. 3. How to: Brooch 1. 2. 3. 4. 5.

DIY Capiz Shell Chandeliers -Cant believe theyre faux! To make a capiz shell chandelier is time consuming, but so worth the effort! Just take a look at these examples and find out how to make a show stopping faux capiz shell chandelier for as little as $9! This is the very popular West Elm Capiz Shell Chandelier installed in the bedroom at Vintage Mint. And an even dreamier version! A DIY Faux Capiz Shell Chandelier posted on Design Sponge. You can find the full tutorial on Susan’s blog here. Then, her husband installed hooks to the ceiling and hung the capiz chandelier. Here it is with the light on. And this is Amy's faux capiz shell chandelier, one of Susan's friends. And another masterpiece here! Tiny Pumpkin Pie My family’s Thanksgiving meal always features a magnificently high homemade pie-to-person ratio. I love the warm wafting scent of spices, pumpkin, and expertly rolled-out crusts emanating from a hot oven, and that anticipation of dessert after any already delicious dinner spent with friends and family feasting. Is your belly rumbling already too? For this week’s How-Tuesday post, Jessica Partain from Inedible Jewelry, a shop dedicated to mouth-wateringly realistic faux food jewelry, and author of The Polymer Clay Cookbook, has shared with us a tutorial on making miniature polymer clay pumpkin pie charms that actually smell like pumpkin pie. Jessica will also be joining us on Monday, November 14 at the Etsy Labs in Brooklyn (RSVP), and on the Online Labs, to lead a Craft Night on the same topic. Thanksgiving just wouldn’t be complete without pumpkin pie! Purchase The Polymer Clay Cookbook right here on Etsy. Materials: For the filling: 5/8″ (15.9 mm) ball orange clay Directions: 1. 2. 3. 4.

DIY Paper Beads One time I was seriously considering buying a pair of sandals because they were offering a free bonus paper bead necklace. I really liked the sandals, but I loved the paper bead necklace. Fast forward to my present phase of jewelry-making. I’ve been haunting Anthropologie’s jewelry page to get ideas for jewelry to make. I came across these dazzling beauties, and did a toe touch from excitement (wouldn’t that be awesome?!) I set my heart on them (stay tuned for a knock-off post/tutorial on those!) What you’ll need: -magazines, colored paper, tissue paper, toilet paper (ok, maybe not) but really. -Elmer’s glue, Modge podge, and some kind of varnish. -scissors, or a rotary blade, quilting ruler and cutting mat (way faster) -round toothpicks -something to stick your toothpicks in like a styrofoam tray or packing materials, or cardboard box. -a paintbrush Before you start cutting, I’ll say a word about paper choice. Cut your strips: Measure 3/8″ from the bottom edge and mark. Now varnish.

Sugar Bee Crafts: sewing, recipes, crafts, photo tips, and more!: Birthday Board Here ya go - - a Tutorial on how to make a Birthday Board! I guess it's about time I do a craft post for ya - I've enjoyed the break but am ready to show you some things that I've been up to - and I'm sure you're ready to read actual craft posts, since this is a craft blog and all :) I made this Birthday Board for Trevor's mom - Trevor is one of 9 kids, so there's a lot of them! Instead of doing the whole family's birthdays, I just did the grandkids and great-grandkids. The way it works is each disk represents a child. I originally pinned this idea from a link on etsy, and HERE's the Link!! You can search google or pinterest for "birthday board" and come up with lots of different ideas and variations. I liked the one with the wooden circle disks, and I found them in a bulk pack at Michaels - here's the package bag in case you go to look for them. There are tons of ideas on how to hook everything together. So go ahead and grab a discarded board and whip yourself up a birthday board.

Made with love by Agus Y.: Cute Painted Pasta - Pasta decorada I had received so many nice comments about the last two cards (first card, second) using pasta, that I decided to show a bit of what I have been making....I have had a lot of fun painting this pasta bows! I think is one of the things that really push your creativity! (: He recibido muchos lindos comentarios sobre las útlimas dos tarjetas (primera tarjeta, segunda) en las cuales he usado pasta, es por esto que he decido mostrarle un poco lo que he estado haciendo!! Me he estado divirtiendo pintando estos moñitos! I dont know if it is notable in the photo but the one in the middle have glitter is the one that I used in my lastest card. Hope you liked and get some inspiration! I would love to see your! Me encantaría ver los suyos!

Modern DIY Bracelets 28 Jun As a girl, I spent a lot of summer days lounging around making friendship bracelets of one form or another. It started simply with trios of embroidery thread and eventually evolved into more intricate creations involving beads and other such adornments. So today I’ve rounded up a dozen wonderful bracelet crafts. Dip dyed nautical rope bracelets DIY at …love Maegan. Lester lace bracelets at I SPY DIY. Summer bracelets DIY at Between the Lines. Classic friendship bracelet DIY at Design Mom. 15 minute Mod Podge wooden bracelet at maya*made. Summer kid craft: friendship bracelets at ohdeedoh. DIY braided hex nut bracelet, DIY rope bracelet, and DIY friendship bracelet from Honestly…WTF. Modern friendship bracelets DIY at A Beautiful Mess. Similar Stuff:Arts and Crafts for Big Kids (featuring another of my favorite bracelet DIYs)Retro Toy Love: Suitcase DollhouseEaster Style: Sew vs. P.S. P.S.

Yagen Yagen Yagen (薬研?) is a crushing tool used in phytotherapy in Japan. It uses a wheel which is rolled back and forth to crush ingredients. It differs from Mortar and pestle used in Japanese cuisine, which are called suribachi (擂鉢?) Weltschnellster Stempel {DIY} ::: worlds fastest stamp {DIY} « neuerStoff Liebt ihr Stempel auch so wie ich? Es gibt ganz wunderschöne fertige Stempel z.B. von margamarina. Man kann aber auch Stempel ganz super selber machen! Das ist das schnellste DIY-Projekt, das ich jemals gemacht habe. Do you love stamps like I do? You can buy wonderful stamps like hers: margamarina. But you can even make your own stamps quite easily! This is the fastest DIY-project I ever made. Ihr braucht: KorkenStreudekoKleber You need: corkdeco-confettyglue Ich konnte es kaum fassen, als mir kürzlich diese kleinen Vögelchen und Herzchen aus Holz begegnet sind. Gibt es Streudeko nicht sonst immer nur in hässlich? I found these wonderful little birds and hearts made of wood. Aren’t they beautiful? Also los geht’s: Here we go: Ein bisschen Kleber auf ein Herz der Streudeko geben… Put some glue on one of the hearts… …Herz auf den Korken drücken. Und Zeit gemessen? Ich würde sagen höchstens 3 Sekunden. Also das ist mein absoluter Rekord auf dem DIY-Sektor. …stick the heart in the middle of the cork. - Anja -

DIY Macrame Bracelet Growing up by the beach in Southern California, the ability to knot a macrame bracelet was practically a right of passage. Although those days are long behind us, we’ve never forgotten the ever-so-simple square knot technique. This time, however, we’re replacing hemp and wooden beads for more updated elements like colorful nylon cord and glossy metal charms. Happy knotting! You’ll need: Start by cutting the knotting cord into two 30 inch, two 20 inch and one 10 inch lengths. Center the 30 inch cord under the two middle strands. Pull tightly and slide the knot up to the top. Finish the 2nd half of the square knot by folding the left cord over the middle strands and under the right cord. Pull tightly and repeat the steps – left, right, left, right . . . To finish the knots, thread one of the cords onto a needle and sew up the center of 3-4 knots along the backside. Repeat the same step on the other cord. After sewing up both knotting cords, trim away any excess.

Bra-Making Sources by Mail You'll need a few special findings to make a bra. From left to right in the photo below: hook closures, strap elastic, plush elastic, rings and also slides so the straps can adjust, underwires, and channeling. Photo: Scott Phillips by Cynthia Elamfrom Threads #71, p. 40 For suppliers of bra patterns, kits, fabric, elastic, and more, check the sources listed below. Bra-makers Supply480 Hood Road, Unit 5Markham, ON L3R 9Z3, Canadawww.bramakers.comPatterns, kits, fabric, trim, lace, findings

Related: