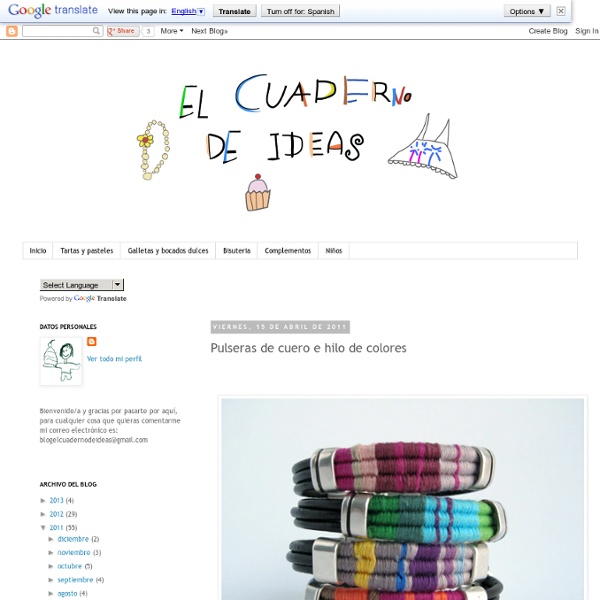
Pulseras de cuero e hilo de colores
Es uno de mis modelos de pulsera favorita porque te permite jugar con el color. Es sencilla de realizar, combina cuero e hilos de colores, yo he usado hilo de bordar cuyos colores son luminosos y el colorido es muy variado. Inspirándonos en los cartoncillos de los hilos, los peques han hecho las etiquetas. Es para un regalo especial que vamos a hacer hoy, la destinataria tendrá que escoger una bolsita con la pista de la etiqueta. Están hechas con tres cordones de cuero de 2 mm entre los que se entrelaza hilo de bordar de colores. Son muy sencillas de realizar, el material que necesitas es: 3 tiras de cuero 16,5 cm de largo (según la medida de tu muñeca) y 2 mm grosor 2 piezas metálicas centralesUn cierre de dos piezas para ambos ladosHe sujetado uno de los extremos con celo y el otro lo he dejado abierto. Inserta las piezas centrales en los extremos de los hilos y fija con un poco de pegamento.
DIY Utility Cord Bangle « greeneyed.com
ANNOUNCEMENT: A select number of these bracelets are available for sale here. I know, I know. ENOUGH ALREADY WITH THE UTILITY CORD AND BRACELETS! I couldn’t resist! Materials: Utility cord Crochet hook (sized according to utility cord thickness) Metal chain (optional) Directions: 1. 2. 3. 4. 5. 6. 7. Photos: Courtesy of Ashley Weeks Cart
DIY Woven Bracelet & Necklace « greeneyed.com
I’ve been itching to make myself some jewelry inspired by Aurélie Bidermann’s “Do Brasil” line. Since I don’t have 300 Euros lying around, this looked like a design I could recreate on my own. I was primed to put together a DIY Tutorial for you all when I discovered that Honestly WTF had already done the honors. I picked up the gold necklace and the two bracelet chains from an antique shop for $5 a piece, and had the embroidery thread on hand. Jump on over here for the tutorial. NECKLACE: I used shades of pale blue and turquoise embroidery thread, and wove through one side of the chain to mimic this necklace. CHARM BRACELET: This bracelet was already armed with charms. DOUBLE BRAIDED BRACELET: For this bracelet, I removed the charm and just used the chain. Photos: Courtesy of Ashley Weeks Cart
Summer bracelets DIY
When M. came home from her camp with school, she showed me this yellow bracelet she made with 'scoubidoo' strings. One of her friends taught her how to make these and of course I wanted to have a go at it too. Instead of scoubidou string I used strips of fabric for one and leather - what did you think?!- shoelaces in offsetting colors for another one. I believe both resulting bracelets look really nice. The possibilities in terms of material to braid with are endless. So, in case you 're in need of a fun summer project here's a how-to in 16 pictures with a short description below. This is what you'll need for an adult size leather bracelet. Steps: 1. This is the kind of craft you could easily do with kids - have them cut strips of fabric, no need to worry about the strips being straight and regular, and teach them how to braid. With special thanks to my little girl M. for teaching me how to make these...
DIY Friendship Bracelet
For several months now, we’ve been receiving emails requesting a friendship bracelet DIY. Well, friends, ask and you shall receive! Today, we’ll give you a step by step tutorial on the classic chevron pattern. You’ll need:embroidery threada safety pin or tapea pair of scissors Start by cutting several strands of embroidery thread at about 24 inches each. Start on the left side with the outermost color (shown here in red) and make a forward knot by creating a 4-shape over the 2nd color, loop it under and back through the opening. Pull up and to the right to tighten. Now pick up the outermost color on the right side (show here in red) and make a backward knot, creating a reverse 4-shape over the 2nd color, loop it under and back through the opening. Continue knotting towards the left until the outermost strand reaches the middle. Remembering the color order is important for the first few rows but after the 3rd or 4th row, the strands will fall nicely in place.
Related:
Related: