
How to Style a Low Bun It's the perfect season for easy and elegant up-dos. Maybe you are getting your outfit together for a friends wedding or for your senior prom. Here's a simple style for a cute low bun, you could dress this up with little flower blooms or ribbon! 1. Seperate a few thick strands from the top of your head (where your part naturally ends) and tease them by brushing the hair up toward your head. 2. Have fun styling your own low bun! This hair tutorial was created in collaboration with Sarah Chapman, a professional hair stylist at Blu Skies Hair Studio in Springfield, Missouri.
GUEST POST photos by: Kathleen Bly post designed by kristin ess Mad love for our first guest post winner, Taylor Nick!!! I am fully obsessed with this bohemian-inspired-braided-goodness! Even though Taylor had some SERIOUS competition, there’s no doubt that this little lady took the cake in our hair tutorial contest. She created a beautiful, textured, easy hairstyle that will work with almost any hair type. Congratulations Taylor, and thanks to ALL of you who entered this post contest. Xx Kristin “My look is inspired by all of the bohemian braids on the 2011 runways. Tools: 2 Claw clipsBobby PinsHair tie, preferably matching your hair colorFine tooth combHairspray Steps: 1. 2. 3. 4. 5. 6. 7. 8. XO Taylor Tags: congrats, congratulations, contest, hair, kristin ess, lauren conrad, taylor nick, the beauty department, thebeautydepartment.com, tutorial, tutorial contest, win, winner Related posts:
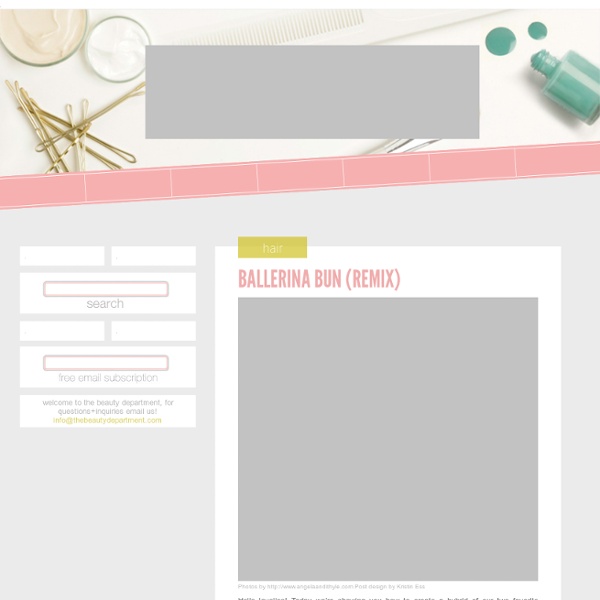
Photographer Martin Schoeller Braided Bun photos: post designed by kristin ess Today we’re introducing you to one of the easiest hair tutorials ever– the braided bun! It can be done on almost any texture or length of hair, using regular or fishtail braids! Luckily, we have our very own gorgeous/genius photographer, Angela Kohler, (in front of the lens for once) to show us how this is done… Before you start, know that this hair style is just 5 simple braids, made into a bun shape. It makes things a little less complicated when you think of it like that. TOOLS: curling iron, 5 clear elastics, bobby pins, sectioning clips and hairspray is optional! Start by curling your hair. Xx Kristin Tags: angela kohler, braided, braiding, braids, braidy, bun, bun braid, fun, hair, hair do, hair style, kristin ess, kristin ess hair, lauren conrad, new year, new years, new years eve, NYE, style, the beauty department, thebeautydepartment.com, tutorial, up do, up style, updo Related posts:
Messy French bun My friend C. always wears one of those perfectly messy buns that makes it look like she just rolled out of bed in Montmartre. Here are her step-by-step instructions. (I say we copy her ruthlessly.) xo Step 1: Make your hair dirty. Step 2: Next, pull together your hair and hold it straight up, like a Lucky Troll Doll. Step 3: Then twist your hair down to a few inches above the crown. Step 4: Wrap your hair around itself until it forms a loose bun, right on top of your head. Step 5: Pin the bun in place with bobby pins. Step 6: Finally, pull loose strands of hair from the nape of your neck and around your face to make it look like you’ve worn the bun all day. (Photo by Anna Wolf for Cup of Jo)
Find out about 10 Holiday Hair Must Do's By kenziepoo | Are you in need of some hair inspiration for all your holiday happenings this year? A lot of us go all out with sparkles, high heels, and deep red lipstick. Keep reading after the jump to view our 10 Holiday Hair Must Dos! nggallery id=’122048′ Braided Do This hairstyle is basically the same thing as milkmaid braids, only modified to up the volume and lessen the big part in the back. For More Hair Inspiration follow me on my Pinterest here! 7 totally chic braids to rock this winter The 20 best makeup, hair, and nail trends of Fall/Winter 2011 25 fun and flirty nail trends you have to try 15 easy DIY Christmas decor ideas 10 stunning gift-wrapping ideas for the holidays
Fashion Inspired by Marvel's The Avengers - College Fashion All movie images courtesy of The Walt Disney Company You know that tingly sensation of awe and excitement you get after seeing a truly great film? Well, besides leaving me with a serious hankering for shawarma, Marvel’s The Avengers definitely gave me that oh-my-gosh-you-guys-let’s-watch-that-again feeling. Its all-star cast includes Chris Evans, Robert Downey Jr., Chris Hemsworth, Mark Ruffalo, Scarlett Johansson, Jeremy Renner, Samuel L. Jackson, and Cobie Smulders. I saw the movie last Saturday night, but I still can’t stop thinking about it all: the epic battle scenes, the hilarious one-liners, the seriously sexy cast, and of course, the style! For more geek-inspired fashion, check out previous posts: Sailor Moon-inspired fashion, Doctor Who-inspired fashion (part 2 and part 3), Sherlock-inspired fashion, Star Wars-inspired fashion, The Hunger Games-inspired fashion, The Big Bang Theory-inspired fashion, The Lord of the Rings-inspired fashion, and Star Trek-inspired fashion. Thor
PIN IT UP, GIRL Our email box is literally flooded with requests for updos so here’s a fun one to get us all going! This is always a favorite for attending an event. This updo looks gorgeous on any hair color but particularly amazing with hilighted hair because it gives the hair lots of depth and dimension. For lack of a better word, I love the way it becomes “swirly”. Best thing is; it’s easy to do, gorgeous and keeps your hair out of your way for the night. Tools you’ll need: curling iron (to prep the hair with waves), sectioning clips, teasing comb or brush, clear elastic rubber band, bobby pins, light to medium holding hairspray (to mist over at the end). Tags: bride, bridesmaid, date, hair, hair style, hair tutorial, how to, kristin ess, kristin ess hair, lauren conrad, prom, sister, special occasion hair, the beauty department, thebeautydepartment.com, tutorial, twisted, updo, wedding, wedding hairstyles Related posts:
25 HairStyle TUTORIALS & EXTRAS! Looking GOOD! With the holidays also come a bunch of parties! Some of them are just family gatherings, some other ones are work related and some are hosted by great friends. Whatever the occasion is I think we ladies deserve to look good, regardless of our age, size or taste. So I put together for today’s Sunday Best 25 tutorials of hair-styles and some few other EXTRAS for inspiration! The Messy Side Updo. What I like about this hair is that you can wear it casually or dress it up with some cute hair pieces for a more formal look. I love it! tutorial The Gibson Tuck Elegant, simple, chic… perfection! Her beautiful hair makes me want to color mine… I love the red! tutorial EXTRA: Greenlicious! I thought it would be fun to throw in this list some eye makeup tutorials also. This color palette is perfect for the Holidays! It would look great with brown eyes also… How do I know? I have done it! tutorial The Side Chignon You La La! So pretty and romantic! tutorial Side Knot Two minutes and you look fabulous!
25 Super-Easy Everyday Hairstyles for Extremely Long Hair … The hairstyles for long hair I’m about to share with you won’t take more than 20 minutes of your precious time but will score you some major style points and help you style your long tresses like a pro! So, are you ready to experiment with a couple of interesting new hairstyles for your lovely locks? Well, then you absolutely must give these 7 hairstyles for long hair a shot. Amazing, stylish and oh-so-cute, braids are one of my most favorite styles ever! And if you’re one of those lucky ladies whose hair is gorgeous and unbelievably long, you should definitely experiment with braids, starting off with a simple braid. 25 clever ideas to make life easier Via: amy-newnostalgia.blogspot.com Why didn’t I think of that?! We guarantee you’ll be uttering those words more than once at these ingenious little tips, tricks and ideas that solve everyday problems … some you never knew you had! (Above: hull strawberries easily using a straw). Via: apartmenttherapy.com Rubbing a walnut over scratches in your furniture will disguise dings and scrapes. Via: unplggd.com Remove crayon masterpieces from your TV or computer screen with WD40 (also works on walls). Via: athomewithrealfood.blogspot.com Stop cut apples browning in your child’s lunch box by securing with a rubber band. Via: marthastewart.com Overhaul your linen cupboard – store bedlinen sets inside one of their own pillowcases and there will be no more hunting through piles for a match. Via: realsimple.com Pump up the volume by placing your iPhone / iPod in a bowl – the concave shape amplifies the music. Via: savvyhousekeeping.com Re-use a wet-wipes container to store plastic bags. Via: iheartnaptime.net
DIY HAIR NECKLACE In this beautiful world of buns + top knots, we’re always searching for ways to mix it up. Today’s DIY helps us do just that! Making hair jewelry can be really fun & it’s very likely that you’ll have most of these supplies already at home! You can take apart an inexpensive multi-strand chain necklace that you don’t wear anymore, or if you don’t have that you can go to a bead shop where they sell chain and necklace making supplies. Here’s how I created this golden goodness: photos+ tutorial by Kristin Ess TOOLS: Wire cutters, flat-head pliers, thin gold wire, strands of necklace chain, a brass loop, a small hair comb + a bobby pin that matches your hair color. Open the brass loop.String your first chain on to the loop.Continue stringing chain until you have as many as you want on there. Related posts:
YOU ASKED FOR IT… - StumbleUpon photos + post by Kristin Ess So many emails have come in asking how I did the braid on Lauren’s hair for her last Chelsea Lately appearance. I recently recreated that braid and took a couple photos so you could see it up close. Here’s the very simple secret to this braid: In a regular braid there are 3 strands. Watch this video to see how it looks as the pieces loosen up and naturally fall out of the braid: Tags: braid, braid in a braid, braids, chelsea lately, hair, hair style, kristin ess, lauren conrad, lauren conrad braid, lauren conrad plait, layers, messy braid, messy plait, plait, style, textured braid, the beauty department, thebeautydepartment.com, video Related posts: