background preloader

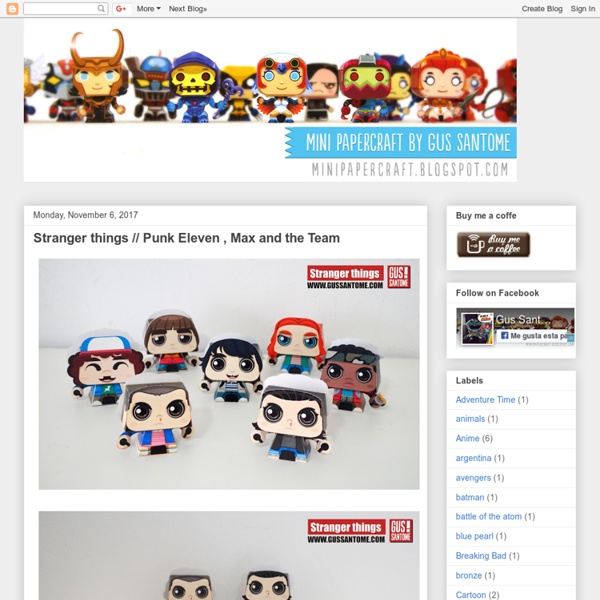
Mini Papercraft

Mini Papercraft

Echoes of a Dream: Basic instructions for a waldorf doll " ......a handcrafted doll is one of a kind, an individual which carries the spirit of the maker in its stitches and absorbs the spirit of the child who loves it". Isn't this a beautiful description of a handmade doll? I've been making waldorf dolls for about six years now and I was very lucky to be shown how by a German lady who was based at the waldorf school in Kings Langley. I started off making dolls for my own children and I in turn have taught other people to make dolls for their childen. In this way the waldorf doll making tradition continues as it has done for most of the last century. The dolls I make are 16'' tall and made from natural materials. Next off you need to tie the eye, head and chin lines. Place pins where you think the eyes and mouth should be and embroider them. Then sew up the arms and body on the sewing machine. Sew the arms onto the back of the chest piece. Stuff the feet and then the legs and then the tummy of the doll. Update 28 October 2009.

Paper toys Crepúsculo | Todokawaii Como la saga Crepúsculo tiene muchos fans no es de extrañar que Luna Nueva ya tenga paper toys. Son de Kobico, al igual que los de One Piece que anunciamos el verano pasado. Hay de los tres personajes principales; Edward, Bella y Jacob. alt="Paper toy de Jacob de Crepusculo Luna Nueva" /> Podéis descargarlos de la web Kobico

poseable Become a Member for free access to this and other files on the site. See the Membership page for more details. Already a Member? A cute poseable Triceratops to download and make. Members and patrons can download the model for free from the appropriate place - thanks for your support! Download the parts file and print out the pages onto thin card (230gsm / 67lb) Note that there are three different colour variants and an uncoloured version for you to choose from. Score along the dotted & dashed lines and cut the solid black lines before carefully cutting out the pieces. Some of the parts in the model are made from double thickness card. Start by making the legs from double thickness card. Once the glue is dry carefully cut out the legs. Make the horns from double thickness card, make sure that you don't glue the tabs at the base of the horns together. Fold over the four large rectangular flaps on neck piece and glue them down to make double thickness card. Glue a washer onto the two tabs.

Fix Barbies hairHousing a Forest How to tame doll hair with one simple trick. I grew up playing with Barbies, but mostly just when friends came over. I remember my mom spending hours sewing special outfits for my dolls. The sad thing was, I never really played with them. Today was a good day to dig out the Barbie collection and play. As you can tell from this poor girls hair, the barbies in our house are in need of some love. The first step is to brush barbies hair the best that you can. Brush and style your barbies hair. Much better! I love how they are all lined up. The barbies look so cute all dressed up and hair done.

Howie Owl – hoot hoot! « 3EyedBear The first kit of the new year is this deceivingly simple looking little owl to expand the bird-population in 3EyedBear’s universe. We all know owls are one of the wisest creatures and this one certainly will be one day too. Thing is: she’s still very young and inexperienced, but she compensates that with a passion for reading thick books while you sleep. It don’t hurt to have her posted in your bedroom since owls hunt for little scary creatures by inborn instinct. She will watch over you. Happy dreams everyone (click one of the images to download Howie) Collect them all! Edit: Thank you for all the lovely blog-title suggestions in the comment-box. Now let’s send some pictures of one of the owls and share how you are taking care of them. -Darla from delicious Bakingdom created 3 Harry Potter-themed owls here for downloading. TAGS: None

TravelWees by Larissa Holland Category: Sewing Type: Toy Item: Animal Skill Level: Beginner Basic Skills Necessary: This pattern is written for folks who have had some basic sewing and embroidery experience and who are familiar with common sewing terms. Pattern Description: Take a furry friend with you wherever you go! This fully illustrated pattern shows you how to make:- a fuzzy poseable TravelWee creature- tin liner- tiny camera with strap- leaf snack with bite missing- includes printable label for inside the tin No need to be afraid of the tiny size! Included in this original eight page pattern are color pictures, detailed step-by-step instructions and clear diagrams for every step. Materials used to make TravelWees are commonly available and could be in your craft stash already! This pattern is in PDF format on 8.5 x 11 paper, so you can print it from your regular printer at home on standard paper or card stock, as many times as you need for personal use. Printable label reads:Hello!

In search of Cinderella The week before my kiddo's 4th birthday, she got hit hard with Cinderella Fever. We visited a bookstore and she poured over the Disney Cinderella books like she was studying for the SATs. She knows all of the names of the princesses somehow, as if by osmosis. For those of you with girls, I am sure you are aware that the Disney princesses are everywhere you go - on disposable diapers, cans of soup, band aids, and fruit snacks. And, I want her to think outside the box. This week I found the book Fanny by Hollie Hobbie. Together my kiddo and I will be making our own Cinderella doll.

Papercraft You may freely distribute or give away these paper models to others without prior permission from the designer, you may modify with the credit to hobikitkertas.com. Feel free to add any of these paper models to your website or blog, with the link to hobikitkertas.com model pages. Do not use direct link. Uploading to mass file storage for public view is forbidden, including, but not limited to, rapidshare, mediafire and others which provide similar service. All images are copyrighted. This work is licensed under a Creative Commons Attribution-NonCommercial-ShareAlike 3.0 Unported License. No Warranty is provided whatsoever. This pattern never been tested, some minor errors were found in several of previuos models, please be advise maybe you will find errors such as missing tabs or unnecessary tabs, despite the models never been tested, many have succeeded build all of them perfectly, just need little imagination and dedication to this hobby. Please proceed download below

craftsanity tour stop & podcast + a giveaway | Brett Bara Hello! There’s a whole lotta stuff going on today. First, I’m excited to share with you a few peeks at some more projects from my book. For today’s blog tour stop I’m popping over to Grand Rapids, MI, to visit with Jennifer Ackerman-Haywood of CraftSanity fame. I’ve enjoyed Jennifer’s CraftSanity podcasts for years. And now it’s giveaway time! To enter, leave a comment on this post and tell me who you’d make this kitty and bunny for! PS: A few other announcements to share: Thanks to Crafternews for posting about my book and providing a free, downloadable version of the One-Hour Skirt.

Life Size Jack Skellington WIP Been here for a while watching everyone else make amazing props, so I decided to start posting some of my builds. This build kind of kills two birds with one stone. My fiance wanted to have a life size Jack for display during Halloween. And our son's 5th birthday is in October, Nightmare Before Christmas themed of course. So we set out to build a budget minded Jack replica. Boy doll Arm/fingers The arm bends at the wrist and elbow. Making fingers is rather difficult. Arm Sew 2 sheets of cloth at the lines of A and B. Cut with 1/4" margin. Stitch and tie the top of the wrist (C). Stuff Put a little fiberfill into the wrist. Make the elbow joint. Hand Draw patterns and sew 2 sheets of broadcloth by small stitch. Turn inside out using a thin stick. Put a little glue around a wire and wrap with some cotton batting. The length is longer than finger, shorter than hand. Insert cores into fingers. Stuff fiberfill into the lower part of thumb. Bend the end of the wire to prevent wound. Joint Connect the hand and the wrist with a thick thread tightly. Covering Fold stretch fabric and sew arm skin. Be small stitch at the fingers. Put it on the base just as a tight fitting glove.

How to make animal pom-poms - Mr Printables Blog After making those flower pompoms, I couldn’t help making more. Maybe it’s called procrastination. I have hundreds of other things on my to-do list, but then this week I thought, well, hey let’s just make more pompoms! Among many other ideas, I went for having a go at animal pompoms. Basically the method is the same. Start with the nose and mouth in the middle, wrap around the surrounding face color on top of this, a little wrapping floating in the middle for the eyes then finishing with more face color. Place a pencil (or your finger) on one end and wrap extra yarn around it a bit like this. I had a comment from a reader who thought my pompoms looked perfect and hers weren’t. Before the trimming: a sad koala. Yay! Here are more detailed step-by-step photos showing how to make a lion pompom. I’m still using the same cardboard pompom maker I used for the flowers. After you wrap some face color all over then add a little bit of black on top where the eyes would be. And after the trimming.

Papercraft Golden Girls Set In my opinion, Golden Girls is one of the best shows ever. It’s right up there with Murder, She Wrote. What? Via: Nerd Approved DIY Lego Costumes Last year, after returning home from Europe the precious was on to figure out what we were going to dress up as for our friends annual Halloween party. I created a list of 25 DIY Couples Costumes for Halloween and shared it with Jon. We narrowed it down and that’s when he decided we were gonna create DIY Lego Costumes. Jon knew if we were gonna do this we were gonna do it right. We scoured the internet and never found a complete tutorial nor could we find real life measurements. So Jon got to sketching while I tried to narrow down which lego I wanted to be! Today, I’m participating in not one but two costume parties. Here is the sketch up Jon created. Supplies: CardboardFoamYard Stick RulerBlack Gaffers TapeGorilla GlueHot GlueHand SawWeightsPoster TubeMeat Carving KnifeYellow PaintYellow Poster BoardWhite Poster BoardBlack SharpieBlack PaintBlue PaintPink PaintMetal MeshWhite Spray Paint First up, you need to create the base and body of the lego. Then, it was time to build the feet.

Related: