
Apprendre les mailles de base du crochet Le crochet s'exécute à partir de quatre mailles de base : la maille chainette ou maille en l'air, la maille coulée, la maille serrée et la bride (dont il existe plusieurs variantes).Comment tenir le crochet ? Avant de commencer la technique des mailles, il faut savoir comment tenir le crochet. Il se tient dans la main droite comme on tient un crayon (entre le pouce et l'index) en faisant dépasser un peu le bout du crochet, la main gauche tient l'ouvrage (si vous êtes gaucher, vous devez inverser et tenir l'ouvrage de la main droite).Les mailles bassesLa maille chainette ou maille en l'airLa maille chainette est également utilisée comme substitut de la première maille pour commencer un nouveau rang. Dans ce cas une chainette équivaut à la première maille serrée, deux chainettes à la première demi-bride, trois à la première bride et ainsi de suite... Ramener le fil au travers des 2 mailles présentes sur le crochet Pages
Cardigan - Home CROCHETED ROPE BASKET I love having little baskets and containers around to keep things tidy, and have really been wanting to experiment with different materials to crochet with recently. This little basket is not only a perfect way to practice crocheting with rope, but also to hold little odds and ends! For this project I used a Size P crochet hook and one package of clothesline rope. This rope is nylon, but it would be fun to use cotton rope and experiment with dyeing it different colors! To begin, start with a slipknot and then chain five stitches. In order to close up your loop, send your hook through the center of the original slipknot and chain one. Your loop should look like the one above. Send your hook through the center of the loop and single crochet six stitches. One completed round should look something like this. Chain one, and go around the circle again. Stitch markers definitely make it easier to keep track of where your rounds begin and end. Round and round we go... Keep going... and going...
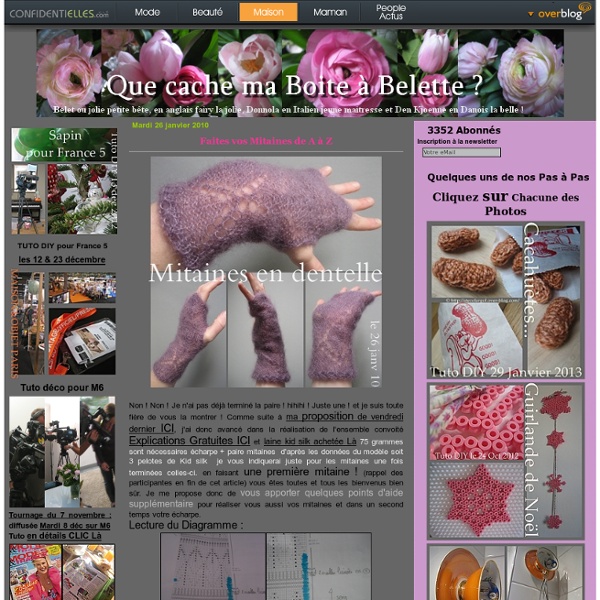
Fleurs au crochet Je vous présente des Fleurs au crochet que j'ai eu le plaisir de réaliser ! Vous trouverez pour ce modèle , mon ouvrage terminé et le tuto qui va au schéma. Voici 5 fleurs roses et mauves , auquelles j'ai rajoutées une perle pour la finiton ! J'ai trouvé le tuto sur le joli blog de " Katty " , les explications sont ici , elles sont données rangs par rangs! Dans la série des Fleurs au crochet, voici des nouveaux modèles trouvés sur le net . Voici des magnifiques fleurs au crochet , trouvées sur le site de " Passion-crochet " , les explications sont ici ! Il y a en tout 13 modèles de fleurs , les explications sont données rangs par rangs . Voici des jolie fleurs accompagnées de leurs grilles gratuites , trouvées sur le net ! Voici un choix important de magnifiques fleurs , trouvées sur Crochetclub.net , ici ou si vous êtes inscrites sur Facebook , sur la page d'une amie , ici ! Voici des belles fleurs et ses grilles gratuites , et de nombreux modèles supplèmentaires , trouvés sur la Galerie Picasa
Crochet : galeries Picasa - Galerie Picasa de "… - Une bibliothèque de… - Une bibliothèque de… - Une bibliothèque de… - Une bibliothèque de… - Une bibliothèque de… - Une bibliothèque de… - Une bibliothèque de… - Une bibliothèque de… - Une bibliothèque de… Samedi 30 juillet 2011 6 30 /07 /Juil /2011 07:03 Je vous présente une nouvelle Galerie Picasa , celle de " Ursula " , qui nous propose un incroyable choix de catégories et de nombreux modèles gratuits ! De quoi nous satisfaire un moment , nous les passionnées du Crochet d'art . Clique sur les images pour aller aux modèles & grilles . Marque-pages ( 21 modèles et grilles ) Napperons ( 74 modèles et grilles ) Décorations tableaux ( 30 modèles et grilles ) Napperons tulipes ( 84 modèles et grilles ) Napperons roses ( 96 modèles et grilles ) Bordures ( 110 modèles et grilles ) Corbeilles ( 129 modèles et grilles ) Abatjours ( 47 modèles et grilles ) Chapeaux ( 61 modèles et grilles ) Ombrelles ( 28 modèles et grilles ) Dames ( 31 modèles et grilles ) Boules Noël ( 89 modèles et grilles ) Anges ( 75 modèles et grilles ) Etoiles Noël ( 77 photos et grilles ) Cloches Noël ( 34 modèles et grilles ) Napperons Noël ( 215 modèles et grilles ) Pâques ( 71 modèles et grilles ) Pâques + ( 153 modèles et grilles ) Rideaux Papillons Coussins
Narcissus Lace Tunisian Stitch To make the Narcissus Lace Tunisian Stitch, you’ll need to get your long afghan hook and make a foundation chain with a multiple of 4 stitches. Step 1: Insert hook in 2nd chain from hook; yarn over, draw up a loop {Repeat Step 1 across row, keeping all loops on your hook.} Step 2: Yarn over, draw through 2 loops on your hook; *chain 4, draw through 5 loops on your hook {Repeat Step 2 from * across row until you have 3 loops remaining on your hook. Chain 3, draw through 3 loops.} Step 3: Chain 1, insert hook in next 3 chain stitches and in each chain stitch in each loop of chain 4.
Etole japonaise au crochet - Le pot 2 colle & Cie Une fois terminée, elle ressemble à ça! Pour celles qui cherchent encore les explications: Chaque rang (rg) se termine par une maille (m) coulée (MC). Rang 1 : commencer par une chaînette de 6 m. Fermer par une MC. Rang 2 : faire 4 m. chaînette, puis en plongeant dans le cercle * une bride, une m. chaînette * répéter encore 10 fois et terminer par une MC (on a en tout 12 brides). Rang 3 : changer de couleur. Rang 4 : changer de couleur. Rang 5 : crocheter une m. serrée (MS) au milieu du groupe des 4 brides du rg 4, 5 m. chaînette, une MS au même endroit que la première MS, une MS entre 2 groupes de brides, répéter tout autour puis terminer par une MC. Rang 6 de la première fleur : faire une MS puis 8 brides dans chaque arceau, 1 maille serrée entre 2 ensemble de 4 brides, répéter jusqu’au bout, terminer par une MC. Assemblage : Les fleurs sont liées 2 à 2 par 2 pétales. Avec le diagramme, c'est plus simple... Partager l'article !
Tuto bracelet au crochet , Challenge 12 mois, 12 projets* Alors voici mon mini tuto pour confectionner ce bracelet au crochet vous aurez besoin de : - Du fils de coton - Un crochet. J'ai utiliser un crochet de grosseur 1.6mm - Une attache à bracelet - De la petite chaîne en métal - De la colle à tissus ( assez liquide et transparente) Commencer par faire 3 cercles au crochet comme ceci: Faire un anneau de 8 ml 1er tour: 12ms ds l'anneau, 1mc ds la 1ère ms. 2ème tour: 1ml, 1ms dans la ml, 2ms ds chq ms suiv, 1mc ds la 1ère ms. 3ème tour: 4ml,[1br,1ml] 23 fois, 1mc ds 3ème ml. 4ème tour: 2ml, sauter 1ml, 1ms ds ms suiv, [1ml,sauter 1ml,1ms ds ms suiv] 22 fois, 1ml, sauter 1ml 1mc ds 1ère ml. 5ème tour: 3ml, sauter 1ms, 1mc ds la ms suiv, [3ml, sauter 1m, 1mc ds la m suiv] 22fois, 3ml sauter 1m, 1mc au pied ds 3ml du début du tour. Une fois mes 3 cercles fait, je les ai assembler ensemble en me servant du bout de fils que j'avais laisser à la fin de mon ouvrage à l'aide d'une petite aiguille J'espère que cela vous à plu A+
l'@telier de Bergère - le Blog - le crochet à Verdun et Lyon En effet ce sont bien 8 colis -bien garnis- qui ont été envoyés le 10 janvier dernier à des antennes locales de SOS Préma. A défaut de pouvoir tout détailler, en voici l’essentiel histoire de bien illustrer le travail de toutes les petites mains qui ont oeuvré ! le 77ème colis pour l’antenne de Blois a été réalisé en commun par les tricoteuses et crocheteuses des Ateliers de Thionville, Dompierre sur Besbre , et Loudun :22 brassières /pulls / gilets, 18 bonnets, 16 paires de chaussons, 15 pantalons, 5 paires de chaussettes, 4 couvertures, 3 robes, 3 doudous, 2 nids d’ange, 1 écharpe, 1 combinaison le 78ème colis pour Bordeaux a été réalisé en commun par les tricoteuses et crocheteuses des Ateliers de METZ , VERNON et ST RAMBERT D’ALBON : 21 paires de chaussons, 18 bonnets, 16 brassières /pulls / gilets , 8 couvertures, 7 pantalons, 6 nids d’ange, 5 écharpes, 3 paires de moufles, 2 robes, 1 doudou l le 84ème colis pour Montpellier a été réalisé en commun par les tricoteuse
Crochet Button Flowers Get out your button collection and create these fabulous Crochet Button Flowers! You’ll love to try this FREE Pattern and they’re perfect for decorating. The photo tutorial requires Translating so click on it up the top of the page on the website. The Pattern is available in English further down the page. Click HERE for the FREE Pattern from ‘Craft and Fun’ Make these Crochet Flowers - Click HERE Given email address is already subscribed, thank you! Oops. Please provide a valid email address. Thank you, your sign-up request was successful! Please complete the CAPTCHA. Please fill in the required fields.