background preloader

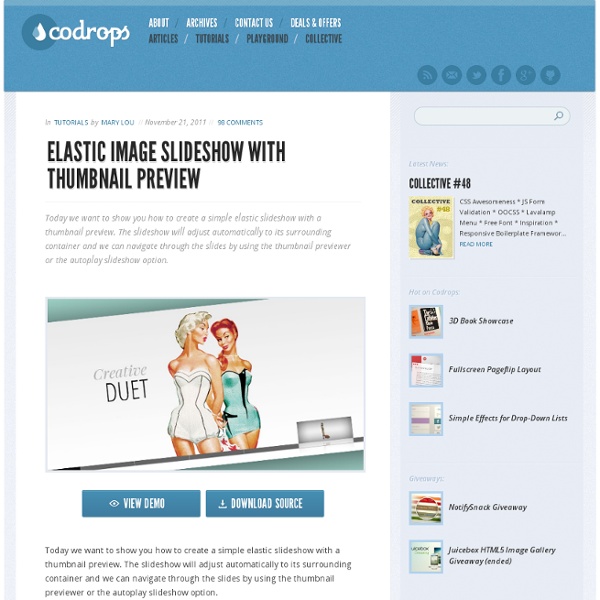
Elastic Image Slideshow with Thumbnail Preview

Elastic Image Slideshow with Thumbnail Preview
Today we want to show you how to create a simple elastic slideshow with a thumbnail preview. The slideshow will adjust automatically to its surrounding container and we can navigate through the slides by using the thumbnail previewer or the autoplay slideshow option. View demo Download source To make this slideshow responsive, we will use a mixture of JavaScript and CSS techniques. The fabulous photography used in the demo is by Bartek Lurka and it is licensed under the Attribution-NonCommercial-NoDerivs 3.0 Unported License. So, let’s do it! The Markup We will create two unordered lists, one for the main slider and one for the thumbnail navigation beneath the large image. The list for the thumbnail preview navigation will contain an absolute element (the first list element with the class ei-slider-element and the thumbnail list elements which consist of an anchor and an image (the thumbnail). Now, let’s add the style. The CSS First, we will define the style for the main wrapper. The JavaScript

Tiny Circleslider: A lightweight circular carousel for jQuery What is it? Tinycircleslider is a circular slider / carousel. That was built to provide webdevelopers with a cool but subtle alternative to all those standard carousels. Tiny Circleslider can blend in on any wepage. It was built using the javascript jQuery library. Features IOS and Android support. Need support or custom features? Anything is possible! Examples $(document).ready(function(){ $('#circleslider1').tinycircleslider();}); Note: There is no lightbox natively in tiny circleslider for this example fancybox was used. To get a better understanding of how it all comes together I made a (corny) styled example. Constructor Properties Methods Events Usage The image below displays how you calculate the radius of your circleslider.

Ultimate Guide To Setting Up Your First Online Shop E-commerce is the most popular business trend in our futuristic society, as most modern cities have Internet equipped and it’s such a simple process to send payments anywhere in the world via Internet connection. Along with these technologies have risen hundreds of thousands of new digital web stores which sell both physical and digital products to one global marketplace. (Image Source: Fotolia) Business means trade, and trade means transaction. For Internet buyer, what they really care about is probably the security, as there are overwhelming fraud issues happening all around the world nowadays. But hard doesn’t mean that it’s impossible to do it yourself. The Process of Building Before even considering to launch your website it is crucial to spend some time away from the computer and build your idea. (Image Source: Fotolia) These are all very important topics of discussion which you should consider deeply. Registering a Domain Spend a lot of time considering your domain before purchase.

Making a Beautiful HTML5 Portfolio Martin Angelov In today’s tutorial we will be making a beautiful HTML5 portfolio powered by jQuery and the Quicksand plugin. You can use it to showcase your latest work and it is fully customizable, so potentially you could expand it to do much more. The HTML The first step is to write down the markup of a new HTML5 document. index.html <! In the body, there are a number of the new HTML5 elements. The #stage unordered list holds our portfolio items. You can put whatever you want in these li items and customize the portfolio further. Beautiful HTML5 Portfolio with jQuery The jQuery What the Quicksand plugin does, is compare two unordered lists of items, find the matching LIs inside them, and animate them to their new positions. First we need to listen for the ready event (the earliest point in the loading of the page where we can access the DOM), and loop through all the li items detecting the associated tags. script.js – Part 1 Each tag is added to the itemsByTags object as an array. Great!

Hacking Google Analytics: Ideas, Tips and Tricks By Claudiu Murariu Web analytics is a powerful tool made accessible to all of us through awesome free software such as Google Analytics. These tools are designed to satisfy the general needs of every kind of website out there. That’s why website analytics tools, in general, are very good at offering a fundamental overview of traffic data of a site, but not so good when it comes to answering specific questions. To get specific questions answered, sometimes you have to work around limitations of your current software. As a proof of concept, I’ll present three examples/ideas for gathering more information in conjunction with Google Analytics. The purpose of this article is to present some starting points for your further exploration. Example 1: Where Do Users Come From? Google Analytics (and other web analytics tools) does a great job of telling you the last web page the user clicked on that got him/her to your website. Here is how you could do it better: Below is a sample of such a script.

Creating an iOS-like Home Screen with CoffeeScript Martin Angelov Today we are going to create an iOS-like home screen using CoffeeScript – a new JavaScript based language, and the jQuery library. CoffeScript has a clean syntax that lies somewhere in between Ruby and Python. If you haven’t used any of them, don’t worry – it is not required. However you will need to be familiar with JavaScript so you can better understand the concepts behind the language. We are also going to use the Touchable plugin, so we can listen for touch-based events. First, what is CoffeeScript? CoffeeScript is a neat programming language meant to enhance the good parts of JavaScript, while working around the not so good. CoffeeScript works in every browser out there, and is compatible with all your existing JavaScript code (including libraries like jQuery and plugins). iOS -like Home Screen with CoffeeScript The HTML Lets start with the HTML markup of our iOS-like home screen. index.html <! The #mask div shows only one screen at a time with overflow:hidden. The iOS Dock

20 Powerful And Useful jQuery Tutorials Of Year 2011 A few days ago we created an awesome post featuring some of the great jQuery Animation tutorials which was appreaciated by our visitors those are in the professions of designing and developing. This article clearly shows that how flash is getting out-dated and JavaScript frameworks are taking place when someone want to create animations. This article has also shown that jQuery is becoming favorite for many web developers and designers out there and using this JavaScript framework for creating stylish animations for websites, web apps, stylish effects and much more. Being one of the most advanced, powerful and lightweight JavaScript framework – we here at WebTabLab like jQuery very much and always love to showcase various compilations related to jQuery such as best jQuery plugins of May 2011, great jQuery plugins of July 2011 and recently jQuery animation tutorials. Don’t forget to subscribe to our RSS-feed and follow us on Twitter for recent updates. 1) Rotating Image Slider

Timeline Portfolio Timeline is a jQuery plugin specialized in showing a chronological series of events. You can embed all kinds of media including tweets, videos and maps, and associate them with a date. With some design tweaks, this will make it perfect for a portfolio in which you showcase your work and interests. The HTML Timeline comes with a light colored theme by default. First, let's look at the basic layout of the page: index.html <! In the head section, we have the plugin's stylesheet - timeline.css, and styles.css, which will hold our customizations. When we call the plugin, it will search for a div on your page with the ID of timeline. <div class="container main" id="timeline"><div class="feature slider" style="overflow-y: hidden;"><div class="slider-container-mask slider-container slider-item-container"><! As we will be modifying the CSS of the timeline, the fragment above will give you a better idea of the customizations. The jQuery The init method takes single argument - the data source. The CSS

12 High Quality Business Card Design Tutorials « Business Card Gallery – CardDsgn.com A business card is an important tool any designer, it is a platform for the designer to showcase their style and creativity on a piece of material that a client can take away with them. The business card design is an extension of your branding representing you and your company, you should invest your time and money in creating a unique and well crafted business card design and not opt for a cheap alternative. A well designed and executed business card reflects your design skill and attention to branding, a potential client will use this as an insight into who you are and what your brand represents. If you are new and just about to start designing your own business cards, check out these high quality business card design tutorials that will give you a great insight into the process behind the creating a print ready business card. Design a Print Ready Business Card for Designers How To Create a Sophisticated Business Card Design Create a Print Ready Business Card Design in Illustrator

How to Use Brackets · adobe/brackets Wiki Getting Brackets Downloads Brackets here for Mac, Windows and Linux (Debian/Ubuntu). Brackets is built with HTML, CSS and JS, but currently runs as a desktop application in a thin native shell that can access your local files. Updates are released about once a month. The Basics Initially, Brackets opens a default "Getting Started" project. You can open a different folder in the file tree on the left using File > Open Folder. Unlike other editors that show open files in tabs, Brackets has a "Working Files" list, which is displayed above the file tree. Split View Initially Brackets will show just one editor in the main view but you can split the main view so that 2 editors can be shown in whichever orientation you prefer (vertical or horizontal). You can do this by selecting View > Horizontal Split or View > Vertical Split. Brackets will remember the view layout for each project so switching to another project will show the layout you had chosen when the project was closed. Extensions Themes

How to Turn Website Visitors into Customers for Your Creative Business So you’re attracting lots of visitors to your website. But if you’re a freelancer or running a creative business, you need those visitors to become clients and customers. Otherwise your site is like a bucket with a hole – draining away your time and money. 1. Work out what they really want. Finding out what your customers want is the beginning and end of your marketing efforts. If you’re selling products or artworks without so much interaction with your customers, it’s a little harder but still doable. Working out what your customers want is an ongoing process that involves trial and error. Which products/services/artworks are my customers most enthusiastic about? 2. When a new visitor lands on your website, what’s their first impression? And do you make it obvious this is a business website, where you want them to buy from you or hire you? Don’t say: ”Hi, I’m Rachel, welcome to my photography site, I hope you enjoy the pictures!” 3. Don’t say: ”I’m available for portrait commissions.” 4.

How to Create Credible Infographics Infographics have become an increasingly popular inclusion in the blog posts of many respected experts within the online promotional content industry in recent years. These great tools allow knowledgeable individuals to share their views on important subjects and relevant issues in an easy to understand format. Unfortunately, many web content creators don’t understand how to build an infographic that is not only well-designed, but also informative and credible. Focus on Outside Information Perhaps one of the most important tools when it comes to developing credible infographics is the inclusion of outside information within your visual device. Finding outside information might be easier than you think. Strive for Clarity If you develop a great viewpoint but forget to maintain focus when creating your infographic, all of the information you intended to share with your audience will be lost. Refrain from Repeating Old Information Look for the Emotional Hook The Quest to Plug Wikileaks

How to Create Incredible Photoshop Brushes from Hand-Made Art There is a huge collection of great Photoshop brushes here at WeGraphics. But what some don’t realize is that most all of our brushes are created by hand and then scanned and converted to brush sets. There are simply no Photoshop filters to reproduce what you can do by hand with brushes and paper. Below is a walk through of my process for creating a brush set, down to the paper and paint to the scan and final prep work. For this tutorial I’m going to walk through the process and technique I used to create the Ink and Bleach Splatter Brush Set posted a couple of weeks back. First let’s start with… The Tools For this set I used Strathmore Newsprint for the paper. For the ink/paint I’m using an inexpensive black acrylic paint that can be found at any hobby store. For good measure, I’m throwing in some bleach. You’ll need a nice collection of brushes, but don’t buy expensive ones. The Process I’m going to start by adding bleach to one of my glasses and paint to the other. Conclusion Related Posts

Photoshop Mastery: 25 Techniques Every Designer Must Know One of the best things about Photoshop is that you never stop learning. I’ve been working with the software for about 12 years, and I always stumble across something I didn’t know, whether it be a new feature, or just a new, better way of doing something. There are countless tips and tricks to help boost your productivity and work flow some are obvious and easy to find while some you have to dig a little to seek them out. In this post I’m going to reveal 25 of the best advanced techniques to help you design faster and better within Adobe Photoshop. Keyboard Shortcuts for Layer Manipulation Note: These shortcuts refer to the “Cmd” key on a Mac keyboard. Create a new layer As your working in PS adding layers to your canvas is essential. New layer with dialog box: [ Cmd + Shift + N ] New layer without dialog box: [ Cmd + Shift + Alt + N ] Zoom in and out zooming in and out is a necessity when designing a piece with lots of detail, or working on a large print piece. Fit to window: [ Cmd + 0 ]

Learn Illustrator CS5 - Creating complex art with the Shape Builder tool Share this Episode Autoplay End of Video Show End Screen Default Quality Adjust your embed size below, then copy and paste the embed code above. Community Translation Your transcript request has been submitted. Adobe TV does its best to accommodate transcript requests. Join the Community Translation Project Thanks for your interest in translating this episode! Please Confirm Your Interest Thanks for your interest in adding translations to this episode! An error occurred while processing your request. Another translator has already started to translate this episode. Thanks for Participating! This episode has been assigned to you and you can expect an e-mail shortly containing all the information you need to get started. About This Episode Create complex art from simpler basic shapes by using the Shape Builder tool in Illustrator CS5. Presented By Produced By Runtime : 00:06:12 Added : 04/30/2010 About this show Learn Illustrator CS5

Related: