
How To: Print On Fabric Printing on fabric is so much easier than I thought it would be! You start with some spray adhesive: Spray it onto a piece of cardstock and place your fabric on top, being sure to get out as many bubbles as possible. Then cut down the fabric so that it is the exact same size as your cardstock. Place it in your printer with the fabric facing whichever side gets the ink. You now have printed fabric! Just peel it off of the cardstock. And you are ready to use your new printed fabric!
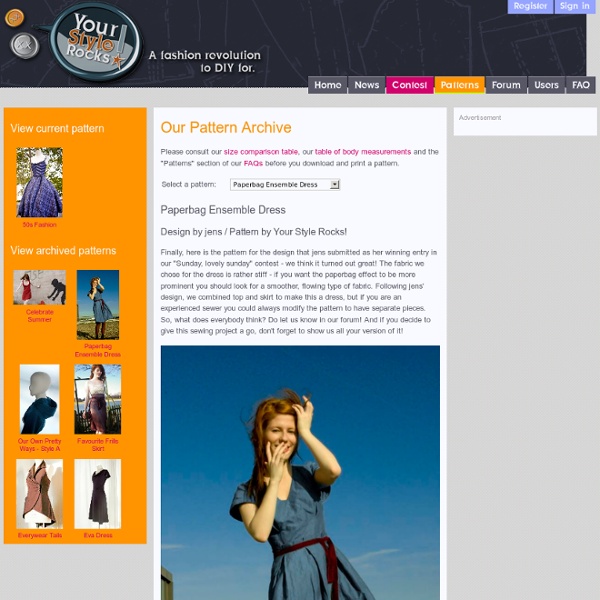
Celebrate Summer - Patterns Archive Please consult our size comparison table, our table of body measurements and the "Patterns" section of our FAQs before you download and print a pattern. Celebrate Summer Design and Pattern by Your Style Rocks! Since we only just started with this website and haven't had a contest yet, we decided to design the first piece for our pattern section ourselves so you can see how we work and what we're doing. This flirty red dress is every girl's loyal companion for a day of gallivanting in the hot summer sun. Remix our dress with a shirt underneath and a pair of leggings to make it fit for fall. Download this free pattern now, start sewing and show us your work when you're done - we are looking forward to seeing how your version turns out! Detailed sewing instructions for this pattern are available here. Download the pattern:
How to make gloves Sewing > Gloves Have you thought you can sew gloves of cloth? It's rather easy. Why not try? Materials Cloth, 30cm length. Patterns and cutting Print the pattern out on the A4 paper. Sewing Sew the gussets to the back of fingers. b'-c-d' and d''-e-f' and f''-g-h'. Sew the wrist to the top of the forefinger continuously. a-b-b'-c-d'-d-d''-e-f'-f-f''-g-h'-h-h''. Fold the wrist and stitch around. The patterns are rough a little. Finished with trimming. Other examples Made of two-way stretch, with chains. Thick furry cloth. Sewing Baby cape / Baby dress / Baby bonnet / Baby shoes / Baby mittens / BibPolo shirt / Sweatshirt / SundressKid's cap / Reversible hat / Tulip hat / Flat cap / Knit cap Cloth glovesPanda apron / Slippers / Indoor boots / Socks / Night vestShopping bag / Pouch / Felt cake Links Hanty / Cute Underwear / Nuno Life / Boy Dolls / Cloth Doll Making / ソーイング
Making a picnic dress Several people have asked me how to make my Picnic Dress. It’s a bit too complicated for the step by step instruction on how to draft a pattern I gave for the draped t-shirt, but I hope this will be enough detail for anyone who is familiar with how dresses are made. You will need 4 yards of 45″ fabric and an 18″ zipper. These are the pieces of the pattern. Mark out the measurements listed and the distances between them. If you’re not used to making your own sleeves, trace both the arm hole and the top of the sleeve off a pattern you’ve used before and like. To make the curve of the skirt even, use your tape measure like an enormous protractor. To gather the top, mark out a distance ¾ of the difference between bust and underbust measurement on one side. After gathering both the lining and the top layer of the bodice, sew them together along the neckline. Sew the edge of the facing to the neckline on each back piece. Sew the front and back together at the shoulders.
Grosgrain The 1.5 Dress 1.5 yards + 1.5 hours = One New Dress. Scarlet and I met the prudent dad for dinner shortly after the completion of this number, and he complimented my new dress! I excitedly exclaimed “Thanks! I made it!” to which he responded: “It’s cute!” So, if your goal in life is to be as sexy as possible at all times, then I guess this isn’t the dress for you. Not even a little sexy? 1. You’ll see the front neckline is lower then the back. 2. Sew in place. 3. Align the edges and pin together: Sew together and finish the edges by serging, sewing with a zig zag stitch, or cutting with pinking shears: 4. Sew in place with a straight stitch: You can leave the sleeve like this, but it will be a bit pointy as in this pic: So i made a little tweak. Fold the tip of the sleeve down about 1″: Secure it in place at both sides of the fold with a few stitches perpendicular to the sleeve: 5. 6. So you need to finish the neckline. 7. But i decided I’d like to have a little bit more fitted around the waist. Done!
Radical Cross Stitch – Page 6 Free Twinkle Sews Dress Pattern - CraftStylish Love in the Afternoon dress from Twinkle Sews Photo: Kevin O'Brien In the Spring '10 issue of SewStylish, the editors were able to catch up with Wenlan Chia of Twinkle and chat with her about her sewing and design inspirations. Chia has become well known among the sewing and knitting communities for her amazing how-to books featuring her stylish designs. Here we feature the Love in the Afternoon dress from her latest book, Twinkle Sews (Potter Craft, 2009) With its form-defining topstitching (albeit with a bright, sporty twist), cocoon shape, and origami-inspired detail, this dress can take you from a country club to a cocktail party. For more on Chia, check out SewStylish Spring '10 for our interview with this talented designer on sale now. To make the dress, download the instructions and the pattern in your size. Print out the pattern in your size on 8 1/2"x 11" paper.
Craft Passion: Free Craft Pattern & Tutorial 1-Hour Dress May 31st, 2013 Email 287 users recommend This dress is so quick to sew, you’ll find yourself making more than one. Jack Deustch Inspiration by Oscar de la Renta Style.com Sloan Howard Photo: Jack Deustch What says summer more than a chic, lightweight dress? What You'll Need: French curveHand-sewing needleInterlock knit, 2 yardsMeasuring tapePattern paperRulerSewing machineThread Make the Pattern 1. 2. View 5 member project galleries
How to make your own crapestry. « Crapestry This is the general technique that I have developed: 1.) I choose a cross stitch kit (most of my kits are discovered on, and purchased from, ebay.co.uk)… Original design from Paco 2.) 3.) 'raw' canvas 4.) An explosion added to the picture of the raw canvas using Photoshop 5.) Coloured dots represent stitches in my new crapestry design 6.) 7.) 8.) 9.) 'Evening' from the 'War' collection x x x x x x x x x x x x x x x x x x x x x x x x x x x x x x x x x x x x Some other advice, take it or leave it… 1.) 2.) 3). 4). The author has asserted his right to post all text/images within this site under a Creative Commons License (text/images that are not the property of Theo Humphries have been identified as such and therefore may be exempt from Creative Commons). Like this: Like Loading...
Empire Sheet Dress Tutorial: Get something a lot nicer out of your extra sheets. I think this might be one of the easiest ways to make a empire waist summer dress. (DISCLAIMER, Honestly, I don't "do" strapless. I like to be more modest. However, I have no problem wearing a strapless with a cardigan. I wanted to add straps, but I haven't since I can't wear it now anyway. You will need: *A sacrificial sheet. -Side note- I used a rotary cutter and board for this. STEP ONE: The bodice Look for the narrow hem of the sheet (The part of the sheet where your feet go. It will look like this when it is finished. STEP TWO: The length Measure yourself to the length that you would like your dress to be. Once you have made up your mind- cut it! STEP THREE: Everything is better with ruffles My way of making a decent ruffle is to multiply the length of the skirt by two. I sewed the pink strip on first. Don't forget your belt. So that is it.