
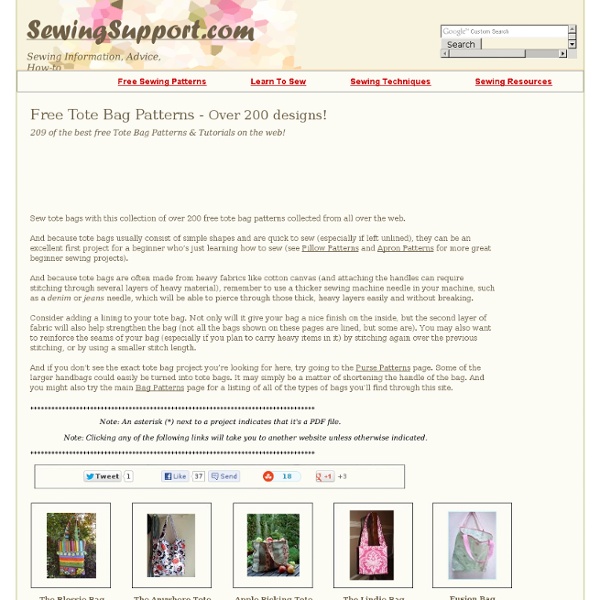
zart Art Easy Art Craft Activities | Primary School Activities | Textile Projects | Making Bags | activities for children/students/kids | Teacher Art Craft Lesson Plans | Australian School Teacher Education Resources Textile/Fabric Art Projects Materials: Calico Bag, Procion Dyes, Procion Painting Powder, Procion Manutex Liquid Note: Procion Painting Powder makes a liquid solution, which allows Procion Dyes to be painted or air-brushed onto natural fabrics. How to Paint with Procion Dyes on a Calico Bag: 1. 2. 3. • For full strength dye add two tablespoons of dye powder to 1 litre of Painting Powder solution, i.e. approx. one teaspoon of Dye Powder to 100ml of Painting Powder solution. • To thicken the dyes add Manutex Liquid. 1. 2. 3. 4. © Copyright Zart Art 2009. Key words: Art, craft, activity, activities, children, kids, school art activities, studio arts, gift idea, sewing, making your own bag, art ideas
Decorating your 'Quirky Kit' canvas bag If you've already received the latest Quirky Kit: 'What's the Story?' then you'll know all about the packaging 'surprise' that Leo kept teasing everyone about. If you haven't already got yours- you can see details of the kit here - but I'll let you in on the secret right now[don't tell Leo - OK? - OK! ;) All of the gorgeous papers and embellishments in the kit come packed inside a plain cream calico bag which you could use as a shopping bag, as storage for your stash, a tote to take along to your crops/crafting days; or as a protective case for one of your smaller albums. And you could simply take it out of the box and start using it without doing another thing to it - if you wanted to. So where are you going to begin decorating your calico bag? I recently customised a bag very similar to the one in my 'What's the Story?' The fabric [with the tree and buildings pattern] below came from the 'Hot Date' kit: Once your fabrics are in place began start adding your 'What's the Story?' Julie :)
How To Sew A Reversible Tote Bag With Adjustable Strap | craftpassion.com Having a reversible tote bag is like having 2 bags in one, now with the adjustable strap, you can have even more styling with it. Be it full length till your hip and sling across your chest, or shorten it till just below your armpit, inside out or outside in, style it with your mood and base on your outfit. I made this bag with one of my favorite fabrics. It is actually a lightweight upholstery material normally use as curtain or drape. The silver flower printing caught my eyes and I can’t go home without taking a few yards with me. Let’s get to the tutorial and pattern on how to sew this reversible tote bag with adjustable strap after this jump…. Difficulty: Intermediate SkillTime required: 2-4 hoursMaterial: 1. Download the pdf pattern. Fold fabric as indicate in the drawing, place and pin the tote pattern on top of the fabric. With right-side facing each other, align sewing lines, pin , sew side and base of the tote. Make a snip on the seam allowance 1″ below seam (b).
Tudor Rose Purse I made this bag out of some of the fabric my very nice grandmother gave me. The best part is that it converts into either a handbag or cross body bag. The best, best part is that this flower doesn't attract bugs handbag: cross body: Here's the genius behind it: The bag takes a LOT of material. The center is one piece of fabric. The bag was supposed to have a zipper AND a purse snap but that was redundant so I only used a snap: Overall, I feel accomplished. Lazy Girl | Blog » Simple Sewing Alterations You Can Make On Any Bag Project Lazies, Tracy Chapman, owner of Sew Thankful, had a great time creating this Miranda Day Bag for herself. Tracy made two versatile alterations to her Miranda that I want to share with you today. Miranda Day Bag pattern from Lazy Girl Designs (LGD123). Alteration: Applique Instead of Piecing After The Fact The first alteration Tracy made was the vertical black strip at the center of the bag in the picture above. Tracy simply appliqued strips of fabric over the vertical seams on the center of the front and back covers of the bag. I love Tracy’s creative addition to make the bag exactly what she wanted. Applique doesn’t always have to mean adding a flower or other design. Benefit: Don’t Unsew, Re-do, or Start Over The beauty of this alteration is that Tracy added these strips after all the piecing and quilting was done. Adding strips on top of the already sewn cover allowed Tracy to customize her project and move forward without losing any of the work she had already done. Enjoy!
The Keisha Bag Tutorial ***The Keisha Bag Tutorial*** Large Purse, Grocery Tote, Book Bag (It was late when I put this together. Let me know if I've made any mistakes, or if you have questions!) This pattern is a Copyright of Jana Nielson , Lola...again!!! 2008. For this project you will need: *1 yard Main fabric*1 yard Accent Fabric*fusible interfacing of your choice. From Main Fabric Cut:-Outside body-2@ 14"x 15"-Sides-2 @ 5"x 15"-Bag bottom-1@ 5"x 14"-Back pocket- 2@ 10"x 14"-Handles- 2@ 6"x 22"-tabs- 2 @ 2"x 5"-inside pocket-1 @ 6.5"x 10" From Accent fabric cut:-Lining body-2 @ 14"x 15"-Lining Sides- 2@ 5"x 15"-Lining bottom-1 @ 5"x 14"-Handle accent- 2@ 2.5"x 22"-Back pocket accent- 1@ 3"x 14"-Front ties- 2@ 6"x 22" From Fusible interfacing cut:-Purse body- 4 @ 14" x 15"-Purse side- 4 @ 5" x 15"-Purse Bottom- 2 @ 5"x 14" Before you begin sewing:-Cut out all pieces. We'll start with the back pocket. Stitch across top with a 1/2" seam allowance. Press sandwich open. Now set this piece aside. That is it!!
Pleated tote (beach bag) tutorial Before we went away, I decided that a new bag for the beach was a must – something big and roomy to hold books, magazines, sunscreen, hats, and all that other good stuff. So I made this big pleated tote, and it worked perfectly. This is a picture of it in action: And here’s a little tutorial in case you want to make one for yourself – doesn’t have to be for the beach either, it could come in handy for schlepping all kinds of things around town. Here’s what you need: two pieces of your main fabric cut in shape A four pieces of the top shape (B) in a contrasting fabric two pieces of a lining fabric in shape C one piece of the long rectangle for the strap in the contrasting fabric two pieces of the top shapes (B) and one of the strap in a medium weight interfacing 1) Along the longest (22″) edge of the main fabric pieces, mark along the top at the following intervals: 3″ – 4″ – 6″ – 7″ – 9″ – 10″ – 12″ – 13″ – 15″ – 16″ – 18″ – 19″ 13) And voila, this is what it should look like.
Runaround Bag Pattern In this pattern you’ll find:step-by-step instructions with full color photos and professional illustrations for making one Runaround Bagfull size print-at-home pattern piecestwo interior pocket optionsmagnetic snap optionincludes License to Sell!!! By purchasing this pattern, I also give you (the purchaser of this pattern) the rights to sell finished Runaround bags (on a home based scale). Additional information regarding the license to sell is included in the pattern. Materials needed: 3/4 yard exterior3/4 yard interior1/2" double fold bias tape (store bought or handmade)14mm magnetic snap (optional)8” zipper (optional)1 1/2 yards fusible woven interfacingthreadwater soluble pen Approx. This is an 14 page PDF pattern with full size print-at-home pattern pieces and includes detailed step-by-step instructions with professional illustrations and full color photographs.
The Olivia Bag Tutorial | Dixie Mango ** Don’t forget to enter this weeks giveaway! It ends Thursday night. Who doesn’t need a new bag… or 10!? Ready to make your own?? I used a canvas weight material for the outside and a quilting cotton weight for the inside. First you will need to create a pattern piece using the diagram below. So, this is what ya need: Using the pattern piece for the body, cut: 2 main fabric, 2 interior fabric, 2 fusible fleece, 2 duck cloth From the interior fabric, cut: 1 pocket piece 8″ x 4 1/2″, 1 strap piece 3 1/2″ x 41″ From the main fabric, cut: 1 pocket piece 8″ x 4 1/2″, 2 zipper pocket pieces 9″ x 5 1/2″, 1 strap piece 3 1/2″ x 41″ From medium weight fusible interfacing, cut: 1 piece 2 1/2″ x 9″ From the fusible fleece, cut: 1 strap piece 2 1/2″ x 41 7″ zipper (optional) magnetic snaps (optional) strap pieces are not in this picture Seam allowances are 1/2″ unless otherwise stated Sew down each long side and across the bottom. Trim the triangle leaving a 1/2″ seam. Do the same to the other corner. Yay!!
10 Free Tote Bag Patterns and Tutorials Totes make great handmade gifts. Here is a Tuesday Ten that shows a round-up of lovely totes. If you love to sew you might also like these free sewing tutorials right here on Skip to my Lou! Every tote needs a matching pouch. Pleated Zippered Pouch Lined Zippered Pouch 1. 2. 3. 4. 5. 6. 7. 8. 9. 10. How to make fabric storage baskets Here are 10 terrific ways to make fabric containers, baskets and buckets. These fabric storage basket tutorials will get you organized in style! 1. Fabric Storage Bin Tutorial 2. 3. 4. 5. 6.Fabric Scrap Baskets 7. 8. 9. 10.