
Inspired Stays: Sleeping with History in Bologna words by Silvia Donati Imagine sleeping in a 900-year-old tower in the heart of a medieval town in Italy. You can fulfill this fantasy in Bologna, where the Prendiparte Tower, one of the few remaining towers in town, has been converted into a bed & breakfast consisting of one multi-level suite. It sleeps up to four people but it is generally reserved by couples, especially to celebrate an anniversary or a birthday or simply to spend a romantic night in a magical building suffused with history. “It is a place that emphasizes feelings, that allows you to dream, to test the sensitivity of your partner, his or her attention to the peculiar, the historical, the beautiful,” says the tower's owner, Matteo Giovanardi, a jovial Bolognese man who inherited the tower in 1972 from his father, who had bought it both to make an investment and to fulfill his passion for historical buildings. The tower sits right in the centre of town, in the small Sant'Alò square.
64 Things Every Geek Should Know - laptoplogic.com The term ‘geek’, once used to label a circus freak, has morphed in meaning over the years. What was once an unusual profession transferred into a word indicating social awkwardness. As time has gone on, the word has yet again morphed to indicate a new type of individual: someone who is obsessive over one (or more) particular subjects, whether it be science, photography, electronics, computers, media, or any other field. A geek is one who isn’t satisfied knowing only the surface facts, but instead has a visceral desire to learn everything possible about a particular subject. A techie geek is usually one who knows a little about everything, and is thus the person family and friends turn to whenever they have a question. 1. USB – Universal Serial Bus GPU – Graphics Processing Unit CPU – Central Processing Unit SATA – Serial ATA HTML – Hyper-text Markup Language HTTP – Hypertext Transfer Protocol FTP – File Transfer Protocol P2P – Person to Person data sharing 2. 3. Here’s what one looks like: 4.
Tutorial~Ruffle shirt~ I have been a big fan of Down East Basics and Shade for a few years now. I wear Wonder tees from Down East all the time. They are comfortable, modest (hide everything I need to hide and when I bend over it doesn't flash people) and since it is not baggy, I wear it under a cardigan all the time. There is only thing I was hoping for... Then, one day I was at a Down East store, and going through their sales rack and found this... I couldn't believe my eyes, yes, I know, it was a $1!!! 1. 2. 3. 4. 5. 6. You can stop here. 7. 8. 9. 10. That is what I did today. Except, Rachel kept telling people, "There is an American flag hiding!"
Vendors « Piece by Amy Rosentha, picture by Babs of Eventography! Wicked Faire is known for many things, and among them is the size and assortment of its vendor offerings. We can say with some confidence that you could go to three or four other events and not see the range and breadth of vending available at Wicked Faire. Vending hours: Friday: 4pm-midnight Saturday: 11am-midnight Sunday: 11am- 6pmClick here to see the full list of vendors organized by location at the event! Agreeable Agony Toys for pleasure, and toys for pain… Agreeable Agony is a collective of crafters/artisans and kinksters from the east coast who make beautiful handmade floggers, candles, claws, pretty colored bondage rope, and other kinky toys, and have a passion for sex education! Akima Botanicals Akima Botanicals: Eco-friendly Bath & Body products from Mother Earth, hand-crafted in small batches with the finest quality ingredients. The Bee Folks Belethil Belethil brings fantasy to life. Big Circle Jewelry & Steampunk Emporium
The Featured Creature : Showcasing Unique and Unusual Wildlife Panty Tutorial: How to make your own drawers Well folks I think I have been talkin' about this tutorial for about a year, so I finally pulled it out. There are millions( ok maybe not millions, but a whole heck of a lot) of variations and add ons but I was trying to do the simplest one first. Materialsthreadsewing machine1 yd stretch elastic or fold over elasticpaper for pattern(paper bag or newspaper)scissorsold t shirt or any knit materialpair of underwear to cut and make pattern from Make your knickers !! 1. 2. Lie the pieces as flat and symmetrical as possible on your pattern paper(I Try to use the manufactured straight edge of my paper as the center fold line, This way I know that line is straight) Trace around your fabric piece leaving about 1/8-1/4 " edge. This pattern may take a bit of tweaking to get the way you like so use up and the oldest ugliest t-shirts on your first pair then you can make adjustments to your pattern from there 3. I cut the front panel from a large enough scrap of fabric I had in my cotton knit pile. 4.
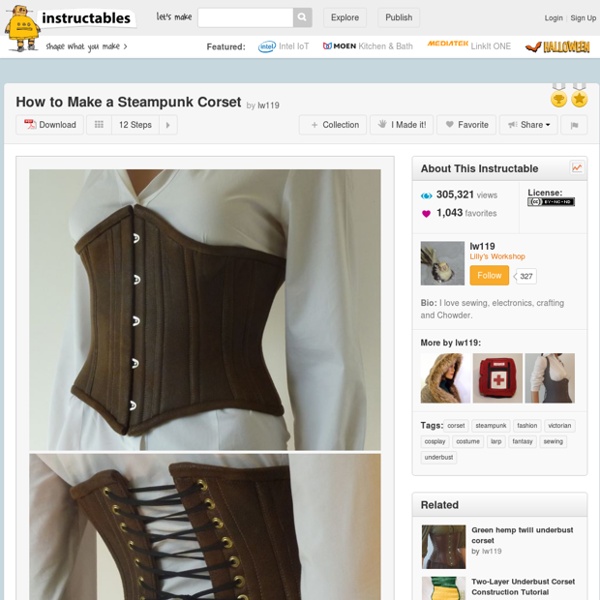
Steampunk Threads Steampunk fashion has a definite Victorian look and feel, often embellished with wildly creative bits of hardware or technology that might have been conceived by a Victorian mind. While wearing something off-the-rack might be the antithesis of the underlying thrust of dressing in Steampunk attire, the fact is the favored style of clothing is at heart Victorian, and not everyone has the skill or inclination to create these types of garments. This makes Steampunk Threads the ideal place to start creating your own unique wardrobe. Here, you will be able to find all of the basics – like lovely corsets and uber-feminine skirts and bodices for the ladies, or an elegant frock coat or period-inspired timepiece for the gents – that will provide a foundation upon which you can create your own personal style. We have also done some serious hunting to gather must-have accessories, like those ubiquitous eye-loupe goggles with copper frames and tinted lenses, and period timepieces and parasols.
Realistic Lateral Thinking Puzzles Lateral Thinking Puzzles, unlike most puzzles, are inexact. In a sense, they are a hybrid between puzzles and storytelling. In each puzzle, some clues to a scenario are given, but the clues don't tell the full story. Your job is to fill in the details and complete the story. Obviously, there is usually more than one answer to any given puzzle, but, in general, only one solution is truly satisfying. You can try solving these puzzles on your own -- that's certainly a legitimate way to go about this -- but usually you can have more fun if you involve other people. Warning: For some reason, these puzzles have a tendency to be rather morbid. The scenarios given on this page are realistic, if unlikely.
Stepping Thru Crazy: Mens Button-Up Refashion... into Ladies Tank! A few years ago, when the hubby and I lived in Florida (this was pre-kids, so make that 5-ish years...) I bought him a button-up shirt for his work. The deal was that he had to wear blue or white button-ups, so I thought, "Why not both at the same time?" It was actually really easy to do... let me try once again to tell you how I used a sewing machine... eh.... First things first, I chopped the sleeves off. Then I slipped the shirt on and pinned in the sides so that it fit. I took off the shirt, flipped it inside out and sewed up the sides where my pins were, trimmed off the excess, flipped it rightside out again, and tried it on to make sure it fit. Then I pinned the armholes the way I wanted them... carefully......and sewed them. Then I cut a piece of thick white ribbon, gathered one side/sleeve/armhole-front up kind of like a fan, and wrapped the ribbon around it. To secure it in place, I attached a button (cut from the excess shirt) with a needle and white thread. That's it!
Ladies' Guide to Steampunk Fashion, 2011 Ladies, what will you wear to the Steampunk Ball, September 17? If you've not put together a costume yet, no worries! There's plenty of time to compile a fantabulous ensemble from thrifted pieces, odds and ends, and a little Victorian inspiration. What Is Steampunk? Are There Steampunk Costuming "Rules?" There are no rules for what women can and can't wear - pants, corsets, no corsets, short skirts, striped stockings, no stockings, hats, no hats, you name it, there's nothing proper or improper. Steampunk sub-genres include: Adventurer/Safari Steampunk, Cowboy/Western Steampunk, Neo-Victorian Steampunk, Goth and Supernatural Steampunk, Steamship/Sea-Faring Steampunk, Air Pirates, Mad Scientists, Military Steampunk, and I'm sure there are many more, so don't feel limited! Check out these images below for some steamy ideas: Also try adding "steampunky" elements to your Victorian historical gowns. Online Vendors: Local Vendors (Reno area): Melting Pot World Emporium - 1049 S.
Origami Envelope If you’d like to make these cute little “Flap Lock” Origami Envelopes–all you’ll need is a piece of square paper…any size. I used Christmas scrapbook paper. 1. Fold the paper in half to form a triangle. Make sure your edges are even. 2. 3. fold the right corner about 1/3 of the way to the left. 4. 5. 6. 6. 7. 8. 9. And there you have it! Now scurry off and make a million of these–or at least 24 if you’re using them for the Family Advent Countdown Calendar. Not in the mood to fold your own? harness in fabric