
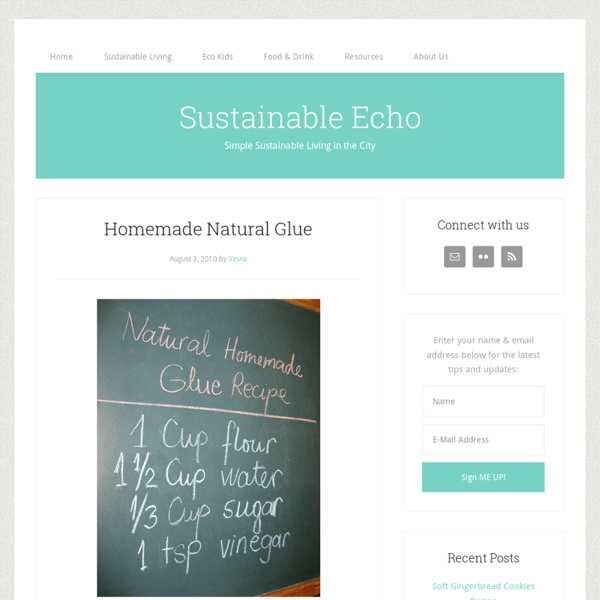
50 Things You Should Stop Buying & Start Making Published with permission from Natural Living Ideas You might be realizing that most of the products out there that aren’t made organically or naturally contain a lot of toxic chemicals. Not only that, many of these products can be harmful to our environment in a number of ways. Making things yourself not only saves you money and helps the environment, but it lets you know where your products are coming from and exactly what’s in it. You can make anything from food items to personal care and cleaning products all in very simple ways. Remember: whenever you can, use organic foods and ingredients in recipes. 50 Things You Can Start Making Homemade Ketchup – This ketchup won’t break the bank, tastes better than the real deal and contains no added sugar – so it’s nutritionally good for the whole family. Homemade Mayonnaise – This is a great recipe for any mayonnaise lover out there wanting to make their own at home, it’s simple and easy and tastes better than the store bought versions. Google+
Natural air fresheners: 9 nontoxic options that really work Chemical air fresheners are not just a problem for people with chemical sensitivities; they are a problem for everyone. Inhaling petro-chemicals, dyes, and perfumes can cause long-term health problems. Time magazine reported that many chemical air fresheners contain phthalates, a type of chemical that causes cancer. Why willingly expose yourself to cancer-causing chemicals when you can freshen your air naturally? When cleaning your house, opening your windows, and sprinkling baking soda isn't enough, try these nontoxic options. Aura Cacia grapefruit oil I spent way too much time sniffing this essential oil when I bought it. Aura Cacia olive candle lamp I avoided buying an essential oil candle diffuser for a long time, because most of them look too hippie for my taste. JR Watkins Aloe and Green Tea Room Spray Have you ever noticed that chemical bathroom sprays actually make the bathroom smell worse than the original offending odor? Clean Air Room Spray Zeofresh Carpet Deodorizer
Instead Of Throwing Empty Bottles Away, She Transforms Them Into Something I NEED In My Home It seems that day after day, the price of most things is going up. Sometimes pinching your pennies is wise, especially when it comes to small decorations. With so much knowledge at our fingertips, making our own beautiful creations is extremely easy. Here are a bunch of ideas that not only save money, but also re-use some bottles you may have laying around. 1. Start off by cleaning the bottles with soap and warm water. Next, roll up the photos that you want "framed." Add some decorations and finishing touches (the sky is the limit with these) and you're done! 3. These are certainly not limited to Halloween, so get creative and decorate them however you would like for any occasion.
Non-Toxic Bug Repellent Recipe with Coconut Oil NOTE: A few weeks back, my recipe for bug repellent was featured on the CoconutOil.com website. Since there are still some high days of summer left and the bugs are in full swing, I wanted to share my recipe for bug repellent on here too! by Jessica Espinoza CoconutOil.com Looking for an all-natural, non-toxic insect repellent that doesn’t contain the chemicals (like DEET) that most of the commercial brands do? Catnip Cedarwood Cinnamon Citronella Clove Eucalyptus Geranium Lavender Lemongrass Patchouli Peppermint Rosemary Tea Tree Note: Some citrus oils, like lemon, also have strong bug repellent properties, but are also considered “phototoxic”, meaning that the skin could damage or burn easily if those oils are applied to the skin and then exposed to any source of ultraviolet (UV) light. Natural bug repellents are not going to be 100% bugproof, nor are they going to last all day. Bug Balm Recipe This recipe makes approximately 4oz (1/2 cup) of bug balm. Ingredients: 1/4 cup coconut oil
17 Incredibly Useful DIY Projects With PVC Pipes - Top Inspirations PVC pipes are not only for waterways, you can also use them to make some incredibly useful DIY projects. Some of these PVC pipe projects include a PVC pipe sunburst mirror, wine storage, toothbrush holders, flower vases, wall decorative detail, etc. These DIY ideas will help you stay organized and decorate your home in a new and unique way. 1. Perfect patio table centerpiece you can use as a serving station, planter and flower vase to decorate with flowers. 2. Use PVC pipes to make a colorful budget friendly desk organizer. 3. Very creative and a nice space saving shoe storage idea. 4. Use the largest sized PVC pipes and cut them. 5. This is an elegant and beautiful wall decor and an incredibly creative sunburst mirror from PVC pipes. 6. Make a worthy wall artwork and a very beautiful, decorative detail for your home. 7. Make adorable PVC pipe vases that are a perfect centerpiece for your dining table. 8. This PVC pipe partition looks super cool and unique in the bathroom. 9. 10. 11. 12.
45 Uses For Lemons That Will Blow Your Socks Off These 45 health benefits and ways to use lemons will definitely motivate you to keep lemons on hand at all times and maybe even work lemon water into your diet. Credit: Au Feminin Most people are familiar with the traditional uses for lemons to soothe sore throats and add some citrus flavor to our foods. However, the diversity of applications for lemons far exceeds general knowledge and once you read the following list, you’ll likely want to stock at least a few lemons in your kitchen 24/7. 1. Freshen the Fridge Remove refrigerator odors with ease. 2. 3. 4. Credit: Organic Facts 5. 6. 7. 8. 9. 10. 11. 12. 13. 14. 15. 16. Credit: Galore Mag 17. 18. 19. 20. 21. 22. 23. 24. 25. 26. 27. Credit: Healthy Food Spirit 28. 29. 30. 31. 32. 33. 34. 35. 36. 37. 38. 39. Credit: Live Science 40. 41. 42. 43. 44. 45. * If you do consume lemon peel, stick to organic lemons to reduce your pesticide exposure. John Summerly is nutritionist, herbologist, and homeopathic practitioner. Credits: preventdisease.com
vanilla scented soy candles I don't consider myself the crafty type, but attempting to make my own candles was a project I decided to take on for my monthly clean living column in clean eating magazine. It actually turned out to be pretty easy and you can make 6 candles for $5 each! what you need: glue gun 6 pre-tabbed naturally coated cotton wicks 6 8 oz jars or containers 6 clothespins double boiler or a pot and a heat safe bowl pouring pitcher spatula scissors ingredients: 3 lbs soy wax flakes 1 1/2 qt melted) 3 tbsp vanilla essential oil ** if you can't find pre-tabbed wicks you can by the cotton wick and cut it down to size. Glue the wicks to the bottom centre of each jar.
Use baking soda for easy-to-peel hard-boiled eggs Sometimes, I’m a little slow to pick up on cause and effect. Let me give you an example. My husband’s family loves deviled eggs, and for years, I’ve been making them by the dozens for different events. It never occurred to me that the problem was the type of eggs I was buying. Fine Cooking says this is because the albumen, or the egg white, will stick to the shell of a fresher egg, but as the egg ages, it doesn’t stick as much to the shell. I hadn’t heard this until someone mentioned it on Pinterest, but once I read about it, I decided to give it a try. When I went to peel them, the one that had been in the water with the baking soda peeled with no problem. I was pleased with the results of my experiment, and I’ll be adding baking soda to the water next time I boil eggs. Do you add baking soda to the water of boiled eggs to help them peel easily, or do you have another trick to share?
The Best DIY YouTube Channels to Turn You Into a Fix-It Master Natural Cleaning Recipes Why spend a fortune on cleaning products that introduce toxic chemicals into your living space? You can use simple ingredients, such as baking soda, lemons, and vinegar to make effective cleaners that work in every room of your house. Besides being a snap to make, homemade cleaners cost mere pennies! Common Natural Cleaners Combined in various ways, these common household items work just as well as the most expensive and noxious cleaners on the market—and they don’t leave your living space smelling like a freshly sanitized hospital. Baking Soda – The cleaning powers of baking soda reach far beyond it’s role as a fridge deodorizer…Baking soda works as a non-abrasive scouring cleaner on countertops and ovens, and in bathtubs and sinks. Natural Cleaning Recipes Here are a few quick and simple recipes to help you on your way to a spick-and-span, non-toxic living space. Always perform a test for allergies before using new ingredients or essential oils. Post-Cleaning Hand Soak
Project Videos If you appreciate the free content of this site, please thank our sponsors. If you appreciate the free content of this site, please thank our sponsors. Homemade Shaving Cream – Silky & Natural 8K+ This recipe/post has been a long time coming. Feels like forever since I wrote down the note on my idea board "Homemade Shave Cream". I think for some reason I was thinking it would be difficult to make or require something I didn't have on hand. Turns out that neither of those things were true and I'm glad I finally took the plunge! Easy Homemade Shaving Cream What You Need: 1/3 c. The ingredients! Just like with coconut oil, with Shea Butter you want to pick a good unrefined, unprocessed kind. Start by melting the shea butter and the coconut oil on a low heat on the stove top. Once it's melted, pour into a container and add in the olive oil and stir. Once it's solid again you can take it out of the fridge and put it in a bowl you can whip it in. Whip it! Isn't it beautiful? Use this homemade shaving cream the same as you would any store bought shave cream! Want more DIY projects and natural health and beauty make-your-own ideas? Enter your email below to get our weekly newsletter!