
How To Make Digital Photos Look Like Lomo Photography A Post By: Darren Rowse The following tip on getting digital images to look like Lomo Images was submitted by DPS reader – Frank Lazaro. You can see his photography at his Flickr page and see some of his Lomo shots here NB: most of the shots in this post can be enlarged by clicking them. update: once you’ve read this tutorial and had an experiment with the technique head to our Forum to share some of your results. From the first time I saw a photo that looked like this, I wanted to shoot one of my own. Low and behold I went out and bought 2 of these babies. I searched and searched and after trying several different Photoshop methods, I finally came up with my own using a mix of different techniques. Get Free Weekly Digital Camera Tips via Email Here is my step by step on how I take a digital photo and make it Lomoified. Getting Started – Creating a Vignette Once you have set the feather (shown above) and have drawn the circle, you must invert the selection. Now you have a vignette.
Understanding Digital Camera Sensors A digital camera uses an array of millions of tiny light cavities or "photosites" to record an image. When you press your camera's shutter button and the exposure begins, each of these is uncovered to collect and store photons. Once the exposure finishes, the camera closes each of these photosites, and then tries to assess how many photons fell into each. Cavity Array Light Cavities However, the above illustration would only create grayscale images, since these cavities are unable to distinguish how much they have of each color. Color Filter Array Photosites with Color Filters A Bayer array consists of alternating rows of red-green and green-blue filters. Original Scene(shown at 200%) What Your Camera Sees(through a Bayer array) Note: Not all digital cameras use a Bayer array, however this is by far the most common setup. Bayer "demosaicing" is the process of translating this Bayer array of primary colors into a final image which contains full color information at each pixel.
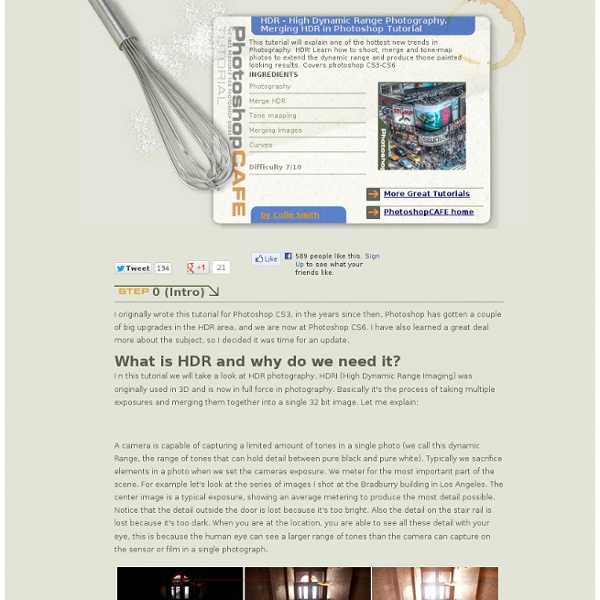
30 Amazing Adobe Photoshop CS6 Tutorials to improve your skills Advertisement Adobe Photoshop CS6 comes with amazing features and new interface changes. Photoshop is really stunning for graphic designers looking to create illustrations, web layouts, icons, digital artwork, photo effects etc. Therefore, no one can master on their skills without practicing of Photoshop tutorials. Keeping the tradition alive of updating you guys with latest trends of Photoshop tutorials, I’ve collected most trendy Photoshop tutorials of CS6. How to Transform Movie Style Photo Effect in Photoshop Create a Magma Hot Text Effect in Photoshop Create a Fantasy City Using Architectural Photographs Create a Metallic 3D Logo With Photoshop and Filter Forge Draw an Electric Guitar in Photoshop Create Guitar String Typography Apply a Great Water Effect to a Horse How to Create Decorated Cookie in Photoshop Create a Nice Harry Potter’s Text Effect in Photoshop Apply a Nice Watercolour Effect on Text Beautiful Matte Painting in a Simple Way Coloring Process for a Female General
35 Excellent Photoshop Textures and Backgrounds Tutorials Textures can be extremely useful resources for web and graphic designers. They can be used to create backgrounds, add grit and texture to any element within a design, and they can also be used to create various photo effects. Photoshop allows for all kinds of possibilities with textures. Here we’ll featured 35 different tutorials that teach various aspects of created and working with textures. Enhancing Your Portraits with Textures Textures can also be used to give a different look and feel to your photos, and it’s easy to implement. 5 Simple Tricks to Enhance Your Textures in Photoshop This tutorial shows how you can get the most out of texture photographs. Ten Steps to Bokeh Heaven Learn how to add a bokeh texture to a photo for an awesome effect. Creating an Embedded Concrete Effect Using Only Layer Styles Here you’ll learn how to create this beautiful textured effect. How to Make an Awesome Grungy Paper Texture from Scratch Unique Textures without Using Brushes Texturing of Old Paper
Photoshop Frenzy - Made for faster learning! » Blog Archive » Dramatic Gritty Effect Posted in Photo Effects on December 6th, 2007 with 77 responses . In this tutorial we’re going to show you how to add a dramatic, gritty, bronzed effect to your images. We’ll convert our subject image as follows: 1. Open our project image and immediately duplicate the background layer by right clicking the background layer and selecting ‘Duplicate Layer’. 2. 3. 4. 5. Our effect looks like this now: 6. And voila…our dramatic gritty effect is complete! How to burn MP3s to a CD with folders on iTunes Hello, if you liked this post, please consider subscribing my RSS news feed. Thanks. Whenever I needed to make a mix CD with some of my MP3s, I would always get pissed off because iTunes always puts the files directly on the root folder of the CD and ignores the folder structure that exists in the original music folder. This is very annoying especially because some MP3 players (like the ones built-in on car stereos) need that folder structure to organize the musics by artists or albums. But now I discovered a small trick on iTunes that allows you to burn an MP3 CD maintaining all the original folder structure. All you have to do is to build a playlist with the songs you want to burn (as you would normally do on iTunes) and then in the top bar in the musics list, click the "Album" tab until this one turns into "Album by Artist". And that's it. You can also use a year-based folder structure on the MP3 CD. Tip from Internet Duct Tape
Ultimate Collection of Free Buttons in PSD Format With the several websites emerging in the net, it is often a struggle to find high quality resources that will make your websites stand out and be completely unique. Although, it pays to create your own designs to cater to this need, it is often impractical to do so because of time and resources constraints. Some designers, then, turns to free resources as offered by numerous websites… In this next post, we have came up with pretty useful resources that you can use for your designs or websites… This Ultimate Collection of Free Buttons in PSD Format is a compilation of high quality buttons that you may find useful and unique. You may want to take a look at the following related articles: • 30+ Free High Quality Gadget PSD Files • 40+ Best Photoshop Tutorials for Creating Buttons and Badges Buttons.012 : 5 Black Buttons Download Source Free Button Pack Download Source Glossy Button .PSD File Download Source Button Docks Download Source A Glassy Button Download Source Color Diamonds Download Source Ads
50 Incredible Photography Techniques and Tutorials Advertisement Over the recent months we’ve been presenting various showcases of photography – while many readers hated the showcases, most readers found them inspirational and perfect for a lousy workday’s morning. However, what we should have done in the inspirational posts is not just provide you with some inspiration for your work, but also present useful photographic techniques which can help you to achieve optimal pictures for your designs. And as requested by many of you, now it’s time to correct our mistake. In this post we present useful photographic techniques, tutorials and resources for various kinds of photography. Among other things, we cover high-speed photography, tilt-shift photography, black and white photography, motion blur, infrared, night, smoke photography, macro photography, HDR, panoramic photography, RAW processing and others. 1. Quick guide to Simple High Speed Macro PhotographyThis is a quick tutorial to get you started with high speed photography. 2. 3. 4. 5.
Selective Sepia | Photo Effects Selective SepiaReviewed by Denny Tang on Sep 9Rating: Preview of Final Results Selective Sepia Photoshop Tutorial Step 1: Open an image into Photoshop Open the File menu and select Open. Browse for the photo you would like to add a selective sepia effect to and click OK. Step 2: Create a Hue/Saturation adjustment layer In the Layers pallet, click on the New Adjustment Layer icon and select Hue/Saturation. A Hue/Saturation window should appear. A) Select by color Selecting the sepia areas based on color will give the most natural effect. B) Select manually Manually selecting the sepia toned areas will let you specify precisely the area that you would like toned. Activate the layer mask by clicking on the layer mask thumbnail in the Layers pallet. Step 3: Add a Black & White adjustment layer In the Layers pallet, click on the New Adjustment Layer icon and select Black & White. A Black & White (or Hue/Saturation if you’re using Photoshop CS2 or older) adjustment layer should appear. Final Results
How to Make a Shoe Shine Box Here at the Art of Manliness, we’ve talked a few times about the manly ritual of a good shoe shine over the years. For awhile now, I’ve kept my own shoe shine supplies in a box I got for Christmas a few years back. It’s a pretty nice box, but I’ve always had an itch to make one with my own two hands. It’s a simple design. This is an incredibly easy and inexpensive project. The Design Here’s the modified Popular Mechanics design that I used to make my shoe shine box: Click here for larger image. Thanks to AoM reader Robert Heffern for providing this SolidWorks image. Materials & Tools Needed Materials (1) 3/4″ x 8″ x 8′ board (I used a cedar board I bought at Home Depot for $11. Tools Saw (I used my table saw. Measure and Cut Wood Here’s the board that I’m going to cut my pieces from. I measured and marked all my cuts at once. Here are the measurements you’ll need: Cut your wood with your saw. All the pieces for the box Mark Arcs and Bore Holes Mark where your bore holes will go for your dowels.