background preloader

OutsaPop Trashion recycled style DIY fashion eco sustainable refashion blog

OutsaPop Trashion recycled style DIY fashion eco sustainable refashion blog

paper bird painting After yesterday’s comments on how unique you thought my craft ideas are, I was a bit hesitant to post this! Not so unique, but easy enough for anyone to do! Last week I gave you a glimpse of a little craft project I had in the works. I wasn’t going to post pictures because this is part of a surprise for a dear friend, but she needs a little pick me up right now. I was inspired by this DwellStudio painting (thanks Bryn!) Step 1: Draw the basic design on the canvas (I messed with this picture in Photoshop to make the pencil marks show up…it isn’t really a big gray bubble) Step 2: Cut out random scrapbooking papers for leaves and the bird (I used Amy Butler paper) Step 3: Glue down the paper. Step 4: When gluing the paper down some of my paper bled, so I lightly went over the white areas of the canvas with white craft paint. Step 5: Paint on your branches Step 6: Seal the canvas. In the girls’ room these will not be hanging this close together…. Handful.

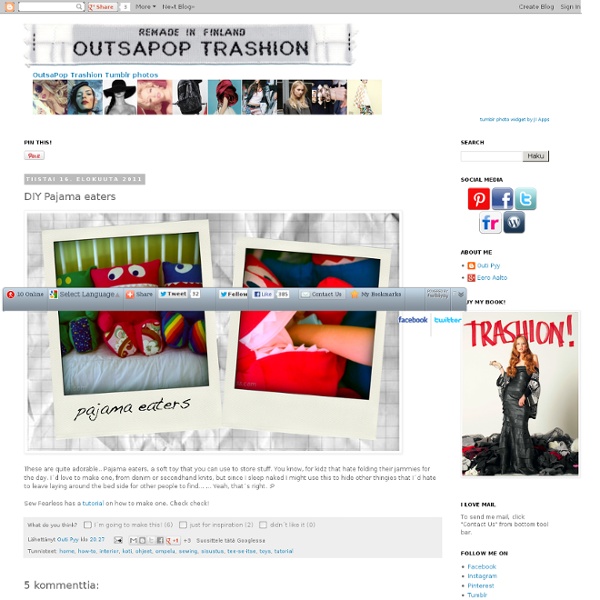
DIY Glow Jars Tutorial Posted on October 19, 2011 by Christina Aren’t these glow jars sublime? They take about two minutes to make and cost only 20 cents a piece. How’s that for an enticing DIY wedding project? These would look amazing at an evening outdoor wedding. If you like this project, check out my DIY ‘glitterarium‘. DIY Glow Jars Tutorial For each glow jar you will need: a jartwo Glow Sticksscissorsrubber glovessafety glasses Disclaimer: This is a project meant to be done by an adult – not a child! Purchase Glow Sticks (I got a pack of 15 for $1.50) and dig a jar out of your cupboard. Grab two glow sticks and cut at one end.

How to create a sunken trampoline - little green fingers - StumbleUpon I think a sunken trampoline has to be my favourite family garden feature. It's a simple enough idea but solves so many headaches. It's safer, less intrusive and popular with everyone. I have sunken a couple myself. Well, to be more accurate, I've sunken the same one twice (note to self - decide where to put the thing and don't change your mind after 12 months). And I have also designed several gardens with sunken trampolines, so I now consider myself, if not an expert, certainly au fait with the ups and downs (no pun intended). So what do you do...? First, measure up - I would say buy a relatively large trampoline (ours is 14') but make sure that it won't dominate the garden. And that's it, except to say, sunken trampolines might be safer, but not so safe that you shouldn't supervise very carefully. Oh and if you want to see a couple of films about putting in sunken trampoines and how to maintain them, check these out below:

Planting A Pineapple Did y’all know that you can take this and turn it into… This? And that this will eventually produce… This? Yes, I’m talking about turning your average, ordinary grocery store pineapple into a tropical showpiece within your home. A plant that is not only impressive but will WOW! Planting a Pineapple 1. 2. 3. In 24 months (sounds better than two years) it will look like this. You will have an actual, large, utterly delicious pineapple in 24-36 months. The thought of growing my own pineapple always makes me smile and giggle just a little bit. Now what am I supposed to do with all of this leftover pineapple? I see something sweet coming soon. While you’re waiting for me to make something yummy with the leftovers, go ahead and plant a pineapple. Be adventurous plant a pineapple. Hugs, Tickled Red *Please bear in mind that I am not a hortoculturist. Tagged as: Gardening, Pineapple, Tropical Fruit

Song Lyric Wall Art / D.I.Y. Project - A Beautiful Mess - StumbleUpon A couple weeks ago, I found a paint-by-number at an unbeatable price. I can't pass these things up even though I already owned this particular design. I thought that I could maybe use it to make a fun D.I.Y., but my new rule is that all thrifts that I purchase with the intent of restyling need to get done right away. I have way too many half finished projects in my life. Here's how I did it... I displayed our piece in our bedroom, on Jeremy's side of the bed. A couple weeks ago, I found a paint-by-number at an unbeatable price.

DIY Project: Repurposing your maps! Good Morning darlings...Hope you have a fabulous day today!! With the use of GPS there is really not much use to all those maps we collected through out time...but somehow I have a hard time throwing them away. How about this lovely way of repurposing them?? I think they are super cute for a corridor to the kids room, or a small side wall!! Can you think of any other great way of repurposing your maps?? {Image via 1. Bird and Text Collage Wall Art | FaveCrafts.com - StumbleUpon [ Close Privacy Policy ] Privacy Policy / Your California Privacy Rights Revised and posted as of March 4, 2013 Prime Publishing, LLC ("Company," "we" or "us") reserves the right to revise this Privacy Policy at any time simply by posting such revision, so we encourage you to review it periodically. In order to track any changes to this Privacy Policy, we will include a historical reference at the top of this document. This Privacy Policy will tell you, among other things: Your California privacy rights. ACKNOWLEDGEMENT/YOUR AGREEMENT Company websites are not intended for use by individuals under the age of 18 or those who are not legal residents of the United States. HOW DO WE COLLECT INFORMATION AND WHAT INFORMATION DO WE COLLECT? Distribution Partners Website operators that license our ad serving technology pass information to us so that we may serve advertisements to you. Website Registration Forms We collect information about you when you register on one of our websites.

guest blogger - Sasha from The Guilded Bee: Here's another DIY project from our sweet friend, Sasha - from the The Gilded Bee. Be sure to check out her awesome shop full of handmade packaging lovelies. Thanks for being here with us Sasha! I'm delighted to share my book tutorial with you today: Supplies you’ll need to make this project: • One—8.5 x 5.5 sheet of cardstock • One---1/2 x 3 inch piece of cardstock or paper • Two---2 5/8 x 3 1/8 inch pieces of cardboard, chipboard or matboard (not corrugated) • Hot glue gun and glue sticks • 25---3 x 5 inch ruled or blank index cards • Two---3 x 5 inch sheets cardstock • 2 rubber bands • Pencil • ¼ inch wide Ribbon: One-6 inch piece, plus two-1 inch pieces To make the page block: * 1. * 2. * 3. * 4. * 5. * 6. To make the cover: * 1. Make a little mark at the center of each side of your paper (4.25 inches on center). On each side of those center marks, draw three lines paralleling each other (6 lines total): 5/16”, 5/8”, 13/16” inch from the center mark. * 3. * 4. * 5. * 6. * 8. * 9. * 10.

Paper Flower Key Holder / Mark Montano | Fiskars - StumbleUpon Difficulty Rating: Beginner Tags If you need a quick 'just because' gift for someone, this is it! It’s simple to make, couldn’t be less expensive and we can all use one. I for one am always losing my keys and this, by far, is the easiest way for me to keep track of them. Here’s how: 1. 2. 3. 4. 5. 6. 7. 8. 9. 10. Supply List Wire hanger Needle nose pliers with built in wire cutter (most are made like this) Hot glue gun and glue sticks Stapler Book pages Fiskars Scissors and Pinking Shears Krylon Clear CoatSmall piece of cardboard wednes-diy | Free People Clothing Boutique Blog UPDATE: This post originally ran on March 23 2011, but with summer winding down we wanted to bring it back up for some late summer inspiration! a fellow fp girl sent this to me a couple weeks back and i’ve been thinking about it ever since! i can think of a million reasons why these would be awesome… as apartment décor, as outdoor party décor, and – wouldn’t they be the best thing EVER for camping in general or at a festival? just let them sit in the sun all day, and they’ll last all night! you can buy a sun jar here, but you can make your own for much cheaper! what you need: a mason jar with a clear glass lid like this one from ikea, a solar garden light like the ones pictured above, which i found here, adhesive and glass frosting spray. start by spraying the inside of the jar with the frosting spray – this will help diffuse the light and give it a warm glow. don’t spray the lid though! last image. Be sure to check out our new DIY Projects category for more DIY Inspiration!

Giant Paper Rose Flower | Green Wedding Shoes Wedding Blog | Wedding... If you loved the beautiful DIY wedding this morning and Nata’s gorgeous paper flower bouquets, you are in luck as Nata is sharing how she crafted them with us! She was inspired by a template created by Morgan Levine on Martha Stewart (as was I in the flowers I created for this styled shoot). I just love that this basic idea has inspired different brides to create their own version of giant paper flowers – you might remember these equally awesome giant paper flowers from this wedding I shared last year. :) Thanks so much Nata for sharing how you created your giant pink paper rose + special thanks to Studio Castillero for the photos of the DIY + her wedding! Materials (to make one giant rose) Step 1: Cut the petals Cut 5-6 teardrop petals and 15-6 heart-shaped petals from the petal colored crepe paper. IMPORTANT: Crepe paper is directional so it matters which way you’re cutting the paper. Repeat until all of your petals are cut Step 2: Cut the leaves + calyx Step 3: Make the rose stem

Related: