
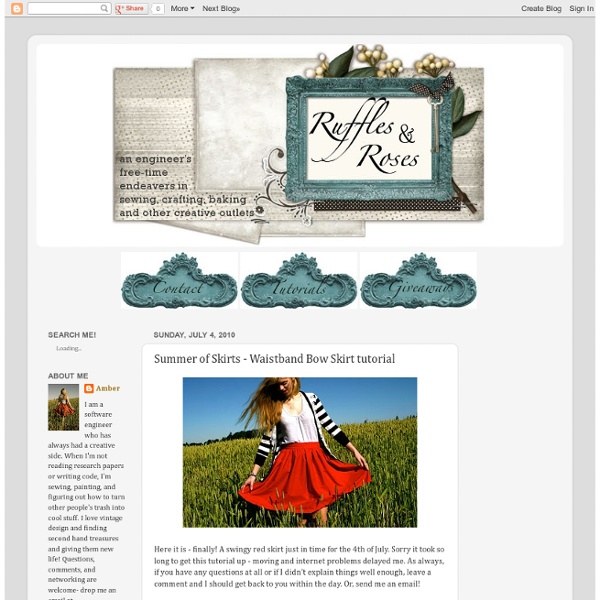
Summer of Skirts - Elastic A-Line Tutorial This skirt is great, because it is almost as easy as the 20 minute skirt but is more flattering and versatile. I plan on making many more of these! It's also worth noting that my current giveaway (enter to win if you haven't already!) dress features this type of skirt. What you need:-elastic - enough to fit around your waist; i prefer 3/4 inch for skirts-1 yard of fabric if you normally wear a small/medium, maybe a little more if you are large and up- a yardstick or newspaper or something with a long straight edge Step 1: Cut along the fold of your fabric, so you have two pieces with the cut fold on one end and the selvage on the other. Step 2: Now you have a little bit of math to do. Step 4: Then, put your yardstick/newspaper/whatever at each of these marks, so you have a diagonal across the fabric. Step 5: You should know have four pieces of fabric. Step 6: This part is optional, but it will make hemming a whole lot easier. Step 7: Sew the skirt panels together.
Watermark Tee by Sweet Verbana Hello U-Create readers! I am so excited to be guest posting here today. It just so happens to be my first guest post and I'm still a little shocked that it's here at Ucreate, one of my favorite blogs! A little bit about me.. I'm from a little town called Keller, Texas. I'm a junior at Texas A&M University (whoop!). I'm working on my education degree and expect to be an elementary school teacher in just two short years. When I'm not busy studying for classes, I love to sew. I just started blogging in May and have already met all kinds of wonderful women, I hope you'll stop by and say hi too! Watermark Tee Tutorial What I love about this project is that it's completely customizable. Materials: Elmer's Blue Gel Glue (it must be the blue gel, white won't work) Fabric Dye (RIT is my tried and true brand) A white cotton Tee, Tank, Dress etc. Tutorial: If you're unfamiliar with Batiking, it's a method of dyeing fabric in which you create a design with a dye- resist. Step 1: Prepare Step 2: Design
the Circle Skirt I used to think that a gathered skirt was the easiest skirt to sew. But I may have changed my tune. A circle skirt is possibly even easier!….especially if you leave the elastic exposed. If you’ve ever made a poodle skirt before, it’s the same concept. Once you’ve created your pattern, you can whip up 4 skirts in an hour! Okay, let’s get started. What you need (for a little girl’s skirt): * about 1 yard of fabric* appx 3/4 yard of 2-inch wide elastic FABRICS to use:* Rayon* Polyester Charmuese* Simple Cotton* Thin Corduroy* Lightweight WoolMany fabrics will work for this project. ELASTIC:Wide elastic from fabric stores typically comes 2 inches or 3 inches wide; white or black in color. If you’d like to add a colorful twist to your skirt, check out our easy Tutorial for Dyeing Elastic HERE. Measure around your waist. PATTERN:This requires a bit of geometry but don’t worry, we’ll break it down for you. You need to figure out the radius so you can easily draw a circle. draw another 1/4 circle:
{tutorial: how to sew a zippered pouch} Two years ago I was learning how to sew in a zipper to make a pouch and I was failing! failing! failing! And that number is not an exaggeration. Anyways :] I thought it would be fun {and helpful} to do a tutorial post on installing a zipper, which coincidentally includes how to sew a zipped pouch. Shall we get started? MATERIALS: * front & back outside pieces of fabric {mine are 9″ x 5″} * front & back inside pieces of fabric {9″ x 5″} * two pieces of interfacing or felt {9″ x 5″} * a 10″ zipper * sewing machine * coordinating thread, to match your outside fabric * scissors * optional: embellishment for your zippered pouch INSTRUCTIONS: The first step is to lay flat the front outside piece of fabric {with a pouch, you’ll have front & back outside pieces and front & back inside pieces}. *Yes, it’s OK to sew over your zipper {sew slowly so you don’t break your needle} and to cut your zipper if it needs to be shortened. When you’re finished sewing the zipper in it will look like this ~
elm street life: DIY: Bow clutch sewing tutorial. And fiiiinally... the tutorial you've been waiting for. This is my first real sewing tutorial - which scares me a bit, because I've never actually taken a sewing class, so I don't know all the terminology. What I do know is that I've learned to sew lots of things by reading tutorials, so hopefully I can make this simple enough that even you beginners can feel confident making a bag. And yes, a bag with a zipper! It can be done, I promise.There are plenty of photos, so hopefully that will help. **Also, please note except where I say, "Sew close to the edge," I am using a 1/2" seam allowance throughout. Ok, let's get started! Supplies you'll need: 1/2 yard exterior fabric* 1/4 yard interior fabric (I recommend a quilting cotton) 9" zipper that matches your exterior fabric 1/4 yard #808 Pellon Craft Fuse interfacing Sewing thread that matches your exterior fabric Sewing machine Scissors Pins Iron & ironing board *I recommend a medium to heavier weight cotton for this. 1. 2. 3. 4. 5. 6. 7.
SEW Hip! Slouchy Slippers...completed! - Sewing Daisies SEW Hip! Slouchy Slippers (issue 20) have been made... The SEW Hip! pattern is advertised as a beginner's pattern, and I wholeheartedly agree. The Slouchy Slippers are incredibly easy to make. If you are short on Christmas gift ideas and you fancy 'making' your loved ones a present, then this pattern is for you. Being Spring 'down under' I adapted the pattern a little... Instead of using fleece on the inside of my Slouchy's, I went for Osnaburgh Cotton; it's lightweight and works well with every colour imaginable. plus I have loads of it ... Of course, being Spring doesn't alter the fact that I need non-slip fabric for the underside of my slippers. Non-slip fabric is something I have never had to buy before... and judging by the look on the face of the assistant at my local 'you want it, we've got it' store, neither has anyone else in Sydney. It's interesting how much a blank look can convey. Not being one to give up at the first hurdle, I scuttled off to find something I could use instead. Hmmm...
pretty fabric bin organization Here are 10 terrific ways to make fabric containers, baskets and buckets. These fabric storage basket tutorials will get you organized in style! 1. Fabric Storage Bin Tutorial 2. 3. 4. 5. 6.Fabric Scrap Baskets 7. 8. 9. 10. {5 Maxi Skirt Tutorials i would ♥ to sew} Maxi skirts, do you remember them back in the old days? Well I do because they were my favorite fashion item to wear in my teens i was obsessed with them, i had them in all colour ranges some were plain other were printed (told you obsessed) I wish that i had kept them because…. like with most fashion items they always tend to make a come back and they are now everywhere Want to know what i did last night….well i didnt get to sleep until 3am this morning because i was searching for tutorials on how you can make your own {I know, i know…you can thank me later} hee hee Lets get started then shall we? I feel in love with this skirt tutorial from {Lorenna Buck} and cant wait to make one or two! Click HERE for PDF Pattern Can you imagine making a skirt in an hour? Another skirt i loved is this jersey skirt by {Megan Nielsen} Couldnt resist not sharing sharing this tiered maxi skirt tutorial by {Sew Much Ado} And that sums it up my lovelies my five favorite skirts that i would LOVE to sew.. comments
Valaan villapaita: Tee se itse -valas You can find the tutorial in English here. ETA in February 2012: Hi! Nice of you to stop by! There will eventually be an English translation of this tutorial, so please have some patience:) In the meanwhile, I'm sorry to put up this disclaimer: It's OK to link back to this post, but it is not OK to copy all the photos and the tutorial, or translate it to another another language. Ja mainittakoon sama myös suomeksi: valaitten ompelu omaan käyttöön tai lahjaksi on OK, mutta kaupallinen käyttö ja kopiointi on kielletty. Denimvalaan ohjeesta tuli useampikin kysely, mikä ilahdutti kovin ja kauhistutti vielä enemmän – en nimittäin tule kovin hyvin juttuun ohjeitten kanssa. Valaaseen tarvitaan laje vanhoista farkuista, pikkutiplu sinistä puuvillaa silmiä varten, täytevanua, ompelukone, lankaa ja hiukan kärsivällisyyttä. Aloitetaan leikkaamalla farkunlahkeista valaan selkäpalat (2 kpl), vatsapuoli (2 kpl), pyrstö (2 kpl) ja evät (4 kpl). Vatsapuolen muodon voi kopioida selkäpalasta. Tadaa!