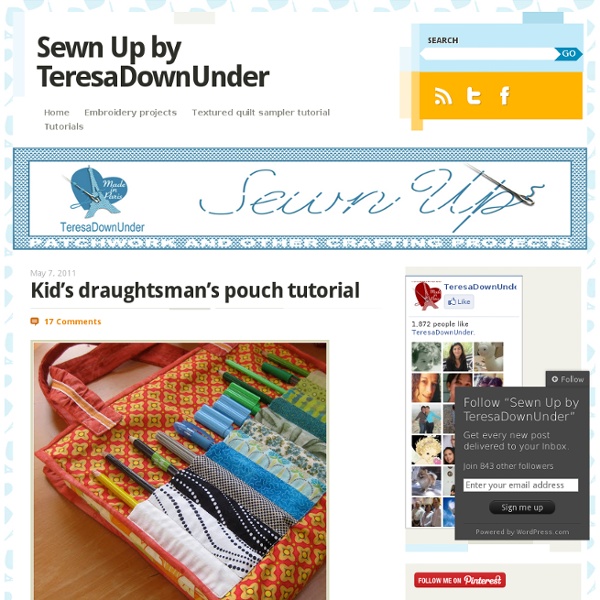
Kid’s draughtsman’s pouch tutorial « TeresaDownUnder

★ Le tuto de mon organisateur de sac
Attention, voici venu le post le plus long jamais écrit sur ce blog... J'ai bossé dur, fait des dizaines de photos et pris plein de mesures pour vous livrer, enfin, le petit tuto promis il y a quelques semaines. Mais avant tout, j'attire votre attention sur le fait que ce tutoriel est mis à disposition selon les termes de la Licence Creative Commons : Citer l'auteur - Pas d'Utilisation Commerciale - Partage à l'Identique Il est interdit de vendre des organisateurs de sac cousus d'après mon modèlesur marchés, plateformes de vente de créations (Etsy, Dawanda, etc), pages facebook et e-shops.Merci de respecter mon travail ! Alors une fois que ceci est dit, si vous êtes partantes pour vous coudre un organisateur de sac avec 5 poches à l'extérieur et 2 poches + 4 emplacements de cartes + une poche zippée + 1 porte-clés à l'intérieur... et bien, je vais tenter de vous expliquer ! D'abord le matos : NB : les mesures indiquées comprennent les marges de couture d’1 cm Pour l’extérieur : Ouf ! Bravo !
Crafty Connections- January 18 - April Bern Photography Blog - April Bern Photography
Another thing I loved about this camera? It has really convenient and easy to adjust dials to change settings on the fly (and because you're looking at the LCD screen, you can see, almost in real time, what's happening.) And lastly, this is pretty important to me, there are so many more points of focus you can select rather than just the 9 that the Mark II has! Did I mention that it was so much lighter? **sigh** Do I want this camera? Here are some shots I took with this camera and the kit lens:
{capture the moment}: Introducing Tiny Treats: Birthday
I am so glad to hear how excited many of you are for the products we are releasing this month! Believe it or not, we still have even more in store for you! Today I get to introduce you to Tiny Treat: Birthday. This set has been one of the most highly requested collections to date and we know all of you are going to love all of the fun options this set has to offer! With adorable little images to mix and match with festive, sometimes punny sentiments you will be able to bring back the FUN of creating birthday projects for young and old alike! The details. The Tiny Treats: Birthday set is PERFECT for creating a variety of projects, but today we thought we would focus on creative birthday gifts, favors & wraps that will inspire you to create unforgettable projects for all the special people in your life, especially the little ones. I've created a super fun little gift ensemble that I am excited to share with you! (PLEASE NOTE: You can click on any of the images below for a larger view)
Back with buckets !
Hiya, Here is my very belated bucket tutorial. I was hoping to do this for Whiplash but never mind. I fluffed the first lot of photos but had to use one of them here as I missed a step - just ignore the fact that the fabrics change won't you? There are probably a gazillion versions of these floating around in the craft cyberspace, so these are the way I make mine. They are super useful for little things in the sewing room or for hair ties and stuff ! For each bucket you will need:· 5 ½ x 18 ½ inch strips of outer fabric, light wadding and iron–on interfacing.· 6 x 18 ½ inch strip of lining fabric (note it is a bit bigger so you get the nice trim at the top.· Circles measuring 6 inches across in outer, wadding, interfacing and lining for the base. Step 1. With outer fabric and lining right sides together (and the wadding interfaced piece under the outer fabric) sew along the long (18 1/2 inch) edge that will be the top of the bucket. You can see the layers here. Open up and press the seam.
Sewing School
Welcome to the Sewing School! I get a lot of emails and comments asking about how to do certain sewing related things and where to find old posts on my blog and so in an effort to consolidate the tutorials and sewing advice you find here on A Fashionable Stitch, I’ve made up this handy dandy Table of Contents page to navigate you through what’s available here. It’s due to be added to every now and then, so check back when you are searching for something and can’t find it. Happy Sewing Adventures! xoxo, Sunni Making a muslin or a test garment (also known as a toile) is a great way to find out if certain alterations are needed for a particular pattern. Alterations for Pants/Trousers Getting a pair of pants or trousers to fit perfectly can be one of the hardest fittings we ever do as sewists. Flat Pattern Adjustments Flat Pattern Adjustments are adjustments made to the pattern before you make a muslin. Ready to add a few techniques to your to your sewing box? Need a little inspiration?
Related:
Related:


