background preloader

Sewing/Craft Room Ideas and Updates...
Sewing/Craft Room Ideas and Updates...
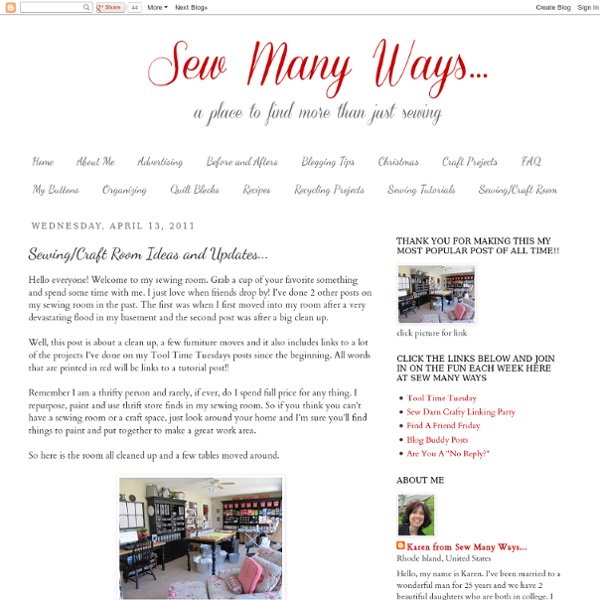
Hello everyone! Welcome to my sewing room. Grab a cup of your favorite something and spend some time with me. I just love when friends drop by! Well, this post is about a clean up, a few furniture moves and it also includes links to a lot of the projects I've done on my Tool Time Tuesdays posts since the beginning. Remember I am a thrifty person and rarely, if ever, do I spend full price for any thing. So here is the room all cleaned up and a few tables moved around. Don't get use to this, because it doesn't stay like this for very long... Seeing that this is where it came from, I'm sure it won't take me long to go back. Seriously, it was worse in person. For some reason, I work well like this! This frightful picture is in the middle of moving things in and out and changing things around. Ok, now we are all back together, let's start in one section of the room and work our way around. To the left of that cabinet is my Vertical Coffee Can project. Each tray is labeled.

Tool Time Tuesday...New Sewing Table Tool Time Riddle... What do you get when you cross a Hollow core door with... space wire and some... Dryer vent tape? Well, a new sewing desk of course! My sister gave me these 2 side tables a while ago. They've been in different rooms throughout the house... now they're in my sewing room. I gave them a fresh coat of black paint. My theory is, if you don't see it...I don't paint it! I added some left over stainless steel knobs that I had. The 2 drawer pulls were an odd size that I didn't have. To make your own drawer pulls, just take heavy duty wire, a rod or dowel and wire cutters. Wrap the wire around the rod until your desired length. Slide off, but leave the 2 ends long enough to thread through the holes in the drawer. Insert through the front and twist off the ends inside the drawer. Very easy... and cute. Here's the other base. brand new desk. See that edge? I bought wooden trim, but decided to return it. This one I really brainstormed over. Until I found this! Just peel and stick.

Incredible Crafts Room Uses Cheap Space-Saving Solutions Design is one thing – deployment is another. All of the ingenious storage and shelving in the world cannot help if the person utilizing them does not do so with forethought and intentionality, as this incredible space-saver craft room illustrates. Etsy seller Megan of? Stored with a sense of immaculate organization are endless collections of beads, fabrics, yarns, ribbons and other material scraps, odds and ends … the list goes on, and all readily at hand for on-demand sewing and general crafting purposes, placed on dowels, suspended from strings in baskets, slotted into cabinet drawers, hung from the walls, laddered along -stepped-up, wall-mounted shelves and more. While style, color and other aesthetic choices are highly subjective, this is truly an inspirational space – the principles and approaches employed here would work for anything from a personal printing studio to a homemade woodworking shop.?

Tool Time Tuesday...Take Out Happy Tuesday everyone! Take Out...Woo Hoo that means food! spaceDo you remember this post...the framed magnetic board? If you haven't seen this one yet, it's a good one. spaceIn that post, I had to cut the 24" x 36" sheet to fit the frame...space spaceand the piece I am cutting off on the left side below is what I had remaining. Well, here's where the title of "Take Out" comes in. For this project you will also need little magnets found in any craft store. Here are a few close ups of the sizes of the containers. The first and only step for the cups is to hot glue the magnet dots onto the bottom of each take out cup. The next part is to get the magnetic board ready. space These next few steps are if you are using the scrap pieces or if you are not using it in a frame. Well, how about these little freebies from the paint section. Mark one of them for a hole where the nail will go into if you are hanging it on the wall. Here's the drilled hole. This is the back after the glue had dried. ~Karen~

Close-Up: Über Organized Craft Room with a Touch of Tech | Apartment Therapy Unplggd Even craft rooms need tech to stay on top of their game. Above we have the impeccable space of Megan from Crafty Intentions. We couldn't believe how highly organized this space was, so we had to ask Megan just how she did it...She painted the space from a harsh purple to Jamaican Sea from Behr, then installed Ikea Lack shelves to hold all her crafty goods including, rhinestones, sequins, little fabric trim, beads, metal and wood accessories, etc. pom poms, tools and glitter. The bottom shelf includes stair-like levels Megan got at Lowes. These allow her to store more small jars in the space. She added lighting from Lowes, "They come in packs of 6 and the price was more economical than purchasing similar lights from Ikea." She bedazzled her rotary phone herself, "I used stick on rhinestones, and on the number display I used black vinyl with holographic stickers that I cut into dots for the numbers. Next to the rotary phone is the iHome iPod lamp. Thanks Megan!

Tool Time Tuesday...Trash!! space I know Tool Time originated in the hardware store, but I've moved to the trash again. It actually starts in the grocery store, so keep your minds open when you're food shopping too.space These few items below look like we aren't healthy eaters. We do eat our veggies, but hubby has a sweet tooth. He works out daily and has the lowest cholesterol levels ever, so he loves his cake or cookie at night. I, however, am a different story. If you read one of my posts yesterday, I mentioned that I had a bad day of eating Saturday. space This is the organized tray for sewing hexagons. space This is the box the mini cupcakes come in.space Hubby and Kelsie said they were delicious. I think these are delicious. This tray snaps closed, so it's great for traveling to a friends house to sew, when taking a class or going to a retreat. This next one is a drink container from one of those quick stop stores. Take your favorite skein of yarn and knitting needles. Look how cute this is. ~Karen~

Sewing Tutorial: Internal Zipper Pocket For Bag I made a bag recently…. before I let you see the bag [update: it is here], I wish to show you how I sewed the pockets inside, both zipper pocket and 2-tier slip pocket with 6 compartments (coming soon, updated). Want a zipper pocket to show only the zipper and not the outline of the pocket’s seams? This is the tutorial you are looking for. A zipper pocket without a side sewn line gives a classy touch for a fine bag. {Get full details on next page.} Pages: 1 2 Get all updates via email: Highlights from Our Partners Home Storage Solutions - Cabinets, Closets, Shelves, More! - BHG.com Declutter your home and get organized with these storage solutions for every room in your home. We have made organization easy with our strategies for clearing the clutter from closets, kitchens, bathrooms, bedrooms, and more. Use our techniques and ideas to purge and clear out what you no longer use or need. Then, we'll show you how to make the most of your storage space and organize everything in your home -- including papers, spices, books, outdoor equipment, clothing, accessories, linens, and more.

Some Inspiration - A Closer Look at Ottoman I'm catching up on some of my favorite blogs and I've found some inspiration. First, is the Apartment Therapy house tour of the duo from Something's Hiding In Here. Check it out here. I know I've mentioned Shauna and Stephen's house before, but it's constantly changing. Litho stones! Speaking of deer, I may have mentioned that I'm looking for some large ones such as these (I think these guys started the trend): And...more craft room organization ideas! I like the simple, shallow shelves...no digging to find stuff... Peg board and, oh, I need a flat file! Next, is the blog the sweetie pie press. This table is inspired by a little boy's seasonal nature table "so that he can collect and possibly ponder the things they (he and his parents) find on walks." I can also relate to Becky's comment "i am able but no website genius. if only the internet could be more...crocheted." Happy Thursday!

My Craft Room! ^_^ (pic intensive) Here's some pics of my new craft room: First up for the teaser pic, my wonderful fabric bookcase. Top shelves have all my craft books, sewing patterns, and gear bag for some sewing stuff. Just below are my ribbons/trims and plastic bins with buttons and other bits and ends. Next up, my sewing corner and desk. I got the paper lanterns at the Dollar General (woot for saving money!) Then, my heavy-duty metal shelving: It still needs some organizing though.... To the other side of my shelving is a bookcase with some binders and my travel books: And lastly, my wall of stuff with more pegboards! A small shelving unit with some cross-stitch stuff. Right above that is my HDF and Carrie's Creations floss along with my bead stash. Higher up is my scrapbooking pegboard. Next to that one is my jewelry-making pegboard. And finally, below that is the last of my cross-stitch and embroidery bits and bobs. Sorry for the long post but I've been excited to share. C&C welcome!

My yarn-holding coffee can cubbies! Well I know I said last week that my studio series would be this week, but I still haven’t been able to get in a good photoshoot of the whole room because there hasn’t been any freaking sunshine since last Thursday! Damn Portland, don’t you know it’s Spring already?! So, here is my coffee can cubbies yarn holder thing that I made, and I’ll probably do more studio posts spread out over the next couple weeks or something… The unit is made with 14 Trader Joe’s coffee cans, covered in faux bois contact paper, glued together with contact cement, then screwed into the wall… The idea came from a project in Readymade a few issues ago – they covered Pringles cans with contact paper, and made a desk organizer – it looked awesome! I carefully cut pieces of contact paper to size, covered all the cans, then cemented them together – this was easier said than done. View from the bottom: And straight on, with my new Ikea magnet board underneath, yay orange!

Related: