Create a Pencil Drawing of a Face
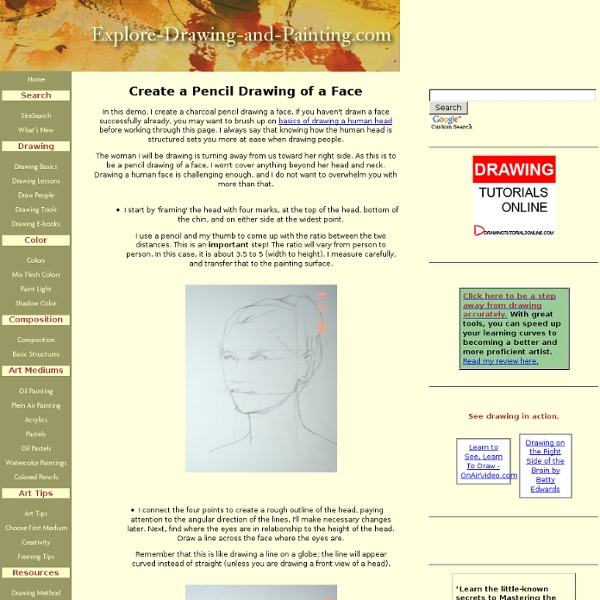
In this demo, I create a charcoal pencil drawing a face. If you haven't drawn a face successfully already, you may want to brush up on basics of drawing a human head before working through this page. I always say that knowing how the human head is structured sets you more at ease when drawing people. The woman I will be drawing is turning away from us toward her right side. As this is to be a pencil drawing of a face, I won't cover anything beyond her head and neck. Drawing a human face is challenging enough, and I do not want to overwhelm you with more than that. I start by 'framing' the head with four marks, at the top of the head, bottom of the chin, and on either side at the widest point. Finally, I declare my pencil drawing of the face done for the time being. If you practice often with a pencil, drawing a face should come easily. I hope you enjoy and learn from my pencil drawing of the face of this ballet dancer (yes, that is her true identity).
Figure Drawing Ebooks - How to Draw People
Gustav Courbet : History of Erotic Art
Gustav Klimt (1862 - 1918) was an Austrian artist from Vienna who was one of the pioneers of Symbolism and Art Nouveau who is best known for his paintings though was also an incredibly prolific draftsman. "All art is erotic" — Gustav Klimt We usually use self portraits of the artists on ErotiCart, however Klimt famously has no self portrait and is popularly quoted saying "I have never painted a self-portrait. I am less interested in myself as a subject for a painting than I am in other people, above all women...There is nothing special about me. I am a painter who paints day after day from morning to night...Who ever wants to know something about me... ought to look carefully at my pictures." Gustav Klimt was one of the founding members of the Vienna Secession, a group of Austrian artists who had resigned from the Association of Austrian Artists in protest of their restrictive attitudes towards art.
Lackadaisy Expressions
Boy, I didn't know what I was getting myself into when I started this. I've had requests for some sort of expressions tutorial dating back a while now, so I figured, "Sure! I can explain expression drawing...and it'll be way better than all those tutorials out there that are nothing but charts of generic expressions. Yeah! Just give me a day or two to whip something up..." Um. Anyway, I found all I could really do was try to explain ways to teach yourself...and then add some pictures.
How to Draw the Head From Any Angle
The Basic Forms To draw the head from any angle you must first understand its basic structure. Look past all the distracting details and visualize the underlying forms. This ability to simplify can be applied to the features of the face, but when starting the drawing you could look even further. The head deconstructed into its basic forms, is a sphere as the cranium and a block as the jaw and cheek bones. A Sphere as the Cranium The sides of the head are flat, so we can slice off a piece from both sides of the ball. A Block as the Jaw and Cheek Bones Attach the shape of the jaw. Constructing From Any Angle Step 1 – Determine the angle of the ball The angle of the head is established at the very beginning of the drawing with the ball. X Axis - The up and down tilt is established by the angles of the horizontal and vertical lines in the oval. Y Axis - The direction the head is turning (left or right) is established by the width of the oval. Step 2 – Find the thirds Step 3 – Add the jaw
Lackadaisy Expressions
Boy, I didn't know what I was getting myself into when I started this. I've had requests for some sort of expressions tutorial dating back a while now, so I figured, "Sure! I can explain expression drawing...and it'll be way better than all those tutorials out there that are nothing but charts of generic expressions. Yeah! Um. Anyway, I found all I could really do was try to explain ways to teach yourself...and then add some pictures.
A Singular Creation Art Community & Tutorial: Matching Colors - StumbleUpon
Hello all, here is a tutorial on matching colors that was provided for us by Bill Martin. Bill has taught at the University of California, The San Francisco Art Institute and San Jose State University among others. His paintings have been shown in major art museums all over the world. I would like to thank him for offering his knowledge to the A Singular Creation Art Community. How Do You Match That Color A rainbow gives us pure examples of the basic colors of the visible world. The wheel is arranged with yellow, the lightest value color at the top and violet, the darkest value color at the bottom. Any TWO colors directly across the color wheel from each other are called COMPLEMENTARY COLORS. All colors come in all values. With These Things in Mind, This is How to Match Any Color We have only to answer these three questions to match any color we see. 1. The colors in order on the palette Matching the Brown LeafThe spectrum color is a red-red-violet. The middle value is first.
How To Draw
"How to Draw" is a collection of tutorials that will teach you everything from perspective basics to shading chrome. Never picked up a pencil before? Fear not! From simple line drawings to modern art and easy animations, we've got you covered. Instructables is the most popular project-sharing community on the Internet.
Drawing the Human Eye & OnlyPencil Drawing Tutorials
We can all probably draw the human eye, we draw the oval shape with the iris and pupil. I consider that to be a basic sketch of the eye. Before you draw a realistic eye you must first study what it really is. Take a look at the pupil(the black area in the center), this area contracts in size when light hits it. Tools Used: 2h wood cased pencil2b 0.5 Mechanical PencilKneaded EraserColor BlenderSmooth Bristol Paper This is the final drawing of what we’ll be working on. Step 1 Well we will start by drawing the outline, this can be a fast sketch, but enough detail to show the shape. Step 2 Start by filling in the pupil using the 6b progresso pencil. Step 3 Take your 4b progresso pencil and put down some graphite on a separate piece of paper. Step 4 Using your mechanical pencil draw the lines that you see around the area that was shaded previously, try to make them quick and light. Step 5 Using your mechanical pencil lightly fill in the area around the pupil. Step 6 Step 7 Step 8 Step 9 Step 10 Step 11
Related:
Related: