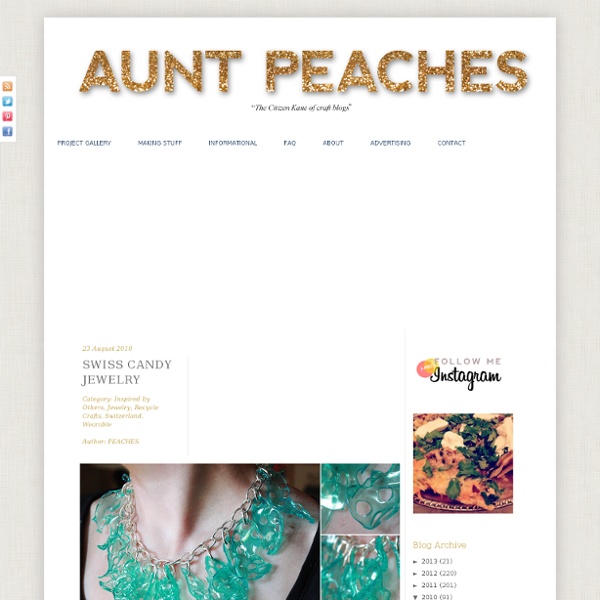
background preloader

Swiss Candy Jewelry

Swiss Candy Jewelry
I call it Swiss Candy Jewelry because it loosely resembles Swiss cheese and the Haribo Gummi candies they sell all over central Europe. Similar to the process used in the Sparkling and Melting Flowers, this tutorial uses the magical properties of #6 recyclable plastic. Materials: * Five #6 recyclable plastic cups * Heat source (like a well ventilated oven) * Chain or wire to use as necklace base and links * Pliers Cost: Free for me (I already had cups leftover from a party and an old junk necklace, but I imagine this could be assembled for less than $10) Time: 60 minutes for the blue statement necklace, 20 minutes for the pink pendant 1. 4. Variation in pink.

Valentines Day Necklace If you missed it, a little bit ago I was lucky enough to be able to guest post over at Tatertots & Jello! I came up with a sweet necklace for Valentines Day but the technique is versatile enough to be able to make a similar necklace for any occasion! Here's the tutorial: My favorite craft of all time is jewelry making. With Valentines Day right around the corner, I thought I would whip up a girly necklace with Valentines Day colors! I'll give you a heads up: by looking at this necklace it LOOKS like it is difficult to make, but really jewelry making is simple after you learn a few basic techniques! The first thing I did for this necklace was gather up some red, pink, and purple beads. The findings you will need for this project are chain, head pins, a clasp and jump rings. The tools needed for this necklace are needle nose pliers (I prefer bent-nose needle nose pliers), wire cutters, and round nose pliers. Next, grab a head pin and string on a purple bead. Add on a red bead Got it?

DIY Red Statement Necklace So... you guys sick of jewelry tutorials yet? I have some things keeping me busy at home currently so my crafting time has been --- zilp. Thus I'm working through my stash of phototurials I've done of jewelry projects but not posted yet! (PST! DIY Red Statement Necklace I bought these red beads from a bead show just knowing they could be PERFECT for some kind of bib statement necklace. Supplies Supplies needed are oval beads, chain, head pins, eye pins, a clasp and jump rings, as well as needle nose pliers, round nose pliers, and wire cutters. <a HREF=" Steps First step is to make a simple loop with a head pin for the bottom bead of each of the strands that we will connect to the necklace. Next step is to connect the loop of the bottom bead unto an eye pin using needle nose pliers. Repeat for each of your strands like so: Attach the top lop of each strand onto a piece of chain equal distance apart. All hooked together. Here's the completed bib: Oh so sauuuvayyy,

Beading Arts: Crocheted Pearls - part one When I found a gorgeous strand of top-drilled pearls at a gem and bead show, I knew that they would need a design that allowed them to show off! I began by creating several strands of single crochet with the pearls on silver wire, and then embellished each strand with loops of seed beads. The necklace was finished off with single strands of strung beads so that it would be comfortable against the back of the neck. Materials & Tools60 top-drilled pearls 2 colors of 8/0 seed beads 2 colors of Delica seed beads 28 gauge silver wire Nymo thread 6 inches of 20 gauge silver wire 2 bead caps or cones Softflex beading wire, .019 inch diameter 4 2mm crimp tubes Assorted Czech glass fire-polished crystals, 4, 6, & 8mm Stone beads and additional pearls (optional) Toggle claspCrochet hook (I used a size H, 5mm) Wire cutters Beading needles Watch-case cement Measuring tape Round nose pliers Chain nose pliers File Creating the crocheted front 1. 2. 3. 4. 5. 6. 7. 8. 9. Copyright 2012 Cyndi Lavin.

How to Make a Bib Necklace: Free Beading Tutorial For Falling Water Necklace - Authentic Arts | Natural Jewelry Want to know how to make a bib necklace? There are tons of ways to create this trendy look, but this beaded design is my favorite. My free beading tutorial includes detailed instructions, a printable PDF and links to help you find all the beading materials you’ll need to create your own Falling Water necklace (from my original design!) A customer of mine said it best, “The way it lays is so perfect it seems magical. And I love that it is just heavy enough to remind me that it is made of rocks and sea creatures.” This necklace is my favorite creation so far! Of course you love it! The Falling Water necklace is made with green aventurine chips, freshwater pearls, mussel-shell coins and shell beads and accented with bright, stabilized turquoise and unique aqua terra jasper beads. Finished necklace will measure 17″ around the neck.Materials you will need from Fire Mountain: You’ll also need 1 or 2 pairs of small, smooth-jawed beading pliers.

Imperial Palace Necklace Things are gonna get colorful! My newest tutorial is my Imperial Palace necklace. It was inspired by the colors and materials of China, including a lot of jade and carved coral beads. I went for an old-meets-new vibe with the traditional carved coral drops and jade against the modern clear glass beads. For my Imperial Palace necklace, I am using entirely materials from Beadmixer. I never could find a good place to buy rhinestones and rhinestone settings: I had tried Etsy and such but they were very expensive. I also got cool coral dagger beads, green jade rounds, carved coral focal beads and howlite rounds. I just love the large selection of gemstone and natural beads that Beadmixer has. Also, they have beautiful porcelain beads that I am kind of obsessed with. Be sure to check out the Beadmixer site, ESPECIALLY if you love to use vintage rhinestones. You can also connect with Beadmixer through their: I also made a pair of matching drop earrings from the coral focal beads and jade. Pliers

Bottle Necklace DIY & GIVEAWAY (This giveaway has expired. Thank you all for joining!) Here is a treat for you: I am having my first giveaway! I made these fabulously cute necklaces and not only did I make a DIY, I am also giving you the opportunity to win one in case you are feeling less crafty! To enter, follow the Lana Red Facebook page and leave a comment on my blog telling me which necklace you would like the most and why. I will draw the winner on Wednesday and they will be announced shortly after. ** This giveaway is open to everyone! And here is the tutorial: create your own personalized necklace with a tiny bottle. Here is a tutorial to show you how to turn them into necklaces: 1. 2. 3.put some glue on the wire. 4. 5. 6. 7. I have had so much fun deciding what to place in the bottles, I just walked around the house searching for tiny objects like a treasure hunt :) In the end I choose: Beads, keys, glitter dust, a tiny lightbulb and a piece of paper rolled up as a secret note with a ribbon around it.

DIY | Perfume Locket Today I have an exciting new feature we are rolling out on Glamour and Grace! I have asked my good friend Sarah Montes, illustrator and crafter extraordinaire, to come and share a fabulous new DIY idea each month! This month she is sharing something really unique that I know you all will love! I will let Sarah take it away! Greetings Glamour and Grace readers! Materials (will make 5-7 lockets, depending on size): 2 tbsp Beeswax2 tbsp Olive Oil, Sweet Almond Oil, or Jojoba OilEssential oils (Some great scents are Jasmine, Lavender, Vanilla, Ylang ylang, Citrus, etc. Making the perfume Step 1: Using a cutting board and a knife (preferably items that you don’t mind getting waxy) cut one of the beeswax blocks into shavings. Step 2: Once the beeswax is in thin shavings, put it into the jar with the olive oil. Step 3: Use the skewer or straw to stir and help break up the beeswax until it is smooth. Step 4: Measure out 20-40 drops of essential oils. Suggested Jewelry Materials: Share:

Make Cold Connection Jewelry! The Perfect Connection: Rivets & Hinges Add dynamic movement to your jewelry with artful cold connections! Fabricate flawless rivets and hinges with expert guidance from instructor Meredith Arnold! Get started with tips and tricks that will help you wield your jeweler’s saw with finesse, and learn how to smoothly cut curves, corners and pierced cutouts. Then, discover how to create wire and tube rivets that add structural and decorative connections to your work. Lesson plan Lesson 1. Meet instructor Meredith Arnold and preview the fundamental skills you’ll learn throughout class. Lesson 2. Once you’re comfortable handling the saw, build those skills with Meredith’s advanced sawing techniques. Lesson 3. Add another essential technique to your toolkit! Lesson 4. Delve deeper by learning how to create your own tube rivets. Lesson 6. Learn how the piano hinge can add an element of surprise and controlled movement to your work. Lesson 7. I have taken a lot of online classes. - guidance4u

How to Make Faux Metal Resin Clay Beads Making your own clay beads is not new. Polymer clay artisans have been making them for years. But there are a couple of disadvantages with polymer clay beads - you have dry the beads in an oven and glue on the bead grommets afterwards. The key supply is 2 part epoxy resin clay. I used the "silver" (actually a light grey) Crystal Clay for this project. You'll need a non-stick surface because the clay is sticky once activated. Take approximately equal amounts of Part A and Part B of the resin clay. Small beads can be made completely out of resin clay. Now stick a grommet on each hole so it looks like the bead might have a metal core. Use wooden balls as the base for larger beads. If you are making beads and have no grommets to fit - like this large bead - then fake it with a suitably sized metal rondelle or ring. One thing useful about having bead grommets, fake or real, is that the beads can stand on these hole ends after the embellishment step to air dry. Before You Go:

Beading Tutorials: Beaded Jewelry Cones Today’s necklace-a-day design features a favorite color combination - amber and dark blue. I have nearly half a pound of these fantastic metallic orange bugle beads, and decided to make a dent in the stash by creating a multi-strand necklace with them. Since giving up on metal findings like eye-pins, I’ve had to take a different approach to multi-strand, and usually finish designs with herringbone tubes that make way to beaded clasps. Apart from quick beading, the thing I miss most about the traditional multi-strand technique is making my own jewelry cones to cap the strands. To create a beadwork jewelry cone: Begin by making a two-bead ladder ring as if you were starting a herringbone tube. Weave through the tube to secure the thread and exit from the top. Stitch up through the last bead added, being careful not to pass under the bridge thread. Pick up one bead, and bring the thread under the next bridge thread in the ring. Happy beading!

Related: