
monatelier.frblog.net - Blog mon blog : Tuto pochette très pratique J'ai trouvé cette pochette super mignone et très pratique alors je m'en suis inspiré pour faire celle d'Isabelle. Voir aussi ma pochette en cliquant ici. C'est une pochette dans laquelle on met tout son bazar (clés, papiers, crayons etc ...) et quand on change de sac, on a juste à prendre la pochette ! Voici comment je l'ai faite, sachant qu'il y aura des améliorations. 1/ Il vous faut un tissu de 80 cm sur 31 cm minimum en tissu souple imperméable (genre toile de tente ou rideau de douche). (Si vous souhaitez mettre une doublure, ajouter un morceau de 30 cm sur 31 cm) Couper les pièces comme indiqué ici, en ajoutant 1,5 cm pour les coutures, sauf pour le haut des pièces dites « côté » où on ajoutera 3 cm (voir schéma). 2/ faire l’ourlet haut des poches 3) Mise en place et couture des poches extérieures .Assembler les parties poches aux « côtés » par un surfil en bas (dos des poches sur devant des côtés) . Positionner vos objets et marquer l’emplacement des couture des poches. Coudre.
Pretty Ditty What a Thanksgiving! I made it through 2 family Thanksgivings, 2 BIG Thanksgiving dinners, 2 Thanksgiving desserts, and a Joann fabrics shopping trip early the next morning. Whew! Before I go into sharing my Thanksgiving with you all, lets announce the fabric give-away winners. By way of the random number generator, the winners are Melissa M who wrote The day after Thanksgiving, I'm going to the outlets for the midnight madness sale =) and Alissa who wrote This day after Thanksgiving I will be reorganizing my house. (And taking blog reading breaks, of course!). Thanksgiving was very yummy this year. Asparagus Bouquets1 lb prosciutto deli sliced 1/2 or 8 ounces neufchatel {softened} or asiago cheese 20 to 30 spears of asparagus {depending on thickness of spears} Preheat oven to 450, place asparagus in boiling pot room temp h20 on stove top. And... My mom cooked the main dinner and just when I thought she couldn't top the previous year's Thanksgiving dinner, she does. Cheers, Jamie
Purse Week I know, the name has been taken about 500 times over, but seriously, this is all I could come up with (and before I searched and found a million others called the same thing, mind you!). Don’t let the pleats scare you (or the length of the tutorial—I just included a LOT of pictures to explain things clearly). The cutting takes more time than the actual sewing does, in most cases! Let’s get started! First, print and cut out these four patterns: one, two, three, four. What You’ll Need: fabric for outer fabric for lining and band 20” piping, cut into two 10” pieces 9” zipper interfacing (all seams are 1/4”) Cut out your fabric and interfacing according to the pattern pieces you printed off. Take one of your band pieces and line up the raw edge of the piping. You’ll want to stitch just to the left of the stitching already on the piping. Next line up the band with the 10” edge of one of the outer pieces of fabric, like this. Press the seam down towards the body of the purse. NOT like this: Almost done!
Scrap It: Gift Card Case or Biz Card Holder Ahhhhh, the gift card. It seems to be such a common choice, and not just as a last minute grab for someone hard to shop for. Gift cards appear to be the go-to gift for anyone and any occasion. Our gift card holders finish at 9¼" x 2¾" flat and 4" x 2¾" folded. Any Sewing Machine (we recommend the Janome 3160QDC) Insert your gift card and close the flap. Contributors Project Design: Alicia Thommas Sample Creation: Liz Johnson Storage Solutions Related Articles Big and little artist » How to sew a fabric flower / rose? I used my fabric flowers to make a statement necklace These fabric flowers are so cool and so easy to make! You can have so much fun makign many of them in different colors ad sizes. Try this project with children and see their amazed faces when the bud starts to form after the fabric strip has been rolled on itself. You will need: Fabric scraps: Linen or Cotton. 12 inches long x 1 inch wideNeedleThread (same color as your fabric) Step 1 Choose your fabric. Step 2 Fold the strip of fabric lengthways down the middle and press with either an iron or your fingers. Your strip of fabric should now be half an inch wide. Step 3 Hold one end of the fabric strip and roll it in (on itself) to approximately 1/8th of an inch. You have just started to form your flower bud. Step 4 Fold the fabric down to a 90 degree angle and hold firmly between your index finger and your thumb. Step 5 Do exactly the same as step 4 except this time, fold at a 90 degree angle in the OPPOSITE direction to the previous fold.
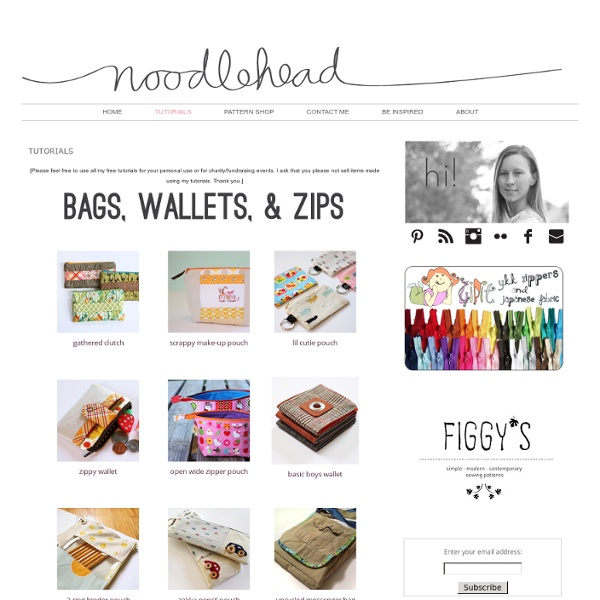
Super cute sewing tutorials Have you visited Anna Graham's blog Noodlehead yet? If you like to sew things that are so cute you can't stand it, rush right over there. Here's her free tutorial for gathered clutches (also available as a PDF pattern with other styling options for purchase right here.) Or maybe you want a little zippered pouch with a key ring. Tutorial here. Maybe you want that zippered wallet to have some adorable detailing. Or maybe you want to sew a bike basket, a diaper keeper, a mail organizer, or a host of other useful things listed on Anna's blog. To see the lovely things others have made from her tutorials, like Yellow Poplar's pouches above, visit the Noodlehead Tutorials Flickr pool.
Tuto couture : faire une pochette à mouchoirs - La Goutte Jeudi 15 juillet 4 15 /07 /Juil 08:00 Par Lilou Voici comment se fabriquer en peu de temps une jolie pochette à mouchoirs. Choisir un tissu qui vous plaise (il ne faut qu'un petit morceau, donc ça se trouve toujours facilement. Choisir du biais assorti. 1°) Couper un carré de 15 cm x 15 cm (pour mon paquet de mouchoirs, donc adapté selon la taille) 2°) Couper un morceau de biais de la longueur des plus grands côtés Le poser avec des épingles à cheval sur le bord du tissus 3°) Piquer à la machine (ou bien coudre à la main) le long du bord intérieur 4°) Faire la même chose pour l'autre côté 5°) En travaillant à l'envers, plier le tissu de façon à avoir les deux côtés avec le biais au centre (voir photo) Fixer avec des épingles les côtés sans le biais (en vérifiant bien avec le paquet de mouchoir) 6°) Coudre droit à 1 cm du bord 7°) Couper à 0.5cm du bord bien droit 8°) Surfiller au point zigzag pour ne pas que le tissu s'éfiloche 10°) Voila c'est fini Partager l'article ! inShare
Crea – DIY – Crafts » Veetje Veetje Paasactie #12 april 16th, 2014 § § permalink Prachtige recyclage van plastic eieren. Zelfgemaakte eierdopjes door Creativity in Progress. Beautiful recycling of plastic eggs. Paasactie #11 april 15th, 2014 § § permalink Gelukkige fluiters in de Paasvakantie: Red Ted Art. Happy whistlers for Easter: Red Ted Art. Paasactie #10 april 14th, 2014 § § permalink Alles onder de bollen: kleefpret en kleur in huis verzekerd. Pompon love by MYK. Paasactie #9 april 13th, 2014 § § permalink Zo eenvoudig dat het geniaal wordt. So simple it’s genius. Paasactie #8 april 12th, 2014 § § permalink Oké, zaterdag, half in de paasvakantie, ideaal om ne keer grote lentekuis te houden in het speelgoed van les petits enfants. Original basket, made of old game boxes. Paasactie #7 april 11th, 2014 § § permalink Een beetje zoals mijn caravan. Just like my camper: simple, sweet doll house made off cardboard by Little Red Window. Paasactie #6 april 10th, 2014 § § permalink
Recent Blog Articles Hi my name is Marni and I’ll be your quilter for this blog post. I’m from Frankenstein’s Fabrics and I’m here with a quilt I’ve made from the fabulous Witch Hazel range. I love and collect Halloween prints. This quilt was so much fun to create and I hope you enjoy it as much as I did! You will need – 30cm of cream witch main print 30cm of cream witch stripe 20cm of gray witch web 20cm of green witch dot 70cm of black witch stars 1.2m of green witch main print (extra allowed for fussy cutting) 50cm of orange witch stars 50cm of green witch web 60cm of orange witch dot 1.8m black and orange chevron 1.85m square of wadding 1.85m square of backing Rotary cutter, ruler and mat Sewing machine with 1/4in and walking foot Neutral thread for piecing Orange thread for quilting Iron and ironing board General sewing supplies Finished size 1.65m square (65in) Preparation There are 2 templates that you’ll need – print them off the arc here and the wedge here. Make sure you read through all the instructions before you start.
Say Thank You with a Lasting Rose... I promised crafty flowers, and here they are! Coffee filter roses, with a vintage patina... I added a thank you sentiment so that they could be messengers of my gratitude! This issue is jam- packed with gorgeous ideas, some of which from dear blogging friends! ... Monica xo Tissue case tutorial I’ve used my new sewing machine to make these very simple tissue cases from scrap of linen fabrics. They are basically a lined fabric rectangle folded to meet at the center. I make the outer fabric longer than the lining fabric so it automatically folded inside, because I don’t like the lining fabric showing at the edge. It also eliminates the need of topstitching. The tutorial is only two pages, but please tell me if something is not clear in it. Disclaimer: You may use the finished products for both personal and commercial use (craft shops or markets only – no mass production). Click to download: Have you made something from my tutorials?
Glee Teeny-Tiny Living Four design students from Sundsvall have developed this clever solution for small space living. The Matroshka Furniture System includes a bookcase, double bed, sofa, dining table, stools, desk, a wardrobe, and can be compacted to only 4 meters. Perfect for student housing, if only universities would catch on... My laptop bag tutorial on Sew Mama Sew! I was so excited when Beth from Sew Mama Sew! invited me to contribute to their Back to School month of projects. I thought it would be the perfect time to actually make the laptop bag I wanted for quite some time. Right after I received the colorful-and-oh-so-awesome fabrics from designer Jessica Jones, I knew I had to use them for this project, her fabrics are one of my top favorites, so you should check them out! So today finally the tutorial went live at Sew mama Sew, and Jessica also posted about it in her blog How About Orange, could this day get any better? I am actually working on a passport pouch and checkcover to match the bag so wen I go to Chile in september I can take all of them with me and of course I will share the how-to’s for you to do the same if you’d like! But for now let’s start with the laptop bag! And to all of you visiting from Sew Mama Sew! I hope you all have a wonderful day! * This tutorial is provided for personal use only.
E TELLS TALES: tutorials