
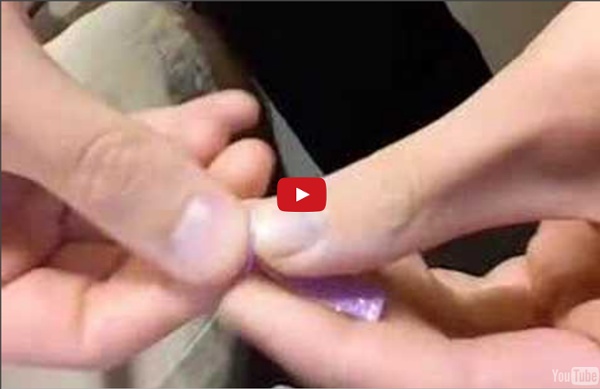
Creative Kismet » Blog Archive » little guiding stars Since the new year has started I’ve been trying to think of ways to be more kind to my self. Especially when that nasty gremlins try to creep in and stump me. I remembered this origami star video on You Tube and had to get them involved in my plan. I thought it would be fun to make a whole bunch with kind words and “you are….” phrases inside. I used 12 x 12 inch scrapbook paper and cut 1/2 x 12″ strips, then followed the video HERE*. *UPDATE! Be Sociable, Share! A Tutorial: Fabulous Ric Rac Flowers & Matilda Jane Clothing Rocks - StumbleUpon Let me start out with a warning or sorry of some sort. The warning is because I have never done a Tutorial before, so I hope this is helpful and easy to follow. The sorry is for how horrible my nails look. I thought I would start off with a Flower, I too, just learned how to make. Material: Time-Roughly 20 minutes about 28 inches of Ric Rac ( This will make a flower about 2 inches in diameter) Suggestion: The thicker the Ric Rac the better Felt (Any Color) One sheet will be fine depending on how many flowers you want to make. Optional: Hair Clips, leaves or buttons Step One: Take the two pieces and hot glue them together. Note: You want to glue them together as if they are a mirror of one another. Step two: Lock in each curve of the first piece with the second. Say to yourself “over,under,over, under”. *If your piece does not look like this, then you most likely glued the two pieces going the wrong direction. *When you are finished wrapping the Ric Rac, it should look something like this.
Cassette tape tutorial | Chezlin A few days ago I posted about my cassette tape wallet and how it’s held up over the past 10 months, and I promised a tutorial. Well here it is! First you need to get your hands on a cassette tape. Some are glued up pretty good. Here are the pieces together. But you still might have to cut it down a little more than that, so it fits snug inside. Take some pliers and go to town on the little pieces that stick up on the inside. Now here’s the fun part. Take your zipper and slowly start to glue it to the inside of the tape. Anyway, as you glue it in, only apply glue to about an inch and attach the zipper, and hold it for a few minutes. Here it is unzipped. Here are the two sides all glued in. Slather your glue of choice all over the inside of the tape and apply the inside fabric. Now, I recommend not to touch this thing until at least 24 hours have past. Here’s the finished product. I ended up giving this one to my little sister.
Do-it-Yourself DIY String Wedding Lanterns Yarn Chandeliers Jessica of Wednesday Inc shows us how to make those gorgeous twine chandeliers from the inspiration shoot she shared with us this morning. Using balloons, glue and twine, you can also make these lanterns for your wedding – and then bring it home and use it as your very own mid century lampshade. What you will need are: balloons, glue, yarn, tray for glue, corn starch 1/2 cup of Corn starch, 1/4 cup of Warm water, clear fast drying spray paint, hanging lamp cord or fishing line (depending on your desired final product), and a lighting kit if you’re looking for a fully functional lantern. Are you getting excited to try to do this at home as much I am? Instructions: 1.
10 Beautiful Fabric Flower Tutorials | Skip To My Lou - StumbleUpon It is spring! If the flowers are not blooming yet here is a round-up of awesome tutorials to help you make your own flowers! Here you will find 10 beautiful fabric flowers, but don’t miss these five fabric flower tutorials! 1. 2. 3. 4. 5. 6. 7. 8. 9. ..And how about updating your spring wardrobe with this beautiful rolled rose bracelet. 10. Just had to add one more! 11. If you need more flowers don’t miss the round-up of crochet flower tutorials and these darling fabric flowers!
page corner bookmarks | I Could Make That This project comes to you at the request of Twitterer @GCcapitalM. I used to believe that a person could never have too many books, or too many bookmarks. Then I moved into an apartment slightly larger than some people’s closets (and much smaller than many people’s garages) and all these beliefs got turned on their naïeve little heads. But what a person can always look for more of is really cool unique bookmarks. Page corner bookmarks are cute, practical and deeply under-represented in the world.* They’re easy to make, easy to customize, and will set you apart from all those same-same flat rectangular bookmarks. If you like this tutorial, here are a couple others that might be up your alley. If you’re loving the toothy monster vibe, check out these simple monster heating bags, filled with rice or wheat and entirely microwavable, to keep toes or fingers or tummies warm during the chilly winter months. What you’ll need: Putting it all together: 1) Follow steps 2 and 3 from above.
The Hipster Home » Blog Archive » How to Make a Tiny Terrarium in a Light Bulb Ahoy there Hipster Homers! I’m Julie and I’m the very first guest blogger on this fine site. Today’s project involves breaking stuff, plants, found objects, and miniatures. Let’s get started! Dos and Don’ts: Do use sand or small pebbles; these are good because water drains through them easily. How To: You’ll need a few tools to make a tiny terrarium but nothing complicated to get started. Needle-nose pliersScissorsLong tweezers or chopsticksFlathead screwdriverGlasses or goggles Let’s start with the light bulb. We will be removing the inside parts of the lightbulb. First, remove the metal tip from the bottom of the bulb. Then, when enough of the sides are raised to get a good grip on them, hold one of the sides with your pliers and yank out the metal tip. Next remove the black glass. Now you will be able to see the interior parts of the light bulb. Using the flathead screwdriver as a sort of lever, snap the interior tube from the side. Pull out any remaining wires with the pliers.
How to Make Leaf Skeletons - The Idea Room - StumbleUpon I wanted to share with you a project from one of my readers who shares with us how to make leaf skeletons. I LOVE this! I have several leafs in various forms displayed in my home and knew I needed to make some of her leaf skeletons to add to my decor. I love how a pattern of leaves can enhance the beauty in your home. So I asked Heather if she would mind sharing her project with you. I have spent hours and tried various ways of making these. You need washing soda, not baking soda! Gather your leaves. Washing soda is a strong base so you may want to wear gloves when handling the leaves. You will add 3/4 cup of washing soda and 4 cups of water to your pot of leaves. Keep going, you will need to add more water so your pan doesn’t dry out. When 1.75 hours are up fill a glass baking dish with cool water. I carefully removed them and rinsed with water and added clean water to the pan. If you’re still with me, this is what I ended up with… I have a maple leaf which turned out not so well.