
My Last Chalkboard For Now. A Chalkboard Frame. Instagram Canvas Wall Art. I whipped this project up for our home last week.
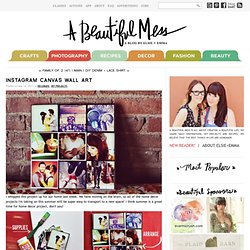
We have moving on the brain, so all of the home decor projects I'm taking on this summer will be super easy to transport to a new space! I think summer is a great time for home decor project, don't you? 1. Supplies Needed: Instagram photos (I used 4x4 prints provided by PostalPix a great app for printing your instagrams and having them sent right to your doorstep!) , a canvas (I used a 12x12 canvas, perfect fit for 9 4x4 photos!) And a paint brush. 2. Photo Blocks using Rit Dye. This giveaway is closed and the winner has been notified… Thanks so much!
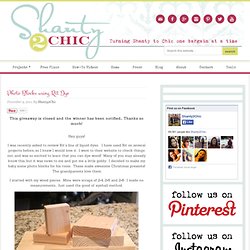
Hey guys! I was recently asked to review Rit’s line of liquid dyes. I have used Rit on several projects before, so I knew I would love it. I went to their website to check things out, and was so excited to learn that you can dye wood! Many of you may already know this, but it was news to me and got me a little giddy. I started with my wood pieces. 10/01/2011 - 11/01/2011. Halloween is approaching quickly and if you have kids, I'm sure they are excited.
I made this Halloween countdown so I didn't have to answer that question 5 times a day until Halloween. Here we go. Supplies:Heavy duty glue (I used beacon 3 in 1) Scissors Tweezers Black hat pins Clear gems Black Tulle 1. 2. 3. 5. Look at that! 7. 8. 9. Now, just cut out a bat attach your hat pins. We hope that you've enjoyed Marie's idea! Make Your Own Cardboard Ring Frames.
If you're new here, you may want to subscribe to our RSS feed.
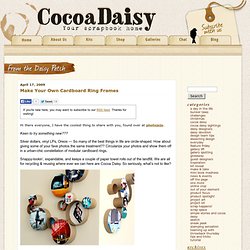
Thanks for visiting! Hi there everyone, I have the coolest thing to share with you, found over at photojojo. Keen to try something new??? Silver dollars, vinyl LPs, Oreos — So many of the best things in life are circle-shaped. How about giving some of your fave photos the same treatment?? Snappy-lookin’, expandable, and keeps a couple of paper towel rolls out of the landfill. Are these not just the funkiest photo holders you have ever seen? What You’ll Need An assortment of cardboard tubes: toilet paper rolls, paper towel rolls, shipping tubes, even oatmeal boxes!
Step 1: Clean Up the Rolls Remove any labels or leftover paper from each of the cardboard rolls. If the paper doesn’t peel off readily, you can scrub it away with a small piece of sandpaper. The DIY Stone Photo Holder: Make a Rad Photo Display for Under $5. Pet rocks were the best: your mom didn’t get mad at you if you forgot to feed them, they didn’t chew on your favorite sneakers, and they didn’t need to be house-trained.
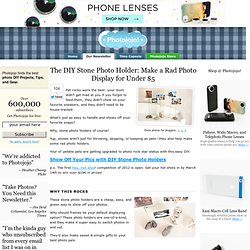
What’s just as easy to handle and shows off your favorite snaps? Why, stone photo holders of course! Yup, stones aren’t just for throwing, skipping, or keeping as pets—they also help make some rad photo holders. Your ol’ pebble pets are getting upgraded to photo rock star status with this easy DIY. Show Off Your Pics with DIY Stone Photo Holders p.s. Why This Rocks These stone photo holders are a cheap, easy, and green way to show off your photos. Why should frames be your default displaying option? They’d also make sweet & simple gifts to your best photo pals. Les Ingredients: Medium-sized stonesGreen, cloth-covered florist wire sticks (we got ours at Michaels)Wire cuttersSomething cylindrical to bend wire into a round, coil shape—we used a glue penThe awesome photos you want to display STEP 1: Rock Rinse STEP 2: Wire Wrap Ta-da! Giant Picture - tutorial! I posted awhile an image that showed off the giant picture I made for my girls’ room – finally, the tutorial is here!

It was so cheap – around $13 (that’s $8 for the print, and another $5 worth of an $11 foam board because you won’t need to use the whole board….) UPDATE Sept 2012: – – I LOVE this project so much that I made another one for my Dining Room – and this time I mounted it on plywood. Get details and a tutorial for mounting on plywood at this link: Giant Picture for Cheap, take 2 First, I saw on IAmMommaHearMeRoar that you could make big prints at office stores (Office Max, Office Depot) for cheap – just ask for the “Engineer’s Print”.
Awesome. So here we go, on to the tutorial- – Giant Picture Supplies –Print in desired size ( I talk about that on down) –Foam Board in desired size (I used a 4×8 sheet, but these 20×30 ones look great too)