

USB IO Board PIC18F2455 / PIC18F2550. USB IO Board can be controlled with just about any serial port emulation program such as Hyper Terminal that comes with every Windows OS.
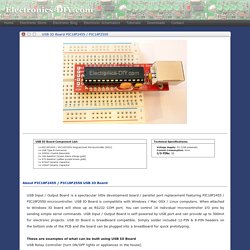
The problem with Hyper Terminal is that you can't see the commands as you type them and that could be very annoying. With Hyper Terminal you also have to go through the wizard for setting up a serial port connection, and if the COM port changes you pretty much have to do it over and over again. Luckily we have released our own little application called USB IO Board Controller that is so much easier and fun to use than Hyper Terminal. It only takes 25KB of space so it's very lightweight. USB IO Board Controller will also show you COM port of USB IO Board so that will save you the trip (and time) to Device Manager to find out USB IO Board COM port number.
To use USB IO Board Controller select the COM port from the drop down list, type the command and hit "Enter" key (or click on Send button). Download USB IO Board Controller (Win 2K, XP, VISTA, Win7) Accelerometer Controlled Usb Gamepad and Mouse using PIC18F2550 / PIC18F4550. Demo Circuit This is the schematics for a PIC USB gamepad that I have built in a steering wheel shell.
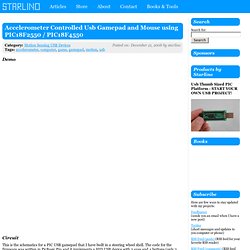
The code for the firmware was written in PicBasic Pro and it implements a HID USB device with 2 axes and 4 buttons (only 2 buttons connected in the prototype). The device is detected by Windows XP/Vista as a standard USB gamepad and can be used with many games and applications. AVR ATtiny USB Tutorial Part 3. This is the third part of my USB tutorial for ATtiny2313 and V-USB library.
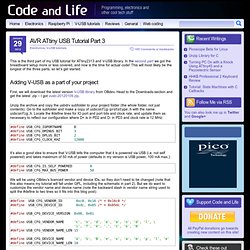
In the second part we got the breadboard setup more or less covered, and now is the time for actual code! This will most likely be the longest of the three parts, so let’s get started. Adding V-USB as a part of your project First, we will download the latest version V-USB library from OBdev. Head to the Downloads-section and get the latest .zip – I got vusb-20120109.zip. Unzip the archive and copy the usbdrv subfolder to your project folder (the whole folder, not just contents). Interactive LED Panels. Ready-to-use Interactive LED Panels.
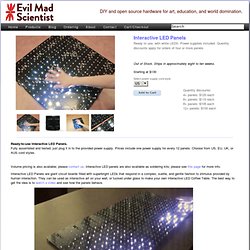
Fully assembled and tested; just plug it in to the provided power supply. Prices include one power supply for every 12 panels. Choose from US, EU, UK, or AUS cord styles. Volume pricing is also available; please contact us. Interactive LED panels are also available as soldering kits; please see this page for more info. Interactive LED Panels are giant circuit boards filled with superbright LEDs that respond in a complex, subtle, and gentle fashion to stimulus provided by human interaction. (Interactive LED Panel video. Octolively - Digital Interactive LED Kits. Octolively modules are tileable, digital interactive LED surfaces filled with ultrabright LEDs that respond in complex and gentle ways to stimulus provided by human interaction.
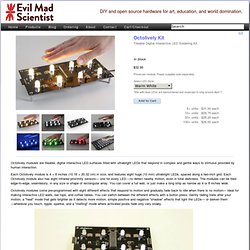
Each Octolively module is 4 × 8 inches (10.16 × 20.32 cm) in size, and features eight huge (10 mm) ultrabright LEDs, spaced along a two-inch grid. Each Octolively module also has eight infrared proximity sensors— one for every LED —to detect nearby motion, even in total darkness. The modules can be tiled edge-to-edge, seamlessly, in any size or shape of rectangular array. You can cover a full wall, or just make a long strip as narrow as 4 or 8 inches wide. Hackable LED Christmas Card. Posted Jan 31, 2012 at 3:08 pm This hackable version of holiday card is based on an ATtiny13A and a few LEDs that play a short light show in the tree upon pushing the button.

From the small Atmel ATtiny13A microcontroller, one pin for PWM blinks the lights while most of the other pins are used for programming and power which can operate similarly with the effects using a 555 timer of discrete components. To hold the reset pin high, the ATtiny13A needs a 10K pull-up resistor. The chip can be reset with a mini tactile switch by connecting the reset pin to ground and it can be decoupled from the power supply using a capacitor. Through a 6-pin in system programming (ISP) connection, the ATtiny microcontrollers can be programmed where the ISP is oriented towards the back of the card.
How To Make Custom Silicone Ear Molds for Your In-Ear Monitors. There’s little worse than an amazing set of in-ear monitors that constantly fall out, and without that seal they’re not doing their job right.
With some silicone putty, however, you can get a fit that seals right and locks tight. If you’re buying a really high-end set of in-ear monitors, like Shures or Westones, then odds are you can afford the $200 custom silicone molds. The process is long and involved, including an appointment with an audiologist. Now, I’m sure that if you’re dropping that kind of money on a custom fit, they’ll be great, but what about the rest of us? If you’re a do-it-yourselfer, then luckily making your own isn’t too difficult. There’s a lot of information on the web about this, some of it conflicting and some of it unanimous. Materials DIY ear plug kit. Silicone putty is great and it’s easy to get a hold of. Disclaimer: In this project, you’re sticking something in your ear.
How To Mold Get your earphones ready by taking off the sleeves.