
Ultimate Guide to Hairpin Lace Crochet. Hairpin lace is a beautiful variation on crochet, in which you combine a standard crochet hook with a certain type of loom to create lacy, openwork designs.
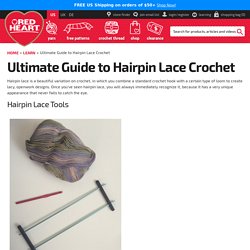
Once you've seen hairpin lace, you will always immediately recognize it, because it has a very unique appearance that never fails to catch the eye. Hairpin Lace Tools Most crochet techniques don't require the purchase of any special tools, but hairpin lace is a little bit different. You will be able to use the crochet hooks that you already have, but you will also have to get your hands on a hairpin lace loom. You can purchase an adjustable hairpin lace loom, which basically looks like two vertical dowels held together by two horizontal dowels (sometimes called cross bars) that each have holes across them.
Fun fact: Back in the Victorian era, before hairpin lace looms, this technique was done on women's U-shaped hairpins, and that is where the name comes from. Beginner's Guide to Hairpin Lace. Beginner's Guide to Hairpin Lace Jeremy Earnest and Harriet Sharp offer these guides to getting started.
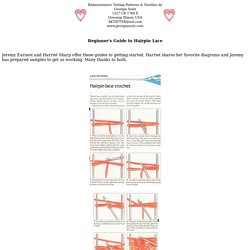
Harriet shares her favorite diagrams and Jeremy has prepared samples to get us working. Many thanks to both. Harriet says that changing the wording in #3 and #7 to read "lift the crochet hook over the shank of the right hand side of the loom" may make it clearer. Study the diagrams and the guides offered earlier in the lesson and then begin with Jeremy's practice piece which makes an icicle. Materials needed: One ball of size 10 crochet cotton Size 6 or 7 steel crochet hook 1/2 inch wide hairpin staple ( Multiple width looms work best) Directions: Leave about an inch of thread, before you make a slip knot to start hairpin lace.
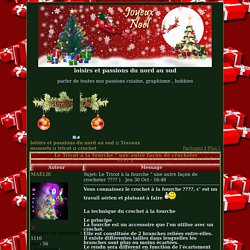
NOTE: when you remove lace from loom, it has a spiral effect. STARCH SOLUTION: You will need a 1/2 cup of sugar and a 1/2 cup of water, bring to a boil and let cool. Tutoriel : Initiation à la fourche , 1ère leçon. Bonjour.
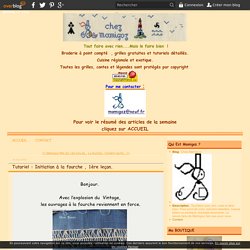
Avec l’explosion du Vintage, les ouvrages à la fourche reviennent en force. Il est grand temps de se pencher sur cette technique ancienne et très féminine. Il vous faudra : une fourche. (On trouve des fourches réglables en largueur) et un crochet correspondant à la grosseur de la laine. Rien n'est compliqué. Regardez attentivement chaque détail des photos, positions des mains, du fil, du crochet. Vous trouverez un traducteur Babel fish à droite du blog. Explications du crochet à la fourche... - Aiguilles & Co. Pour les petites curieuses ou celles qui voudraient s'y mettre....
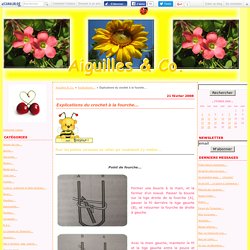
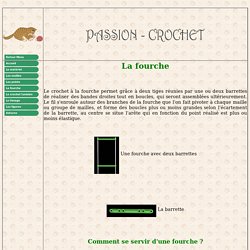
Point de fourche... Former une boucle à la main, et la fermer d'un noeud. Passer la boucle sur la tige droite de la fourche (A), passer le fil derrière la tige gauche (B), et retourner la fourche de droite à gauche. Avec la main gauche, maintenir le fil et la tige gauche entre le pouce et l'index. Prendre le crochet de la main droite, et saisir la tige droite entre le majeur et l'annuaire.
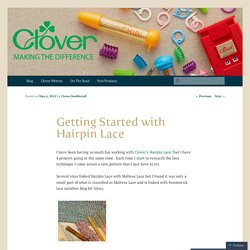
Getting Started with Hairpin Lace. I have been having so much fun working with Clover’s Hairpin Lace Tool I have 4 projects going at the same time.
Hairpin Lace Crochet Tutorial with Photos. Hairpin lace is a very easy technique.
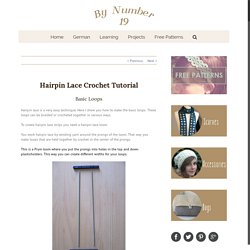
Here I show you how to make the basic loops. These loops can be braided or crocheted together in various ways. Vintage-Crafts-and-More-How-To-Make-Hairpin-Lace.jpg (JPEG Image, 2201 × 1650 pixels) - Scaled (46%) (modèle de la collection "les doigts d'or", édition 77) Fourniture :1 crochet n°3, 1 fourche de 8 cm d'écartement entre les branches.
Fil à tricoter fin, ici qualité pichenette dentelle de G. Picaud, mohair n°1 Echantillon : pour obtenir les mêmes dimensions que celles de ce modèle, il faut que chaque bande issue de la fourche mesure 8 cm de large et que chaque petit zigzag intermédiaire mesure 2 cm. Le châle mesurera alors 45 cm environ de haut mais étant porté il s'allongera de quelques centimètres. Le Tricot à la fourche " une autre façon de crocheter ???? ) La technique du crochet à la fourche. Maille de base : Faire une boucle et la placer à l'intérieur de la fourche, piquer le crochet dans la boucle, faire un jeté et 1ml,1er rang : Faire pivoter la fourche d'un demi tour, passer le crochet sous la boucle et faire une ms, Reprendre au 1er rang autant de fois que nécessaire.
Arête double : Maille de base : Faire une boucle et la placer à l'intérieur de la fourche, piquer le crochet dans la boucle, faire un jeté et 1ml,1er rang : Faire pivoter la fourche d'un demi tour, passer le crochet sous la boucle et faire 2 ms, Reprendre au 1er rang autant de fois que nécessaire. Arête en bride : Maille de base : Faire une boucle et la placer à l'intérieur de la fourche, piquer le crochet dans la boucle, faire un jeté et 1ml,1er rang : Faire pivoter la fourche d'un demi tour, passer le crochet sous la boucle et faire 3bs, Reprendre au 1er rang autant de fois que nécessaire.
Page.