DIY Galaxy Necklace. My apologies for being MIA this week. It was my partner's birthday yesterday (turning 30! I still can't believe it). I wanted everything to be perfect (or at least, the best possible) and it took me more work and time than I initially thought. I apologize. I have an easy DIY project to share today. You will need: Triangle (or round, or any shape you fancy) charms.
I first applied a generous coat of navy blue polish and let it dry completely. I started with the hot pink polish. I randomly sponged the polish onto the charm. I continued sponging the polish onto the charm- a dab here, a dab there, with lilac, then white, then navy blue (the color I used as a base) until I was happy with the result. I applied a layer of glitter polish and let it dry completely.
Voilà! How to Make Cracked Glass Stones for Crafting. This project is a family favorite. My kids *love* to "crack" glass stones with me. They don't even make anything with them most of the time, they just enjoy watching the glass crack and then admiring their handiwork. I like to paint the stones, glitter them, set them in bezels, make magnets, and all kinds of other things. But let me back up a bit and first show you how to "crack" glass! Supplies Needed: Glass stonesWater and icePlastic Bowl Step one: Preheat your oven to 425 degrees.
Step two: Bake the stones for 20 minutes. Step three: Prepare a plastic bowl with ice and add water. Step four: When you remove the stones from the oven, pour them IMMEDIATELY into the ice water. Your stones are now ready to work with. What to do with your beautiful "gemstones"?
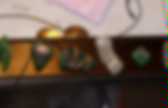
Wire Wrapped Dollar Store Glass Pendant | Morena's Corner. Even though fall is no where in sight here in central Texas, I'm ready to start crafting with autumn in mind. The amber color of this stone makes me think of fall. Read on to learn how easy it is to make. I had been inspired by these pendants several months ago. I pinned the image, hoping to make something similar someday. When Dollar Store Crafts announced the theme for their September challenge, I knew it was the push I needed to give it a try.
Supplies needed: Glass floral stones from the Dollar Tree Jewelry wire Bail 1. 2. 3. 4. 5. Fast, VERY frugal, and fabulous! I'd love for you to follow to keep up with my latest projects! More Fabric flower Necklaces. Single fabric flower necklace with a cluster of pink beads. Below are close ups of each picture. I also used this tutorial as a guide to make this necklace. Yet Another Bloody Pendant (Gold Twig Pendant Replicated in Sculpey) | This project was featured by Craftgawker on 8/21/12 (link). Ok– I promise: I’ll give the sculpey a rest for a bit after this one, honest. To be fair: the sculpey was an add on, in this case.
I’ve seen lots of beautiful real gold pendants cast to look like twigs. They are delicate & lovely, and way too expensive for me. As always, I turn to my trusty and seemingly inevitable tiny pot of never-ending metallic gold paint. I had some fake twig-things left over from the bird picture. . . (Yes it’s a picture of fake sticks: but, you know, I just wanted to prove that fake sticks can look like real sticks.)
I cut off the little twiggiest-bits at the end: (This picture is here in case you didn’t understand what I meant by ‘twiggiest’.) Then I painted them gold: (This picture is here in case you’ve never seen the color gold before and don’t know what it looks like.) The thing is: little bits of plastic painted gold aren’t really as strong as gold. . . . Love, Em. Heart and crazy jewels/Cuore and gioielli pazzi! E nonostante fossi titubante a fare anche questo mese..ieri sera mi ci sono messa e spruzzando, stencillando, incollando e ritagliando foto... a metà fra lo scrapbooking e il collage, ecco il mio cuore di Agosto:And this is my interpretation of this month's theme at HeartJournal2012: after spraying, cutting, gluing and stamping...my half scrapbooking heart:Gesso...
Mists: Distress inks: Stencilling: Gluing some fragments: Adding a picture and some images: E in un momento di pazzia ( ma li metto, si si si si si!!) Recipe/Ricetta: -Cut with a knife the wooden rule in pieces: Tagliare con un coltello il metro di legno: -Make some holes with the drill (2 mm): Fare i buchetti con il trapano (2 mm):-Put some gold embossing powder on one/both edge: Creare un bordino con della polvere embossing oro:-Mount with the chain, or the ring or the fish hook earwire: Montare sull'anello, una catena oppure su dei ganci da orecchini:
Sabi Collection by Jill McKeown. I launched Sabi Collection in May of 2012. I am attracted to natural materials. They have inherent beauty, just by virtue of their existence in nature. I love the unrefined perfection in wood, in all forms. That may, in a way, be a means of understanding my very disorganized (yet desperate for order) personality. The wood that is collected and used in the jewelry is personified in my mind. If it is not clear by now, I am tremendously inspired by architectural ideas. When a piece from Sabi Collection is purchased, it comes with a map indicating the location it was found, as well as a photo of the piece of wood it came from, before being picked up and transformed. VIA: Sabi Collection. Craft Tutorial 3: How to make Crayon Pendants. Materials: Old Crayons, knife (implement to cut up crayons very finely), old chopping board, silicone baking trays, toothpick, length of cord Step 1-4 Peel all the wrappers off the old crayons, sort the crayons into colour groupings.
Chop them all nice and small. I used a knife, you could also use a chees grater. Remember whatever you are using cannot be used for food afterwards so make sure it is old. Step 5 I recommend using silicone baking trays. I got mine when I was in France (€3 each) Ikea do a range of trays too or just keep an eye out in your local pound shops or charity shops. Fill the baking tray in vertical layers. Step 6 Leave the moulds slightly raised as when it bakes it will sink quite a lot.
Store excess shavings in tins. Step 7 Place the moulds in a baking tray. When done they should look like this. Step 8 This is the most important step is you want to turn your crayons into fabulous pendants. Then leave to fully harden. Step 9 Remove from moulds carefully. Step 10 xx Vanessa. Kenneth Jay Lane Strawberry Necklace. Sweet! This cute necklace by Kenneth Jay Lane looks like a piece of candy!
Best of all, you can make it yourself and save about $115. Super sweet! Red is traditional, but I am NOT a traditionalist. Yes, mine is turquoise. Why not? All you need is some leftover polymer clay and a few more "ingredients".... Step 1: Gather materials. Step 2: Shape your clay into a strawberry shape. Step 3: Flatten those teardrops and attach them to the top of the strawberry. Step 4: Take your little stud decal; pick off one of the gold studs and press into your strawberry.
Now bake your strawberry. Delicious- you're all set! Pasta necklace #2. With celebrations and school holidays, I don't have much time to craft! I just wanted to show you a nice pendant, also made with spaghetti, see my tutorial here! I hope you spend good time with your familes and friends! Con las celebraciones y las vacaciones escolares, no tengo mucho tiempo para manualidades! Sólo quería mostrarles un colgante bonito, que también hice con espaguetis, pueden ver mi tutorial aqui! Espero que se la pasan bien con sus familias y amigos!