

Make // Milk Jug Votives. Since today is Earth Day, I thought I'd dig into our recycle bin and come up with an upcycle project.
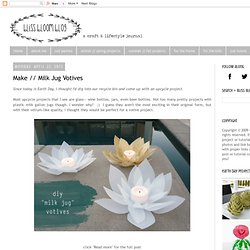
Most upcycle projects that I see are glass-- wine bottles, jars, even beer bottles. Not too many pretty projects with plastic milk gallon jugs though. I wonder why? ;) I guess they aren't the most exciting in their original form, but with their vellum-like quality, I thought they would be perfect for a votive project. click "Read more" for the full post Since I want to use these in our backyard this summer, I decided to make them as water-resistant as possible while also keeping it an easy DIY. Why I didn't use a hot glue gun...
If you don't have any milk jugs on-hand or don't feel like an upcycle project, you can also purchase polyethylene plastic sheets. Instructions: The first step is to make a template for your petals. Cut out your petals from the milk jug as well as a round piece for the center. Bend the end of your petals. Now it's time to glue everything together. During the day... Make Lotus Candle Holders in 5 Minutes! If you know me by now, you know that I am obsessed with making any and everything into either a garden planter or a candle holder.

I do not know where this infatuation came from but it's fun. I enjoy it. I love flickering candle lights and cozy gardens. There is something so magical about them both, especially on a summer night. Here is just another one of my ideas that suprisingly came out great! Things you will need: Super Sculpey or any baking clay Cubcake panFlower cookie cutter about 3.5 or 3.75 inches inches in diameter (I stretched mine out)Rolling pinCooking spray Find a flower cookie cutter big enough to cover the size of the cupcake pan's bottom. Use cooking spray to lightly coat the bottom of your cupcake pan. Anyway, this is my cookie cutter (never used it for cookies) it is big enough to cover the bottom of the cupcake pan and more. Place one layer over the cupcake pan's bottom and paste to the sides gently. See below. Press all three layers down firmly. Charlotte Hupfield Ceramics.
Thank you for visiting my post about DIY Tin Lanterns… You may also be interested in my individually handmade ceramic homewares, accessories and gifts in my shop – take a look!
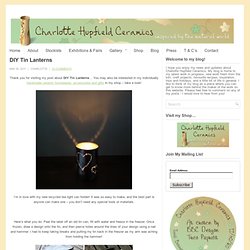
I’m in love with my new recycled tea light can holder! It was so easy to make, and the best part is anyone can make one – you don’t need any special tools or materials. Here’s what you do: Peel the label off an old tin can, fill with water and freeze in the freezer. Once frozen, draw a design onto the tin, and then pierce holes around the lines of your design using a nail and hammer. I had to keep taking breaks and putting my tin back in the freezer as my arm was aching from holding the hammer! Once happy with your design, leave the ice to thaw out and wash off the pen marks. Inspiration: Teacup Crafts! A variety of crafts made with teacups!
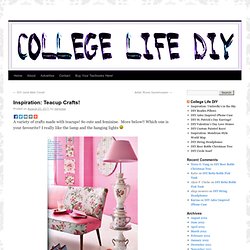
So cute and feminine. More below!! Which one is your favourite? I really like the lamp and the hanging lights Tea Set Lamp DIY Teacup Clock DIY Teacup Terrarium or Flower Pot Hanging Teacup Lights. Like a Candle in the Tin... Washer Panache. Clothespin Candles. Pinterest is amazing, huh?
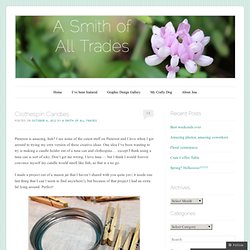
I see some of the cutest stuff on Pinterest and I love when I get around to trying my own version of these creative ideas. One idea I’ve been wanting to try is making a candle holder out of a tuna can and clothespins…. except I think using a tuna can is sort of icky. Don’t get me wrong, I love tuna — but I think I would forever convince myself my candle would smell like fish, so that is a no go. I made a project out of a mason jar that I haven’t shared with you quite yet ( it needs one last thing that I can’t seem to find anywhere!)
, but because of that project I had an extra lid lying around. I wanted to make a permanent candle holder, so I pulled out my hot glue gun to make sure no clothespins would fall of this bad boy. I placed a bead of glue on the inside rim of the lid, then popped the clothespin on top. More than 30 clothespins later, I had a nice form for my candle holder. I also like the rustic look that the clothespins give off. Like this: