
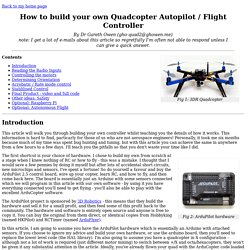
FM 3-04.203 Chapter 7. How to build your own Quadcopter AutoPilot / Flight Controller. Back to my home page Fig 1: 3DR Quadcopter Contents This article will walk you through building your own controller whilst teaching you the details of how it works.
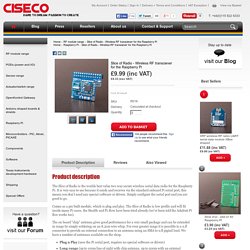
This information is hard to find, particarly for those of us who are not aerospace engineers! Personally, it took me six months because much of my time was spent bug hunting and tuning, but with this article you can achieve the same in anywhere from a few hours to a few days. Fig 2: ArduPilot hardware. Slice of Radio - Wireless RF transciever for the Raspberry Pi. Product description.
Wireless Serial Communication with the Raspberry Pi - Part 2. Now I'm going to go through how to set up the other end of the wireless serial link.

In my case it is a laptop computer on which runs Linux and Windows (and I'll go through how to set up both) but it could be another Raspberry Pi or practically any other computer system. I'll be using a SFR Stick (available from Ciseco) to provide the wireless link on the laptop: The SRF Stick is a small plug in USB module, similar in size to a USB flash drive.
How To Use MOSFET - Beginner's Tutorial. In this article, I will go through some common questions people tend to raise when they are using MOSFET, and the basics of MOSFET.

This tutorial is primarily written for non-academic people, so I will try to minimize the theory part and mainly focus on the practical side of things. However if you are into the theory how MOSFET work, I will share some useful academic articles and resources at the end of this post. MOSFET has some advantage and disadvantage over BJT, so choose carefully depends on your application.
MOSFET stands for metal-oxide semiconductor field-effect transistor. It is a special type of field-effect transistor (FET). Unlike BJT which is ‘current controlled’, the MOSFET is a voltage controlled device. Static Thrust Calculator - STRC. Version 9.3 - Developed by Szabolcs Füzesi© All rights reserved!
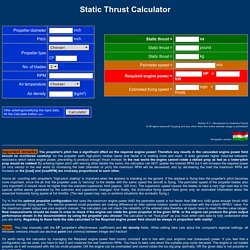
Copying and any other than this online website usage is prohibited! Important remarks:The propeller's pitch has a significant effect on the required engine power! Therefore any results in the calculated engine power field should be monitored carefully! As the propeller (with high-pitch) rotates faster and faster it is stalling more and more. It does generate higher inducted turbulent-resistance which takes engine power, preventing to produce enough thrust instead. EPP1245. Quadrotor - How to choose the right propeller/motor combination for a quadcopter? - Robotics Stack Exchange.
Choosing the correct prop/motor combination can be challenging.
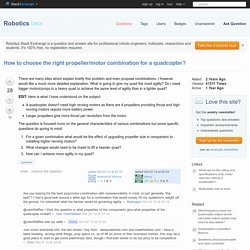
Even worse, the vast majority of RC motors will have vague or non-existant specifications. This makes it very hard to do "real" math. TriBorg - Triplicate your Raspberry Pi GPIO header. Click here to buy TriBorg - A GPIO header replicator board for your Raspberry Pi.
Gives you three GPIO headers to plug in break out boards, add on boards, just about anything that is designed to connect on to a RPi. Elegant and simple, can be screwed onto the RPi if additional robustness / stability is required. Just plug in to your Raspberry Pi to split out into three identical GPIO header connectors. Great for using XLoBorg, LedBorg and PicoBorg together, or for most Raspberry Pi add on boards. Example picture of use on PiCy Raspberry Pi, XLoBorg, PicoBorg, LedBorg and PiCy purchased seperately.
Untitled. How to choose Motor and Propeller for Quadcopter and Multicopter. You won’t believe how much maths and aerodynamics are involved when the engineers are designing the propellers and motors. Therefore you know how difficult it is to choose the best motor and propeller combination for your quadcopter for best performance. Fortunately this is not a new subject, and there are so many people shared their experience about this. Also there are some general rules you can follow to choose the optimal and effective motor and propeller combination. As part of the quadcopter tutorial I will share some information for beginners about how to choose motor and propeller for quadcopter, which also applies to other types of multicopter. Here is a guide about the types prop adapters for your motors, and the pros and cons you might be interested.
When selecting motors, there usually are specification that comes with the motor either provided by the seller or manufacturer. A rule of thumb is Required Thrust per motor = ( Weight x 2 ) / 4 More tips on Motor Efficiency. PWM outputs. Using the I2C interface – Raspberry Pi Projects. Got any example C code for the I2C interface running under raspbian?

Please let us know in the comments! Enabling The I2C Port The I2C port needs to be enabled in Rasbian before it can be used. See here. Checking For Connected Devices. I2C Pins – Raspberry Pi Projects. Enabling The I2C Port The I2C ports need to be enabled in Raspbian before they can be used.
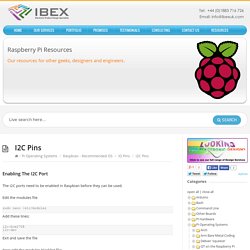
Edit the modules file sudo nano /etc/modules Add these lines: Software PWM Library. WiringPi includes a software-driven PWM handler capable of outputting a PWM signal on any of the Raspberry Pi’s GPIO pins.

There are some limitations… To maintain a low CPU usage, the minimum pulse width is 100μS. That combined with the default suggested range of 100 gives a PWM frequency of 100Hz. You can lower the range to get a higher frequency, at the expense of resolution, or increase to get more resolution, but that will lower the frequency. If you change the pulse-width in the driver code, then be aware that at delays of less than 100μS wiringPi does it in a software loop, which means that CPU usage will rise dramatically, and controlling more than one pin will be almost impossible. Also note that while the routines run themselves at a higher and real-time priority, Linux can still affect the accuracy of the generated signal. However, within these limitations, control of a light/LED or a motor is very achievable. To use: #include <wiringPi.h> #include <softPwm.h>
RPIO.PWM, PWM via DMA for the Raspberry Pi — RPIO 0.10.0 documentation. RPIO.PWM provides PWM via DMA for the Raspberry Pi, using the onboard PWM module for semi-hardware pulse width modulation with a precision of up to 1µs. With RPIO.PWM you can use any of the 15 DMA channels and any number of GPIOs per channel. Since the PWM is done via DMA, RPIO.PWM uses almost zero CPU resources and can generate stable pulses with a very high resolution. RPIO.PWM is implemented in C (source); you can use it in Python via the provided wrapper, as well as directly from your C source. RPIO.PWM provides low-level methods to control everything manually, as well as helper classes that simplify PWM for specific usages (such as RPIO.PWM.Servo).
This module is currently in beta, please send feedback to chris@linuxuser.at. Examples. How Much Less Power does the Raspberry Pi B+ use than the old model B? The power circuit on the new Raspberry Pi B+ has been completely redesigned. It now has an efficient switching regulator. So I decided to take my trusty emeter, a tool I spent far too much money on a few years ago whilst in the grip of the aero-modelling ‘bug’, and make some measurements.
Emeter with Raspberry Pi B+ I measured the current and voltage going into the Raspberry Pi. The emeter has a calibrated shunt (small blue rectange in the photo with ‘battery’ and ‘load’ at each end) that’s good for up to 20 Amps. I did these measurements on both a late rev 2 model B and the new B+. Ciseco wireless products the XRF ERF and URF. Our range of ultra-low power, long range, high value wireless s UART serial data modules come in a variety of shapes to suit your application. XRF is Xbee shaped to fit Arduino, PIC, PICAXE etc. fits the Raspberry Pi using our Slice of Pi.ERF is the same size as the Arduino Mini and has a six way FTDI laid out connector.URF has a USB connector for connection to a computer.SRF is our latest and smallest surface mount design.SRF STICK is an encased version of the SRF-UARF is the latest version and it incorporates a built in power amplifier for even greater distances.
Here is a handy comparison chart for all the above. Also in this section you will find WiFi and Bluetooth units that we can re-sell at competitive prices, as well as several other supporting products. A Slice of Raspberry Pi: Wireless Serial Communication with the Raspberry Pi - Part 2. A Slice of Raspberry Pi: Wireless Serial Communication with the Raspberry Pi - Part 1. Now I'm going to log on to my Raspberry Pi remotely using the Pi console (like I did in my previous post), but this time do it wirelessly using RF modules from Ciseco. For my Raspberry Pi I'm going to use one of the "Slice of Radio" modules: This handy little module plugs directly in to the GPIO header on the Raspberry Pi.... ...and it's small enough to fit inside my standard Raspberry Pi case. Battery Showdown — The Best AA Battery You Can Buy? — Low Drain Test. Results: Low Drain. Owenquad - Raspberry Pi based quadcopter with full walkthrough coding tutorial.
Raspberry Pi2 – Power and Performance Measurement. Energy consumption calculator. Battery Life Calculator. Running a Raspberry Pi from 6 AA Batteries.