
Blendbend. Bone Weight Copy « Copy from multiple targets Many example files for OpenSim and compatible online worlds use a Character with three separated parts (head, upper body, lower body).
You can do a weight copy from those characters as follows: Copy the Head part: Select your target mesh and enter edit modeSelect only the vertices of the head partNow go to object mode, Use SHIFT + RMB to add the head of the source mesh.In the weight copy panel select Interpolation: 2 and check both options (“Only Named Bones” and “Copy Empty Groups” Blender Essentiel. BlenderDiplom Tutorials. Tutorial: Abstract Figure. Weight Painting. Create And Render A Still Life Scene In Blender, Using Cycles. Today, we'll have a brief introduction to Blender's new rendering engine - Cycles.
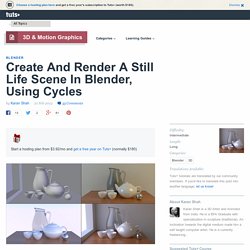
This tutorial will cover modeling a small and easy still life scene, setting up different types of materials used in cycles and then finally lighting and rendering the scene. First we'll create a simple scene, starting with the tea set. Delete all default objects in a new file, press Shift+A and add a Cylinder. With the cylinder selected, in the Tool shelf's (press T if it is hidden) command panel, reduce the number of vertices to 16.
Blender-Cycles Ray Length node output ~ Agus's 3D box. As I promised I'll try to code new features for Blender, to warm up with the source code base, lets start with some small features first, like this one:Ray length output for LightPathNode:

Metric and Imperial units in Blender 3D. Although the measurement of distance in virtual space can be considered arbitrary, the same is not generally said of the 'real world where buildings, products and material objects are constructed, manufactured or made using one or the other of the two major units of measurement, 'Metric' or 'Imperial'.
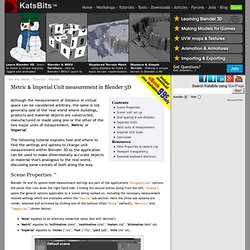
The following tutorial explains how and where to find the settings and options to change unit measurement within Blender 3D so the application can be used to make dimensionally accurate objects or material that's analogous to the real world, discussing some caveats of both along the way. Scene Properties ^ Blender 3D and its system-wide measurement settings are part of the applications "Properties" options, the panel that runs down the right hand side. Clicking the second button along from the left, "Scene", opens the general options applicable to a 'scene' being worked on, including the necessary measurement related settings which are available within the "Units" sub-section. Conclusion ^ Modeling Feathery Wings. Learning Mesh Topology Collection - Blender Cookie. Hello and welcome to this collection of videos on understanding mesh topology for modeling!
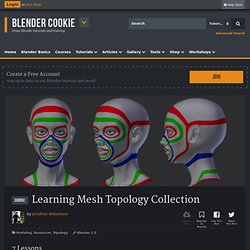
Mesh topology is arguably the single most important aspect to a high-quality model in many different areas. No matter whether you’re preparing a model for animation, modeling clean hard surfaces, making an organic model with smooth curves, or simply modeling something that is easy for other artists to work with, topology is key to each of these. What is topology? Topology refers to the structure of your mesh and the way the mesh flows around the surface and details of your model. Due to the complex nature of the subject, truly understanding it and grasping how to create clean, effective topology for your models, of all subjects, can not only be daunting but also very challenging.
Starting a while ago, Jonathan Williamson began producing Topology Overview videos here on Blender Cookie that attempted to demystify topology for everyone. Additional Reading. Creating an Eyeball. Create a Realistic Earth. In this tutorial you will discover how to: Use color, bump and specular mapsAdd clouds and atmosphereUse material nodes to create city lights in the darkness With the complex terrain, ocean, clouds and atmospheres you’d think that creating a realistic earth would be quite hard to create… especially in Blender.
But with the right know how it’s actually pretty easy. In this tutorial we will be using several textures from NASA and some careful tweaking of materials to create realistic shaders. Finished Result Textures used in this tutorial: All textures are from NASA but have been resized for easier use in blender. At a Glance. Blender 2.6 Tutorial 13 - Bones & Rigging 101. 25 Useful Blender tricks that aren't so obvious. Automatically add a number to the end of your .blend filename In the ‘Save As’ window, press ‘+’ to add a number to the end of the name. This is very useful if you are saving multiple versions. If there is a number already in the name, blender will automatically increase that number by one.Preview textures The feature you always wanted was right under your nose! Simply Hold Ctrl whilst clicking the ‘Load’ button to take advantage of thumbnail previews. This feature however, is currently in an unstable state (which is why it hasn’t been made official yet), so use it at your own risk!
Changing the cameraCtrl + NumPad 0. Hold Ctrl while moving a slider to move it in 0.1 increments (hold Shift + Ctrl to move it in even smaller increments) Have I covered everything?