
DIY Envelopes. This little DIY is by no means new or particularly innovative, but fun nonetheless!

During Chinese New Year it is customary for parents to give their kids a monetary gift in bright red and gold envelopes. So I thought I’d try making my own envelopes, inspired by the red and gold ones I’ve been seeing around for weeks, but in my own style. They could be used for just about anything – letters, gifts, confetti.. and can be customised so easily! Happy Chinese New Year :) All you need is paper (whatever colours you like), glue, scissors, and a paint pen (also in whatever colour you like!). Step 1: Cut the paper using the template (or create your own size/shape and draw it onto the paper). Step 2: I found it easier to fold and glue the envelope before drawing on it so the pattern was seamless, but you can do it either way.
Step 3: Get drawing! Thank you, your sign-up request was successful! Given email address is already subscribed, thank you! Please provide a valid email address. Oops. Sea Lemon. Most favorited all-time. DIY geometric favor boxes in Ideas for planning, organizing and decorating babies, kids and adults parties.
PaperMatrix. MintyCam (Altoids Candy tin) Pinhole Camera. Here are a few sample images I've taken with my MintyCams over the years.
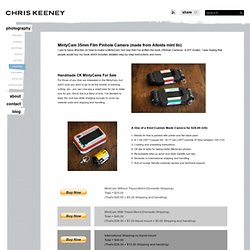
I'll try and update this page with new photos in the future. The picture above is a double exposure using the MintyCam first then shooting the same film through an underwater camera. Fujichrome Provia 100F film. Color photograph of a historic church in Massachusetts created with a MintyCam pinhole camera by Chris Keeney MintyCam pinhole portrait submitted by Bonnie who bought a camera from me and then kindly sent me this test photograph Here's another test photograph created by Bonnie who recently purchased a MintyCam from me. The above pinhole by Steven M Bumgardner a.k.a. The MintyCam pinhole above was created by Steven M Bumgardner a.k.a. Thanks Macro, it's good to see you're getting out and enjoying the camera.
Misc. Pinhole & Camera Maintenance Since the pinhole size in the MintyCam is so small (.007") it's important to keep it clean. iDiY: 'i do'-it-yourself - Part 3. Coloriffic Finds.

Wedding Ceremony Flower Ideas. These fabric covered flower containers are super easy to make and very inexpensive.

By going to IKEA and getting a container for $1, then adding fabric, you have an instant decor piece for your wedding. Pick the fabric, twine or ribbon, and flowers based on your wedding colors to make them completely custom. They are perfect for hanging on the chairs along the aisle. Click “more” below to check out the rest of this project… -Ashley of Dolci Odille Supplies: Bygel IKEA containers (only $1 each), spray mount, fabric, twine, scissors, and flowers.
Step 1: Cut a piece of fabric 14″ x 9″ Step 2: Using the spray mount, go outside and spray the entire IKEA container. Step 3. Recycled Fabric Napkin Rings from Saran Wrap Tubes. I made this fabric napkin rings recycled craft from an empty Saran Wrap tube.
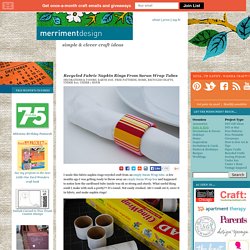
A few months ago I was getting ready to throw away an empty Saran Wrap box and happened to notice how the cardboard tube inside was oh so strong and sturdy. What useful thing could I make with such a pretty?? It’s round. Not easily crushed. Ah! 119 Journal Prompts for Your Journal Jar. There are a myriad of benefits to journaling, and everyone should consider keeping a journal.

However, one of the obstacles that people face when they want to pick up the practice of journaling is that they don’t know what to write about. In this post you’ll discover 119 journal prompts to help you get started in keeping a journal, or as additional inspiration for dedicated journalers. I recommend that you do the following: Hex Nut Bracelet.
Kimmy recently sent me a link with the subject line: “DIY meets Home Depot!”

Needless to say, I was intrigued. I clicked and was taken to Honestly… WTF. DIY Paper Popsicle Memory Game. As a kid I adored the game 'Memory'.
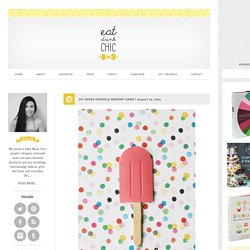
The truth is, I still do. Sure, it's not exactly what you would define as 'challenging' but there's something charming about it's simplicity. DIY string-tie envelopes. Hello!
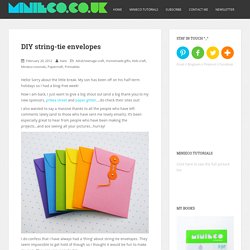
Sorry about the little break. My son has been off on his half-term holidays so I had a blog-free week! Now I am back, I just want to give a big shout out (and a big thank you) to my new sponsors, pi’ikea street and paper glitter….do check their sites out! I also wanted to say a massive thanks to all the people who have left comments lately (and to those who have sent me lovely emails). DIY Origami Heart Love Note. Sigh...
I had all these plans to create a plethora of DIY Valentine's Day projects for Eat Drink Chic. However, plans for my impending engagement party have taken up so much of my time that I've had to put these ideas on hold. A few days ago I created these little origami heart invitations for our engagement. They open up to reveal the invitation message inside and have an attached string so that guests can also use them as a keepsake decoration.
Inspiration, ideas and original details for babies and kids such as decoration, accessories, toys, crafts, gifts, parties and recipes. Inspiration, ideas and original details for the decoration of children and adults parties, with invitations, gifts, games and recipes. Cocktail party invitation in Crafts for home stationery and paper for birthdays, anniversaries or dinners. Keep your book spot in Crafts for home stationery and paper for birthdays, anniversaries or dinners. Make It - The Crafts Dept. - Part 5. Matchboxpinhole.com. Decor8.