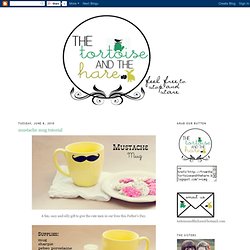

Flaming Foliage Candleholders. Mini DIY Round-up. Mustache mug tutorial. A fun, easy and silly gift to give the cute men in our lives this Father's Day.

First, draw a mustache on the top of your mug with a sharpie marker. As you can see mine took a couple times to get right. Second, trace around the edges of the drawn mustache with your Pebeo pen. Next, fill in the mustache with your Pebeo gel stain. This is a picture of one coat. Be patient because it will take a couple of coats to get the look you are going for. Lastly, follow the directions of the stain. Ta Da...the cutest little mug I have ever seen.
Fill with a favorite drink or candy and pass it on to the men in your life. Happy Father's Day! The Hipster Home » Blog Archive » How to Make a Tiny Terrarium in a Light Bulb. Ahoy there Hipster Homers!

I’m Julie and I’m the very first guest blogger on this fine site. Today’s project involves breaking stuff, plants, found objects, and miniatures. Fun, right? Let’s get started! We’re going to go through the steps to create your very own little terrarium. Dos and Don’ts: Do use sand or small pebbles; these are good because water drains through them easily. How To: You’ll need a few tools to make a tiny terrarium but nothing complicated to get started. Needle-nose pliersScissorsLong tweezers or chopsticksFlathead screwdriverGlasses or goggles.
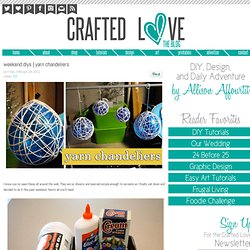
Yarn chandeliers. I know you've seen these all around the web.

They are so dreamy and seemed simple enough to recreate so I finally sat down and decided to do it this past weekend. Here's all you'll need: 1. Acrylic Yarn 2. Elmer's Glue 3. 4. 6. Using round balloons means you'll have perfect circle chandeliers, you can use any kind of balloon but I wanted mine circular. Hang them on a pole or rack and don't forget to lay down tarp or trash bags. Mix up the glue with 1/2 cup of corn starch and 1/4 cup of water. Dip the yarn in the gooey mix and begin to wrap it around the balloon. Let them dry for several hours. Once you pop them they should look all schnazzy like this guy. 5 days of favorite projects {day 1} I love a good project.

In fact I feel a little lost when I’m not working on something. This week, I’ll be putting together a tutorial each day on some of my favorite projects, which {I think} are also some of yours. Let me start by saying I probably didn’t come up with any of these on my own. I’m not that creative. I love looking around me for inspiration and then figuring out how to make things on my own and with my own twist.
It was only natural for me to begin with my current favorite project – one that you’ve seen in my shop, on the baby {over and over and over again}, as favors at my sister’s baby shower, in many of my what I wore posts and in this family picture: Can you guess?