
Head up display for Pico Projectors. Team develops new, inexpensive transparent projection screen (w/ Video) Picture the Louvre pyramid: the iconic glass pyramid that serves as main entrance and skylight to the landmark museum.
The pyramid is illuminated at night, creating a magical ambience. Imagine strolling next to it while a video about the museum is projected on the glass in front of you, adding information while preserving the elegance of the structure. This seems like a scene taken from The Avengers or other sci-fi movies: although some technology for transparent displays exists, in practice it has many limitations. Using the 20 thousand square feet of glass of the Louvre pyramid as a transparent display with existing methods would be expensive and difficult.
Closer to home, one could wish to have a simple method to use a storefront glass, or a subway window as a projection screen. A team from the MIT and Harvard departments of Physics, and the US Army Edgewood Chemical Biological Center, has developed a new approach to produce transparent projection screens. Color sensitive players. InfinitEye 210 Degree HMD Technical Q&A: How does High FOV Virtual Reality Work? - Page 2 of 3. Software Road to VR: Describe the process of rendering a 210 degree stereoscopic image for use with the InfinitEye.

InfinitEye: At the present time, we are using 4 renders, 2 per eye. Left eye renders are centered on left eye, the first render is rotated 90° left and the second looks straight ahead, building two sides of a cube. Right eye renders are centered on its position, the first is rotated 90° degree right and the second looks straight ahead, two sides of another cube. We then process those renders in a final pass, building the distorted image. Road to VR: What demos / software currently work with the InfinitEye and what engines / frameworks do they use?
InfinitEye: For now we have 3 demos and they use our custom engine. Wide FOV Head Mounted Display. Eyetap Digital Eyeglases for Mediated Reality. DIY Dual Screen HMD. This page will contain images and descriptions of my current DIY HMD project that was inspired by the Oculus Rift. Please note that this rift clone will most likely not be compatible with any “Rift Ready” Game. Used Parts: Displays: 2x HV056WX1-100 Driver Boards: NT68674.5X, Unknown 7+1 Driver Board Tracking: The 9 DoF Razor IMU from Sparkfun in addition to the WiiMote Pixart sensor (connected via I2C). Dual Head Setup: Matrox Dual Head 2 Go Digital Edition Lenses: 2x 2 inch 5x pocket loupe magnifier with Aspheric Lens Hardware TODOs: IR LED mounting outside the goggles Mouting fixture for the LCD Panels inside the goggles IMU mounting inside the goggles External Pixart sensor mounting Software TODOs: OpenGL ES Demo Code WiiMote I2C WiringPi (Example + Code) Raspberry PI UART → Razor IMU (Example + Code) My rift inpired HMD will use two HV056WX1-100 LCD panels.
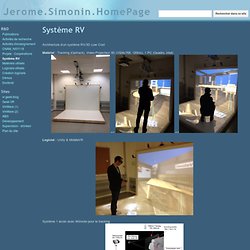
Driver Box I finally put all the pices together for my driver box. LVDS <→ HDMI Breakout Boards. Wastedspace. DIY Goggles and Head mountable displays.......ideas and projects. DIY Goggles and Head mountable displays.......ideas and projects. Système RV - Jerome.Simonin.HomePage. Architecture d'un système RV/3D Low Cost Matériel : Tracking (Opitrack), Video-Projecteur 3D (1024x768, 120Hz), 1 PC (Quadro, Intel) Logiciel : Unity & MiddleVR Système 1 écran avec Wiimote pour le tracking.
Immersive HMD (Head Mounted Display) Full Assembly Now you know where everything is supposed to go, it's time to put it there!

As this was the first rendition of these, I decided to forgo adjustability, and fix everything in place with hot glue. It actually works perfectly for this project thanks to its short dry time! Mount the Camera: After locating the camera in a place where it wont interfere with the lens, glue it in (making sure its pointing as level as possible.) The camera needs to be fairly solidly mounted as I also used it to hold the lenses/screens in place. Once its glued in place, run the cable around the border of the mask to the exit point and secure it in place with glue.