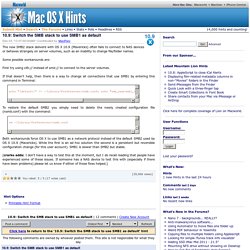

9: Switch the SMB stack to use SMB1 as default. The new SMB2 stack deliverd with OS X 10.9 (Mavericks) often fails to connect to NAS devices or behaves strangely on server volumes, such as an inability to change file/folder names.

Some possible workarounds are: First try using instead of to connect to the server volumes. If that doesn't help, then there is a way to change all connections that use SMB1 by entering this command in Terminal: echo "[default]" >> ~/Library/Preferences/nsmb.conf; echo "smb_neg=smb1_only" >> ~/Library/Preferences/nsmb.conf To restore the default SMB2 you simply need to delete the newly created configuration file (nsmb.conf) with the command: rm ~/Library/Preferences/nsmb.conf Both workarounds force OS X to use SMB1 as a network protocol instead of the default SMB2 used by OS X 10.9 (Mavericks).
[crarko adds: I don't have a way to test this at the moment, but I do recall reading that people have experienced some of these issues. Make Mavericks Install USB with a Simple Terminal Command. In a previous post I went through the lengthy method of creating a bootable USB Flash drive that could be used to install OS X Mavericks as well as a really simple solution that involves using an application called DiskMaker X.

This post will go through another method that utilizes a single Terminal Command. #1 – Download OS X Mavericks First things first, you need to download OS X Mavericks. This is a FREE download from Apple. Here’s link to it: OS X Mavericks #2 – Prepare your USB Flash Drive Creating a bootable USB drive for Mavericks requires a USB drive with at least 8GB of available space. Before we can restore Mavericks onto the USB Flash drive, the drive has to be properly formatted. To format the USB drive open Disk Utility (located in Applications/Utilities). Select the USB Flash drive from the sidebar in Disk Utility.Select the “Erase” tab.Make sure the Format is set to Mac OS Extended (Journaled).As for the name, leave it as “Untitled”.Finally click the Erase tab. 1.
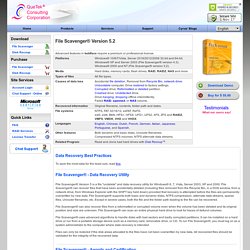
Data recovery tool for Windows 8, 7, Vista, Server 2003/2008, XP, 2000 and NT. File Scavenger® Version 5 is a file "undelete" and data recovery utility for Windows® 8, 7, Vista, Server 2003, XP and 2000.

File Scavenger® can recover files that have been accidentally deleted (including files removed from the Recycle Bin, in a DOS window, from a network drive, from Windows Explorer with the SHIFT key held down) provided that recovery is attempted before the files are permanently overwritten by new data. File Scavenger® supports both basic and dynamic disks, NTFS compression, alternate data streams, sparse files, Unicode filenames, etc.
Except in severe cases, both the file and the folder path leading to the file can be recovered. File Scavenger® can also recover files from a reformatted or corrupted volume even when the volume has been deleted and its original position and size are unknown. File Scavenger® can scan an entire physical hard drive to look for traces of defunct volumes. Data recovery tool for Windows 8, 7, Vista, Server 2003/2008, XP, 2000 and NT. About DMDE (DM Disk Editor and Data Recovery Software)
Monster Hunter. Old Software Downloads for Windows, Mac, Linux and Abandonware Games. Icons & Icon Packs - Download Free PNG Icons. Windows. A gamers hub. Handheld and Console Scene Release and NFO Database. Metacritic - Movie Reviews, TV Reviews, Game Reviews, and Music Reviews.