
Felt Orchids in Baby Food Jar Terrariums (part 2) The summer bug that struck me down on Sunday, is still alive and well here at radmegan HQ. In between doses of Tylenol Cold, old movies, and fits of nose-blowing I managed to make another orchid out of felt. I did most of the sewing in a fully reclined position, so it's a bit like the first one (full of potential, but still a little rough around the edges). Overall, I think it looks enough like a Phalaenopsis, or moth orchid, to be picked out of a line up. I'm still feeling so foggy and listless that sitting at my computer long enough to write out the full how-to is a bit overwhelming.
It *will happen,* eventually. Hope you are all staying healthy this summer! Rick Rack Rosettes. A friend gave me this flower ring and necklace, when she handed them to me I thought they were porcelain–there’s a very vintage feel to them.
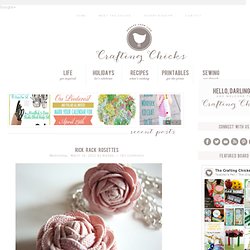
From a distance you really can’t tell that they’re made out of rick rack! Yes, rick rack! She shared how to make them with me, and now I’m sharing with all of you readers! The wow of the rosette comes from a few simple steps! She found this tutorial, in Portuguese I believe. DIY storybook paper roses. DIY storybook paper roses You’re going to love today’s DIY project so much that you’re going to want to start tearing pages out from old books tonight!
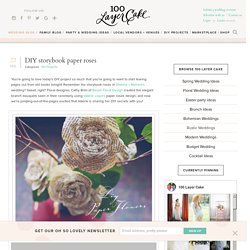
Remember the storybook roses in Shanna + Richard’s wedding? Sweet, right? Floral designer, Cathy Brim of Bloom Floral Design created the elegant branch bouquets seen in their ceremony using Valerie Lloyd’s paper roses design, and now we’re jumping-out-of-the-pages excited that Valerie is sharing her DIY secrets with you! <img class="alignnone size-full wp-image-17711" title="diy-paper-flowers-1" src="<a pearltreesdevid="PTD650" rel="nofollow" href=" class="vglnk"><span pearltreesdevid="PTD651">http</span><span pearltreesdevid="PTD653">://</span><span pearltreesdevid="PTD655">www</span><span pearltreesdevid="PTD657">.
Craft Supplies:Paper Grosgrain Ribbon, ½ Width cut to 4 inch lengths 16 Gauge Wire cut to 15 inch lengths Glue Gun Glue Sticks (low temp) Scissors Wire Cutters Step 1: Gather materials. Step 2: Cutting. Step 3: Shaping. Tutorial: How to Make a Pomander Flower Ball. A Rose is a Rose? Here's a new one!
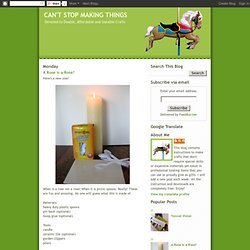
When is a rose not a rose? When it is picnic spoons. Really! These are fun and amazing. Pattern Runway: {Project} ~ Rosette Bib Necklace. This post is in no way original!

Fabric rosettes and necklaces have been doing the rounds in blogging sphere in a big way. You only have to google “Bib necklace” to find an array of D.I.Y tutorials and blog posts devoted to this project. Its a little bit crafty and a little bit shabby chic, but… its popularity in no way diminishes the desirability of this delightfully sweet, simple and fashionable adornment. ~ How to create a Fabric Rosette: Cut a strip of fabric about 1.5″/ 3cm wide and about 50cm /20″ long.
Tuck the knot back on its self and begin to roll the fabric around it, turning and twisting the fabric strip in, towards the centre of the flower. Keep rolling, turing and twisting. When you have a flower of desired size, twist the fabric strip to the underneath of the fabric, trim off and glue to the flower base and make another one! Pistachio Shell Flower Brooch Red by reloveddesigns.
Haha.nu - the lifestyle blogzine - StumbleUpon. How to make Toadstool Pencils – Easy! If you’re the type that loves to make gifts for others, then say goodbye to cookies in a jar (or not, but you could give these as well!).
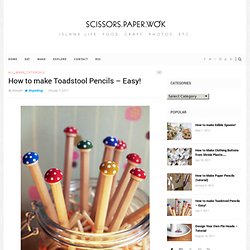
This is a super easy, cheap and fun craft that will make a good gift to yourself or someone else! Glue the wooden button to the pencil using wood glue or a multi-purpose glue. Once you’ve glued them, allow the glue to set. In the picture below I placed them into a jar of matches, but something like a jar of rice will work even better. Once the wooden buttons are firmly glued you can begin to paint. It’s important that the paint is applied gently from the top of the button downwards.
To get the dots for the “toadstools” I used the end of my paintbrush. Once the dots have dried you will have some good looking toadstool pencils in your possession. This post was originally posted on an old blog of mine, and I found that two questions that kept popping up were: Qu 1. Share 2K+ Kimanh Hi my name's Kimanh.