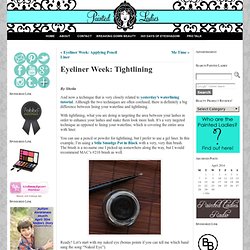

Eyeliner Week: Tightlining « Painted Ladies. By Sheila And now a technique that is very closely related to yesterday’s waterlining tutorial.

Although the two techniques are often confused, there is definitely a big difference between lining your waterline and tightlining. With tightlining, what you are doing is targeting the area between your lashes in order to enhance your lashes and make them look more lush. It’s a very targeted technique as opposed to lining your waterline, which is covering the entire area with liner. You can use a pencil or powder for tightlining, but I prefer to use a gel liner. Ready? What you are doing with tightlining is pushing the liner right in between your lashes. Here’s a little diagram to help you visualize the technique. Don’t ever claim that I’m not dedicated with these photos. I don’t usually tightline the bottom lashes — it’s a matter of personal preference. And with mascara and nothing else … kaPOW! ‘Scuze the spider lashes. Triple Max Tons: EASY HOLIDAY HAIR.
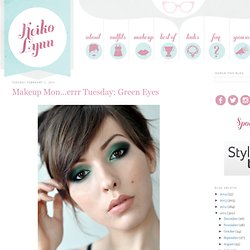
Stick-Twist.jpg (JPEG Image, 1050 × 750 pixels) - Scaled (88%) Sea of Shoes: HAIR HOW-TO. Makeup Mon...errr Tuesday: Green Eyes. First, I know it's Tuesday and I'm predictably late with Makeup Monday.

I hope the lack of alliteration doesn't detract from the post; I promise that I have lots of great excuses for not putting this up yesterday. Or, I fell asleep. One of my first forays into the wonderful world of bright eyeshadow was with a beautiful shade of green from Milani (whose older shadows were amazing), and I was forever hooked. Green has since become the most popular color in my rather large makeup collection, though I can't remember the last time I gave them a proper spotlight.
That was rectified immediately, upon my recent purchase of the Urban Decay Black Palette, which has a beautiful dark emerald that was surprisingly missing from my arsenal. For this look, I only used the dark green in the palette, Libertine, and the primer potion. GUEST POST. Photos by: Kathleen Bly post designed by kristin ess Mad love for our first guest post winner, Taylor Nick!!!

I am fully obsessed with this bohemian-inspired-braided-goodness! Even though Taylor had some SERIOUS competition, there’s no doubt that this little lady took the cake in our hair tutorial contest. She created a beautiful, textured, easy hairstyle that will work with almost any hair type. Congratulations Taylor, and thanks to ALL of you who entered this post contest. Xx Kristin “My look is inspired by all of the bohemian braids on the 2011 runways. Tools: 2 Claw clipsBobby PinsHair tie, preferably matching your hair colorFine tooth combHairspray Steps: 1. 2. 3. 4. 5. Home Facials - Get Natural Skincare Ideas at WomansDay.com. Facials are a great way to keep your skin glowing, but they can be pricey.

We asked Louisa Macan-Graves, author of Hollywood Beauty Secrets: Remedies to the Rescue, and Elda Argenti, owner of the Plantogen skincare line, for their favorite make-at-home face masks crafted from common household ingredients. For All Skin Types Brighten: Cut a slice of ripe papaya and remove the seeds and pulp (save the pulp for a snack later—it’s great for digestion). Rub the inside of the papaya peel on your cleansed face, focusing on lines around the mouth and eyes, crow’s feet, thinning temples, neck and hands.
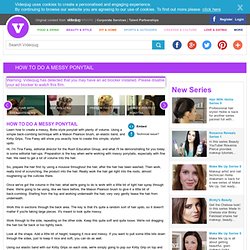
How To Do A Messy Ponytail (The Ultimate Hairstyle Guide) Learn how to create a messy, Boho style ponytail with plenty of volume.

Using a simple back-combing technique with a Mason Pearson brush, an elastic band, and Kirby Grips, Tina Farey will show you exactly how to create this simple, stylish updo. Hi, I'm Tina Farey, editorial director for the Rush Education Group, and what I'll be demonstrating for you today is some editorial hair-ups. Preparation is the key when we're working with messy ponytails, especially with fine hair. We need to get a lot of volume into the hair. So, prepare the hair first by using a mousse throughout the hair, after the hair has been washed. Once we've got the volume in the hair, what we're going to do is work with a little bit of light hair spray through there.
Work this in sections through the back area. Work through to the side, repeating on the other side. Look at the shape. Using our elastic band with our Kirby Grips on each side, we're simply going to pop our Kirby Grip on top and around. How To Create A Hair Knot. How To Create A Messy Knot. VideoJug shows you that this incredibly versatile hairstyle of a messy knot looks high-maintenance but is actually quite low maintenance.

After learning a few tricks of the trade from Celebrity Hair Stylist Robert Steinken, you'll be able to create this updo in just a few minutes. Step 1: You Will Need 1 Hair Brush1 Coated Elastic Band3 Hair Pins or Bobby Pins Step 2: Brush Begin by brushing to smooth and detangle the hair. How To French Twist Hair.